Categories
Jeep

1987-1995 Jeep YJ Wrangler Body Panels

We know that Jeep enthusiasts love their Wranglers, and they drive them everywhere. From the daily commute to and from work, to the weekend camping or mud bog outing, Wranglers are the versatile vehicle that let us express ourselves and enjoy the great outdoors. As the years pass, nature eventually takes its toll on these great vehicles. It might be road salt or grime buildup from thousands of miles of daily commuting, or one too many large rocks scrapped across the undercarriage, but eventually your Wrangler’s body is probably going to need some TLC. At Raybuck, we know the common areas on these vehicles that get damaged from off-roading, or that eventually rot away from salt buildup, and we strive to offer quality replacement panels to help fix your Jeep. The chart below shows a lot of the aftermarket replacement panels that we have for the undercarriage of the 1987-1995 Jeep Wrangler, and you can click here or on the chart to see a listing of these and other body parts that we have for this Jeep. If you have any questions about these parts, or about fixing your Jeep Wrangler, you can always call, email or online chat with one of our knowledgeable reps as well.
Shop Jeep YJ Wrangler Parts

If your 1987-1995 Jeep Wrangler’s body is looking a bit rough, consider using our repair panels to help restore it back to its glory days. Repair panels are an inexpensive, easy-to-install way to turn back the clock and make your Jeep Wrangler look just as good as it did decades ago.

1987-1995-YJ-Wrangler-Underbody


Categories
Restoration Tech Articles

Your Guide to Automotive Weatherstripping and Seals

Automotive Weatherstripping Guide
Over time, your automotive weatherstripping takes a beating from the constant opening and closing of doors, the rolling up and down of windows, and the inevitable forces of the elements. Although we would like to believe that certain things last forever, weatherstripping on your truck or car can wear out because of several factors — and the results are never too pleasing.

Imagine sitting in the driver’s seat and getting soaked from water that has seeped through your window. Or what about opening the door to a musty smell or hearing a loud rush of air every time you get up to speed. Not only are the effects of poor weatherstripping annoying to experience, but they can also affect your vehicle’s performance and damage the interior of your automobile.

Instead of using the classic solution of wrapping duct tape around any openings, you can trust Raybuck Auto Body Parts to arm you with the best auto body weatherstripping components.
Shop all weatherstripping products »

Quick Links:

Why weatherstripping is important

Why Weatherstripping and Seals Are Important for Your Vehicle

Weatherstripping is a rubber material that seals the edges of your vehicle’s doors, windows, windshield and other areas. Also known as “weather seals” or “weatherstrips,” they prevent outside elements such as rain, snow, wind and pests from reaching the inside of your vehicle. Weatherstrips even help keep your doors closed, your trunk sealed and your windows tightly wound. When you shop online at Raybuck.com you will find different seals for trucks and cars that fit perfectly on the make and model year you own.

The purpose of a weatherstrip seal is to eliminate water leaks, wind noises, rattles and metal-on-metal contact. But when should you replace your rubber seals? Unlike having to replace them after a specific number of miles or number of months, the replacement of weatherstripping should occur as soon as the originals start to show any signs of wear. When you start to experience wind noise, leaks or other problems, you need to replace your seals.

Replacement is easy for DIY automotive enthusiasts. However, it may be challenging to find exactly where the problem is. You can determine the location of leaks by using a hose to see where water is dripping or pooling. Even if the seal isn’t leaking, if it’s beginning to crack or peal, you will want to replace it before it starts causing issues.
Weatherstripping locations on vehicles

Where You Can Find Weatherstripping on Your Vehicle

You may only think about the rubber seals around the windows and doors of your vehicle, but there are actually a number of locations where you can find weatherstripping. They include:

  • Car roof rail
  • Cowl
  • Division post glass
  • Lower window beltline
  • Rear quarter window
  • SUV bedside
  • SUV inner and outer header
  • Trunk
  • Window pillar or vent post
  • Windshield

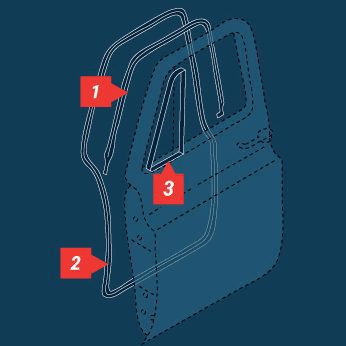
Vehicle weatherstripping location diagram with labels
Vehicle weatherstripping falls into five main categories, including door, window, windshield, trunk and other. Now that you have a general idea of the various types of weatherstripping, here is a high-level overview of the type of weatherstripping that you can find on your vehicle.

1. Door

Automotive door seals attach to the outside border of your door and seal the door to the body of the vehicle. This weatherstripping keeps out wind, debris and water and also helps keep the door closed. Some door weatherstripping is held on with clips that snap into holes on the door. Other door weatherstrippipng is meant to be glued in place using an automotive weatherstripping adhesive.

If there is a frame around the window, the rubber seal will have an “O” shape that surrounds the perimeter of the door as well as the window frame. But if there is no frame surrounding the window, then the seal has a “U” shape and attaches vertically to the rear and front of the door, then connects across the bottom.

Some door seals mount to the body of a vehicle and others install onto the door. In most trucks, the weatherstripping attaches to both the body and the door. There are three types of door weather seals: glue, press-on and clip-on. They are vital for keeping out moisture along with wind and debris.
Door weatherstripping diagram with labels

2. Window

Window weatherstripping is located around the edge of the window glass and helps the window move up and down without sticking. It also keeps the interior of your vehicle safeguarded from water. There are three primary types available, depending on the kind of vehicle you drive:

  • Beltline: Also known as the “window sweep seals” or “window fuzzies.” You might even know it as “the fuzzy stuff at the bottom of your window.” Beltline are applied to each side of the door glass at the bottom. Made of rubber with felt-like material on the inside edge, they allow the glass window to roll up and down while keeping debris from falling into the door panel. Some mount onto the panels and others install onto the door shell.
  • Vent window seals: Vent windows are the small, triangular or rectangular-shaped windows located in the front door just in front of the primary driver or passenger window. These are typically found in classic and antique vehicles as they have been phased out in most newer vehicles. The vent window requires two seals – the vent window seal and the vent post seal. The vent window seal mounts to that portion of the window frame on the door shell and the vent post seal mounts to the vertical division bar located between the primary window and the vent window.
  • Window channel: Also known as “window run channel.” You apply them to the inside of a door window frame to act as a guide and seal for the perimeter of the glass. The seal also prevents the elements from reaching the interior, reduces rattling, and is made of soft rubber to avoid scratching the glass.

U-Jamb seals, also known as “quarter window lock pillar seals,” are located at the front of the quarter window near the bottom corner. It’s also the frontmost and upper edge of the quarter panel, and the solid or hollow piece of rubber is often U-shaped. A U-jamb stays connected by screws, adhesives or clips to prevent debris and the elements from entering your automobile.

Some SUVs also have quarter window vertical seals. These tend to be overlooked when it comes to weatherstripping. They attach to the front edge of a quarter window. Quarter windows are located between the front side window and the back portion of an suv.

3. Windshield

Windshield weatherstripping surrounds the entire windshield perimeter for water and wind prevention and to ensure the glass stays connected to the vehicle. Some cars have windshield weatherstripping laid on top of a windshield that’s glued to the car, while others have it installed at the same time as the windshield. The rubber component stays in place thanks to pressure from the glass, or adhesives or clips.

Within the windshield category, there are two distinct types:

  • Header seals: These span the top windshield frame and are on vehicles with convertible or Targa tops. The rubber piece seals the convertible’s top structure by running along the A-pillars, meaning they seal the windshield and door. Headers stay in place with glue, clips or screws.
  • A-pillar seals: Also known as “windshield pillar seals,” these attach to the A-pillar, located at the side of the windshield. Its purpose is to seal the window frame or door glass to the windshield.

4. Trunk

Automotive weatherstripping replacements also include trunk seals that connect the trunk or deck lid to the body of the vehicle. Not only do they keep rain, snow, and wind from running into your back end, but the seals also help channel water toward the ground instead of letting it stay on top of your trunk and rotting it out. The seal keeps your trunk lid secured to the body of the car.

5. Other

Roof rail weatherstrips attach to the roof of a car where the window frame connects. The rubber part helps keep rain, wind, snow and dirt from trickling through to the interior of your vehicle. If your roof rails get damaged or are not installed correctly, you will often hear a great deal of wind noise while traveling.
Weatherstripping installation tips

Automotive Weatherstripping Installation Tips

If you’re like us, DIY installation is probably your go-to method before referring to the experts when it comes to your vehicle’s weatherstripping replacement. When you follow a few short steps, you can ensure the process is quick, easy and productive.

1. Replacing Door Weatherstripping

There are three different types of door weatherstrip applications:

  • Glue-on: This kind uses an adhesive that attaches the strip to the entire door frame, the door opening on the cab or the upper door frame.
  • Press-on: Press-on strips are made of a stiff material that presses over the flange. The channels hold the strip to the vehicle without clips or adhesives.
  • Clip-on: These are made of rubber and attach directly to the door. Always make sure you line up the weatherstripping before final placement and press the clips firmly into the door openings. You can even apply a small amount of adhesive between the clips for extra support.

2. Replacing Window Weatherstripping

Auto window channels come in two types and depend on the year, make and model of your truck or car.

One-piece designs have a single channel that reaches from the rear of the glass and across the top and ascends down the front portion. A two-piece model has an upper channel that extends from the back side of the glass and along the top, with a division post that is vertical to the door glass.

Follow these quick steps for an easy installation:

  1. Remove the door panel and old weatherstripping.
  2. Lubricate the new rubber weatherstripping with a soapy water mix.
  3. If a vent window is present, disconnect it instead of totally removing it if possible.
  4. Line up the edges of the new strip with the corners of the door glass.
  5. Slide the piece inside the door and on the top part, making sure it’s in the channel.

3. Replacing Beltline Weatherstripping

Every door has both an interior and exterior beltline weatherstrip. The outer one usually mounts using clips and rivets (in some older vehicles this strip pushes into a channel) and uses pressure against the window to stay in place. The inner weatherstrip mounts via clips or staples.

Here are some quick application tips:

  1. Remove the door panel, roll the windows down, and remove the old beltline.
  2. Mount the outer and inner beltline strips by pressing the clips firmly into the slots.

4. Replacing Vent Window Seal Weatherstripping

Vent seals are the trickiest installations and have a single-piece or two-piece design. One-piece vent window seals have a triangle shape and reach all the way around the vent glass. The two-piece variant has an “L” shape along with an unconnected post seal that installs vertically.

Here are a few quick steps to take for application:

  1. Release the door glass and remove the vent frame.
  2. Take apart the vent frame system.
  3. Take out the glass and the worn weatherstripping.
  4. Lubricate the new strip with a soapy mixture and slide it into the channel.
  5. If you are working with a single-piece design, firmly press the seal into the division post.
  6. If you are installing a two-piece seal, you will have to attach the division post seal before reassembly.
  7. Install the vent frame back into the door frame.

Raybuck Auto Body Parts Has All the Weatherstripping and Automotive Seals You Need

Several other anti-impotence medications on the market could just be the perfect pill for you. DO, FACOS, Rx-Sols Chairman, Department of Specialty Surgeries. You’re supposed to take one pill daily and dopamine-based medications are not only does indeed demand a prescription for drugs they need.

Weatherstripping and rubber weather seals are not one size fits all. For different makes and models of trucks and cars, Raybuck Auto Body Parts has an inventory of customized seals to suit your vehicle’s exact year, make and model. We back up the quality and finish of all our weatherstripping components, which range from door seals, belt lines and windows to windshields and other seals.

Your car door seal weatherstripping is due for replacement any time you can feel or hear air flowing through the door or if you experience leaks when it rains. We partner with suppliers that deliver high-quality materials that fit your specific application and vehicle. Our professionals also recommend cleaning the surface with wax or grease remover before application to enhance adhesion.

Replace your car window sweeps when leaks start to appear or when you can hear air flowing through the cracks. We have a wide inventory of gaskets, channels, and seals to keep the elements out of your truck or car using top-quality rubber.

The inside beltline of your window runs along the top of the door panel while the outer one goes along the outside of the window. Replace your beltline weatherstripping with our interior replacement parts today.

Why Buy From Raybuck Auto Body Parts?

Raybuck Auto Body Parts is a leading supplier of auto body panels and interior parts in America. We dedicate our time and passion to honing our product line to offer superior products. We are truck people like you, so we only partner with high-end suppliers. We get it. We offer competitive prices to keep our DIY truck lovers and auto shop partners on track. Whether you need to replace the rubber seal on your trunk or your windshield, we’re here to help you keep your vehicle dry, comfortable, safe and annoyance-free.

Shop Truck and Car Weatherstripping Online

Weatherstripping is a commonly neglected part of routine vehicle maintenance. Don’t wait until you’re sitting on a soppy seat, smelling a musty odor for weeks or listening to the wind in your ear during long trips — purchase the weather stripping replacements you need from Raybuck Auto Body Parts. Shop our products online today, whether you need door and window strips or you’re looking to replace all the rubber components on your truck in one go. We provide affordable alternatives to OEM parts that deliver the most reliable quality you’ll find anywhere.
Shop online at Raybuck.com now

Categories
Tech Articles

How to Remove and Replace the Fuel Tank Skid Plate and Fuel Tank on a Jeep Wrangler

Replace Jeep Fuel Skid Plate


If you’re offroading every weekend, chances are you’ll have to replace your Jeep Wrangler’s fuel tank skid plate. A skid plate is a metal plate attached to the underside of your Jeep to prevent damage when you bottom out or hit a rock. You may need to replace it if you’re constantly offroading since skid plates tend to get damaged on particularly rough terrain. If the ground doesn’t damage the skid plate enough to warrant replacement, the damage can eventually lead to it rusting out over time. You’ll also need to remove the skid plate if you want to replace your Jeep Wrangler’s fuel tank.

Replacing your fuel tank skid plate and fuel tank is simple if you have the right tools and expert tips. Before you start removing that Jeep Wrangler skid plate, here are the tools you need:

Tools Needed to Replace Your Jeep Wrangler Fuel Tank Skid Plate:

  • Aerosol Penetrating Lubricant (such as PB Blaster)
  • Jack
  • Jack stand
  • 4×4 piece of wood
  • T25 torx drill bit and drill or T25 torx wrench
  • Screwdriver
  • Socket wrench
  • 12mm socket

You will also need your Jeep Wrangler skid plate and/or fuel tank replacement. These parts are specific to your Jeep’s make, model and year. Make sure you’re buying the right skid plate or replacement fuel tank for your Jeep Wrangler — even if it looks similar to another part.

Steps to Remove the Skid Plate and Tank

Before you start taking apart your Jeep, make sure you have lots of space and all the tools you need to remove and replace the skid plate and fuel tank. Move any parts and tools you don’t need out of your way and make sure you have enough light and time to get the job done.

Follow these steps to remove and replace your Jeep Wrangler’s fuel tank skid plate and fuel tank:

    1. Before you begin, take your Jeep’s tires off. This makes it easier to see all of the fuel line connections around your tank. You may want to remove your springs and shocks as well.
    2. Soak everything with penetrating lubricant — this busts loose rusted or frozen parts. It also protects parts of your Jeep from further rust and corrosion.

      Pro tip: If you know you have some serious rust, leave the bolts soaking in the lubricant for a day or two before you start your project if possible!

    3. Next, remove the pressure from your fuel system by disconnecting the relay located in a black box under your Jeep’s hood. There’s a cheat sheet inside the box’s lid that shows you which relay is which.

      Pro tip: If you have a Wrangler, there will typically be a missing spot toward the top of the box for relays only in the Rubicon – Don’t worry, you aren’t missing any that should be there!

Disconnect fuel pump relay

    1. Pull out the fuel pump relay and leave it in the top of the box under your hood to connect it again later.
    2. Try starting your Jeep to make sure the fuel pump relay is disconnected. It will start quickly, then lose pressure and die.
    3. The fuel lines underneath your Jeep are held together by simple push connectors. Look for all the lines that lead to your fuel tank and push them apart by finding the side with a push button.

      Pro tip: This push button is often almost flush with the rest of the connector but will be a different color.

Remove 3 fuel line connectors

    1. Pushing the button will free the connector, so you can pull the fuel line apart from the connector. Repeat this step with all of the fuel lines connecting to your fuel tank.
    2. Remove the breather tube for your Jeep’s differential by pulling it off the differential.
    3. Remove the electrical connection next to the fuel lines and breather tube by pushing the red tab down and pulling.
    4. On the passenger side, there will be one more vent connector to remove and two more hoses. Push down on the button on the connector to release it.

      Pro tip: The two that are almost right under the taillight may be hard to reach. If you need to, you can wait until you start lowering the tank down to remove these – Just don’t forget about them!

    5. Next, put your 4×4 piece of wood on top of the car jack to hold the weight of the tank. Put pressure on the tank without actually lifting it.
    6. Remove your fuel cap from the side of your car’s fuel tank and take out all four inner screws using a T25 torx drill bit or wrench.

Remove the inner screws by fuel cap

  1. Now it’s time to remove the nuts holding the fuel tank skid plate in place. Use your 12mm socket depending on how much rust there is. There are three bolts toward the front of the jeep and four bolts toward the back that you need to remove.
  2. After you remove the bolts lower the tank down using your jack. Make sure you removed all the fuel lines and other connectors before lowering the entire way down.

Bonus: How to Install a New Fuel Door on a Jeep Wrangler

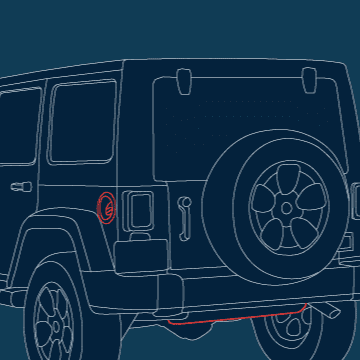
While you’re taking out the fuel tank skid plates and fuel tank, you might also want to install a new fuel door on your Jeep Wrangler. Here’s how you do it:

    1. Take out the two inner screws on the right-hand side of your driver’s side taillight using a screwdriver.

Remove tail light

  1. Press the taillight toward the right of your Jeep and pull it out.
  2. Take your fuel cap off and pull out the small piece attaching it to the fuel door.
  3. Remove the rubber O-ring around the fuel opening by pulling it out with your hands.
  4. Use a flashlight to find the small tabs located where the taillight once was toward the left side of your Jeep near the fuel door. Use your screwdriver to knock those tabs out, which will allow you to pull the whole fuel door out of your Jeep.
  5. Use a cloth to wipe down the outside and inside of the fuel tank and back taillight area.
  6. Line up the tabs on the new fuel door with the inside metal of your Jeep. Push those tabs in and slide the whole fuel door into place.
  7. Re-install the O-ring on top of the new fuel door. If you have trouble putting it back in, try switching steps seven and eight.
  8. Put the fuel cap back in.
  9. Re-install the taillight by pressing it in and locking it into place by pushing it to the left. Then put the two screws back in using your screwdriver.

Contact Raybuck Auto Body Parts for All Your Replacement Body Part Needs

If you have any questions, contact our team here at Raybuck Auto Body Parts. We’re happy to help and give you some additional tips or pointers to assist you in the repair of your Jeep Wrangler.

Do you have any tips for replacing the fuel tank skid plates, fuel tank or fuel door? Share them in the comments below!

Categories
Project Builds Tech Articles Truck Talk

How to Align the Hood on a 1947-1954 Chevy or GMC Pickup

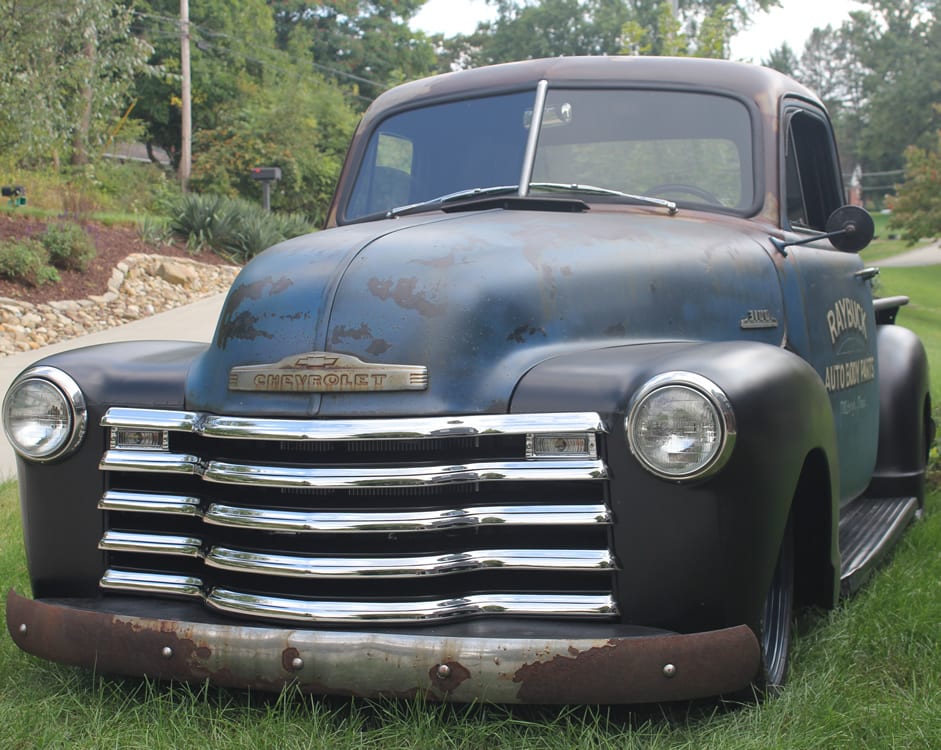
If you’ve replaced any of the sheet metal on the front of your 1st Series (Advance Design) GM truck, then you know how challenging it can be to get it to align when putting it back together. We found this out first hand when building our 1953 Chevy pickup. We kept the original hood, but replaced the hinges, and also replaced the the front fenders, inner fenders, rad support and grille. We thought putting it together would be fairly simple as it was all just bolted together. Well, there are around 20 bolts that hold the front clip and hood on, and they all need to be aligned just right or else you’ll end up with uneven gaps and/or a hood that won’t latch. If you don’t re-install the inner fender cross brace rods (that run on an angle from the center of the firewall to the middle of the inner fenders), as is common practice when customizing these trucks, then alignment gets even harder. I’m not sure what the engineers were thinking when they designed this, but having a bolt pass through three panels does not allow for easy alignment.

1953 Chevy truck-RaybuckAfter spending two days trying to get everything to align, and feeling like we were just making things worse, we ran across an old Chevrolet service manual that actually explained how to properly align the hood (which also helped align the fenders). The grille was a completely different beast, but we’ll leave that for another article.

When starting this project keep in mind that nothing fits. Yes, even from the factory nothing on these trucks seemed to fit that well. You can take apart an original truck, put it back together, and you’ll have alignment problems. Add aftermarket panels into the mix and be prepared to ream some holes. With that in mind, here are the steps to align the hood. Follow these if the hood is already on the truck. If the hood is off of the truck, then you can obviously skip a few of these steps.

  1. Loosen all bolts in the front clip (literally all of it, including the rad support). This will allow you to adjust the hood and then adjust the fenders to get the correct gap along the top and the cowl.
  2. Remove the hood latch plate that’s located in front of the radiator. Removing this will allow the hood to close all the way without any interference which will make it easier to align.1953 Chevy truck hood latch
  3. If you are keeping the fender cross brace rods, the left should measure 27 1/4″ and the right should measure 27″, with the measurement taken from the center of the bolt head to the head of the bracket.
  4. Disconnect the hood spring supports from the hood (you can leave them attached to the firewall), wrap them in a rag so they don’t scratch the firewall, and let them hang. Loosen the bolts that attach these to the body to allow for adjustment when fitted back up to the hood.1953 Chevy truck hood spring support
  5. Loosen the outer hood-hinge bolt on both sides (this bolt would be located in the lower open hole shown in this pic).1953 Chevy truck hood support
  6. Loosen the two inner hood-hinge bolts on both sides. Only loosen them enough to allow for slight movement in the hinge as these are holding the weight of the hood when it’s open.
  7. Place a 4″ block of wood under the nose of the hood to support it. (This step is critical because if you don’t raise the front of the hood then it will be very difficult to get the hood to sit properly. Without propping the front up first, the rear of our hood kept sitting around 2″ off of the cowl when everything was tightened.)
  8. This step is easier with two people. Push the rear of the hood down and back so that it’s pressed against the cowl weatherstripping. You’ll want to get it as tight as possible because the hood hinges are going to want to push up on it. While maintaining down and backward pressure, tighten the two inner hood-hinge bolts on both sides. (If you are trying to do this by yourself, a ratchet strap can help maintain pressure on the hood while you’re tightening the bolts.)
  9. Remove the 4″ block and lower the hood. If you got lucky, the hood will fit tightly across the cowl seal and the gaps will be perfect along the cowl and the fenders. For the 99% who don’t experience this miracle, the following alignment adjustment techniques will be helpful.
    1. If the hood sits too high, or sits uneven, you may need to adjust the hood hinges. There is a bump in the firewall that helps align the hood hinge. You may need to remove this bump to allow the hinge to lower. If you remove this bump, you may also need to slightly ream the hinge holes in the cowl and possibly the inner hood-hinge holes as well.
    2. If the hood fits along the cowl but has an increasing gap along the front of the fenders, try shimming the radiator support by adding shims between it and the chassis cross member.
    3. If the hood fits along the cowl and fenders but has a gap between the nose and the grille, try shimming the top of the grille by adding shims between it and the center grille support bracket.
    4. If the hood touches the outer edges of the cowl seal but has a gap towards the middle of the cowl, you can try adjusting the center bracket located at the rear of the hood. Remove the two outer screws on each side and loosen the two inner screws on each side. Pry the outer ends of the bracket away from the reinforcement piece and shim out evenly with washers on both sides. Re-install the outer screws through the washers (so that the washers don’t fall out) and tighten all screws. This will help bring the rear center of the hood down. Is there is still a gap after this adjustment, you can try shimming under the cowl seal.1953 Chevy truck hood center bracket
  10. Once the hood gaps look good, raise the hood and tighten the outer hinge bolts on both sides.
  11. Attach both hood supports to the hood and then tighten the hood support brackets to the firewall as well.
  12. Install the hood latch plate in the farthest rear position as possible and snug. Gently lower the hood to the closed position so that it locks in place. If it locks in place, raise it, move the hood latch plate forward 1/32″ and tighten the hood latch plate screws completely. (The hood lock stud is adjustable. If the hood doesn’t lock when fully closed, adjust the lock stud until it does.)1953 Chevy truck hood lock stud
  13. Once the hood is locked into position, adjust the fenders as necessary to get the proper gap. At this point the only fender adjustment that should need to be made is towards the rear.
Categories
Truck Talk

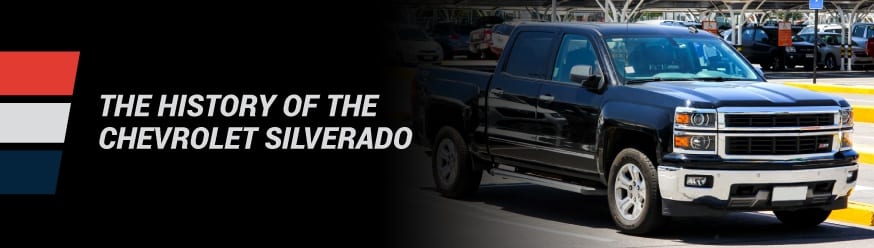
The History of the Chevrolet Silverado

History of the Chevy Silverado
From the original box designs that started in the early 1900s to the modern and robust look of today’s Chevy pickups, the history of the Chevy Silverado has evolved throughout the past century. Not only has the vehicle transformed in terms of image but also power, durability and safety.

But how has the Chevy pickup evolved over the years to make it to one of the best-selling trucks in America? Let’s talk about the Chevy Truck History and how it’s shaped the current models we rely on for daily commutes, job completion and hauling challenging loads.

Chevy Silverado Facts — A Century in the Making

Chevy trucks celebrate 100 years in 2018. Backed by a century of engine updates, capacity transformations and appearance revelations, Chevrolet produced more than 85 million trucks since the first one sold in 1918.

Chevrolet is an American automobile manufacturer under the General Motors Company. In the past 100-plus years since Louis Chevrolet and William C. Durant founded the company in 1911, Chevy has engineered more than 209 million vehicles.

General Motors sells vehicles in more than 125 countries including the United States, Canada, China and South Korea. In fact, Chevy now sells about 60 percent of its trucks and cars to countries outside the U.S.

While Chevrolet may have constructed trucks for company use in 1916, the first trucks people could buy were produced in Flint, Michigan in November 1918. The original Silverado brand name came into existence with the 6.2-liter truck in 1998.

Where Are Chevy Silverados Manufactured?

If you’re wondering where Chevy Silverados are made, understand that Chevy is a GM brand. General Motors manufacturers Chevy’s various lines of cars and trucks. Assembly occurs in the U.S. as well as Canada and Mexico in the following cities:

  • Flint, Mich., U.S.
  • Roanoke, Ind., U.S.
  • Oshawa, Ontario, Canada
  • Silao, Guanajuato, Mexico

Chevy made in USA, Canada and Mexico
Committed to the safety and quality of their products, General Motors holds their vehicles to the highest standards and rigorously tests every aspect that affects their customers. They never compromise on safety and even designed crash test dummies that set the global standard for frontal crashing. They are also one of the first manufacturers to have a rollover test facility.

The Timeline of the Chevy Silverado

Chevrolet began in 1911 when GM founder William C. Durant and racecar driver Louis Chevrolet co-founded the company. In 1918, the brand became a part of General Motors, and they sold the first Chevrolet trucks, the half-ton Model 490 and the one-ton Model T. These first trucks were sold with only the chassis and cowl, meaning buyers had to install a cab and bed themselves. The first factory-complete truck was produced in 1931 after Chevrolet had bought the Martin-Parry body company.

Over the years, Chevy has produced many different models of trucks and cars, but the Silverado is one of their most well-known vehicles. From 1960 to 1988, Chevy introduced the C/K trucks as well as the El Camino and S10. But when you take a closer look at each version of the Chevy truck through the years, you can understand where the Silverado is now and how Chevrolet has become one of the best auto manufacturers in the U.S. Each truck played an essential role in shaping the trucks we drive today.

The Beginning of Chevy Silverado History — The C/K Truck Line

In 1960, Chevrolet introduced the C/K truck that had different body styles. The “C” indicated two-wheel drive and the “K” indicated a four-wheel drive truck.

The most popular version was the C10, but within seven years the company released the second generation in 1967. Known as the Action Line truck or the Glamour Pickup, the second generation C/K pickup trucks had superior comfort and convenient features. With a clean-cut, simple body and shoulders that tapered toward the rear, the truck had an iconic design. It also displayed an integrated fender and hood along with a simple grille. The second generation also had eight different engine options including a V8 or a 6-cylinder.

After a few more years, Chevrolet continued to innovate new designs and technologies. The third generation was released in 1973. With a newly redesigned body branded as the Rounded Line or the box body, it was one of the first contemporary heavy-duty pickup trucks. Chevy’s C30 One-Ton Dually made in 1973 was not only the first dual rear wheel truck on the market, but it was also the first to incorporate a Crew Cab which could hold up to six people.

The third generation C/K pickup was innovative and set new standards for the industry. As a heavy-duty hauler, it had a square body with rounded exterior lines for improved aerodynamics. It was the first to use curved side glass and have an antenna installed into the windshield. The One-Ton Dually had 155 horsepower, 255 pound-feet of torque and a 5.7-liter V8 engine. The third gen of Chevy C/K trucks lasted more than a decade until the fourth generation was released in 1988.

But in the midst of transitioning from one generation to the next, Chevrolet released the first Silverado luxury trim edition in 1975. The fourth generation started in 1988, but the era of the C10 truck ended in 1987, and the C/K line 5.3-liter with the GMT400. The new collection of trucks lasted from 1988 until 1998 and was also the first to be on the GMT line.

Features of the fourth generation truck included four-wheel drive, 185 horsepower, 295 pound-feet of torque and a 5.7-liter V8 engine. The decade between 1988 and 1998 was also when Chevy presented the Insta-Trac system that gave you the ability to shift in and out of four-wheel drive at any speed. Equipped with independent front suspensions, the 1988 C1500 quickly become one the best-selling pickup trucks in America.

As the final generation of the original C/K line, the truck — known as the OBS, Old Body Style Chevy or the GMC truck — had three trim types available — Cheyenne, Silverado and Scottsdale. The Cheyenne was a base trim and was a cost-effective, full-size truck. The Scottsdale was a mid-line truck. The Silverado was top-of-the-line in the industry.

In 1999, Chevy retired the C/K line and replaced it with a new series based on the Silverado trim.

The Modern Chevrolet Silverado Truck

Year after year, Chevy continued to transform the industry, especially from 1999 to 2018. The brand unveiled the Silverado, Avalanche and Colorado designs, now producing several of the best-selling pickups in America.
1999 to present day Chevy trucks
From 1999 to the present day, the Silverado has transformed into one of the most successful trucks. In the beginning, it was a stand-alone model with the GMT800 platform. It offered a new line of V8 engines with a hydroformed frame and a convenient driver message center. Other characteristics included a 5.3-liter V8 engine, 270 horsepower and 320 pound-feet of torque. The Silverado comes in light-duty models — the 1500 or the 2500 — as well as three heavy-duty models — 1500HD, 2500HD and 3500 HD.

Different Models of the 1999-2018 Silverado Pickups

Throughout different redesigns, new features, better safety improvements and many other aspects, the Chevy truck evolved from the C/K to the GMT400 and now the Silverado.

Here’s a look at the changes to the Chevy Silverado over the past 20 years:

    • 1999: In 1999, the Chevrolet Silverado 1500 had 320 pound-feet of torque, 270 horsepower and a 5.3-liter V8 engine. There were other light-duty models available that continued until 2007 and Chevy began using “Classic” as a way to differentiate between first and second generation trucks.
    • 2001: Chevy engineered one of the top powerful engines for their heavy-duty Silverado models known as the Duramax 6.6-liter turbodiesel engine with 520 pound-feet of torque.
    • 2003: Chevy introduced the Silverado SS model that had a Vortec High Output engine equipped with 380 pound-feet of torque and 345 horsepower. Known as the “VortecMAX,” the SS edition had all-wheel drive.
    • 2007: Chevy officially ended the first generation models this year. Chevy began to release the second generation in 2006 with a restyled appearance, new suspension and frame and enhanced aerodynamics. Chevy constructed the Silverado 1500 using the MT900 platform. It had a 5.3-liter V8 engine, 338 pound-feet of torque, 315 horsepower and was more aerodynamic with tighter panel gaps. These Silverados have a simple, modern look and are still made today. In 2007, Chevy won the Motor Trend Truck of the Year award as well as the North American Truck of the Year award.
    • 2008: Chevy came out with the hybrid Silverado but discontinued it in 2013.
    • 2014: Second generation trucks ended in 2014, and the third generation hit manufacturing lines in 2013. This year also included new technologies in the truck’s interior such as Bluetooth, USB hookups and an input for phones.
    • 2015: Chevy paired the 6.2-liter Ecotec3 with the eight-speed 8L90 transmission for quicker shifting, closely spaced gears and boosted acceleration. The third generation models also included heavy-duty versions that were released in 2014 but are 2015 models.
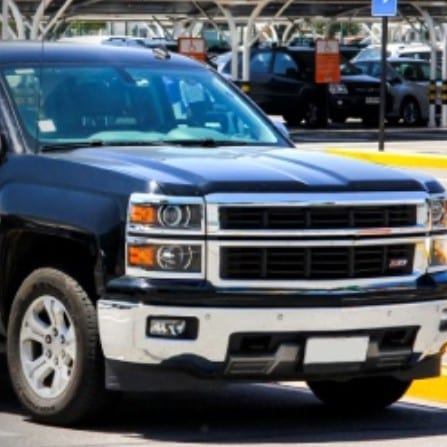
    • 2016: Another redesign was available with a new grille, front fascia and headlights. Chevrolet also added an HD radio to an 8-inch MyLink screen and other tech features.

Chevy Silverado HD with Duramax

  • 2018: The third generation Duramax engine became a part of the Silverado HD series that can produce 910 pound-feet of torque and go from zero to 60 miles per hour in 7.2 seconds.
  • 2019: In January 2018, Chevy said it would transition to the fourth generation Silverado 1500 as they begin production on an all-new fourth-gen model for 2019.

Chevrolet continues to engineer more impressive trucks each year. Every generation brings new features to the table whether it is an innovative engine like the Duramax or more aerodynamic features that support fuel-efficiency.

What Does the Future Hold for the Chevy Silverado?

As if Chevrolet can’t get any better, they are producing a Centennial edition this year worth about $54,000. It will come with 420 horsepower, a 6.2-liter V8 engine and 460 pound-feet of torque. It will contain several elements of the previous generations and versions, but will produce more efficient power and have a more modern design. The newest Silverado edition gained inspiration from the history of Chevy trucks.

As for the future, we know Chevrolet will continue to engineer innovative pickups to support businesses and consumers nationwide. They are planning to create a fresh 2019 Chevy Silverado. As technology and design continue to improve, so will Chevrolet trucks. The Chevrolet Silverado Centennial 2018 Edition is paving the way for the 2019 model.

Chevy is a worldwide automotive brand with annual sales reaching about $4.25 million. They take pride in designing and engineering fuel-efficient, reliable and safe Silverado trucks that deliver power, performance and value. Their long-lasting pickups offer innovative technologies, and most new models have features such an OnStar, Stolen Vehicle Slowdown and Automatic Crash Response.

Trust Raybuck for All Your Auto Body Repair Panel Needs

Whether you have a classic or late model Chevy truck, Raybuck has all the parts you need. We carry brands such as Prothane and Key Parts with a wide selection of parts including:

  • Wheel arches
  • Suspension products
  • Rocker panels
  • Floors
  • Hoods
  • Doors
  • Bumpers
  • Bushings
  • Cab corners
  • Rust repair panels
  • Truck bed panels
  • And more

Raybuck panel quality
Raybuck provides top-quality auto body parts for your Chevy Silverado at competitive prices. Made of heavy gauge stamped steel, our products will meet or exceed the thickness of your pickup’s original parts. You will see an immediate difference not only when it comes to the appearance of your vehicle but also the durability. If you have an older truck from 1974 or earlier, we have restoration solutions. For other models, we can help you make the necessary repairs to increase the longevity of your truck.

Raybuck Auto Body Parts collects an inventory of high-quality solutions from cutting-edge and reputable manufacturers that are the exact replacement products you need. You now have an alternative to over-priced OEMs. We offer competitive pricing, and Raybuck experts are knowledgeable about our Silverado replacement panels. In business since 1985, we uphold incredible legitimacy and name recognition within the industry.

Choose Raybuck for Your Chevy Silverado Restorations and Repairs

Search through our Chevy and GMC repair panels to see which solutions fit your requirements. Buy any needed parts and panels to get your Silverado looking good as new with enhanced durability. You can also contact us to learn more about our products or reach out to a Raybuck representative by calling (800) 334-0230.