Categories
Tech Articles Truck Talk

Common Issues With Dodge Ram 1500 Trucks

Common Issues with Dodge Ram 1500 Trucks

As anyone who has owned a truck knows, all trucks have their issues. The Dodge Ram 1500, while an overall dependable truck, has its own set of problems that may crop up, getting in the way of work, play, and dipping into your bank account as well. If you own a Ram 1500, you’ve either experienced certain issues or most likely will at some point. We’ve put together a guide to the most common problems with Dodge Ram trucks so you know what to expect in terms of repairs.

The FIAT/Chrysler Group restructured the Dodge brand in late 2009. All cars and minivans retained the Dodge nameplate, but the Dodge Ram and Dodge Dakota trucks became RAM trucks. This article focuses on the full size pickup formerly known as the Dodge Ram pickup and now known as the RAM pickup.

Quick Links:

2009-2017 Dodge Truck Issues

Common Issues With 2009-2017 Dodge Ram Pickups

Fourth-generation Dodge Rams are more powerful than these trucks have ever been, yet they’re still susceptible to issues that can make them dangerous to drive. Electrical issues are unfortunately common in late-model RAMs and are some of the worst 2010 RAM 1500 problems.
TIPM issues

1. TIPM Issues

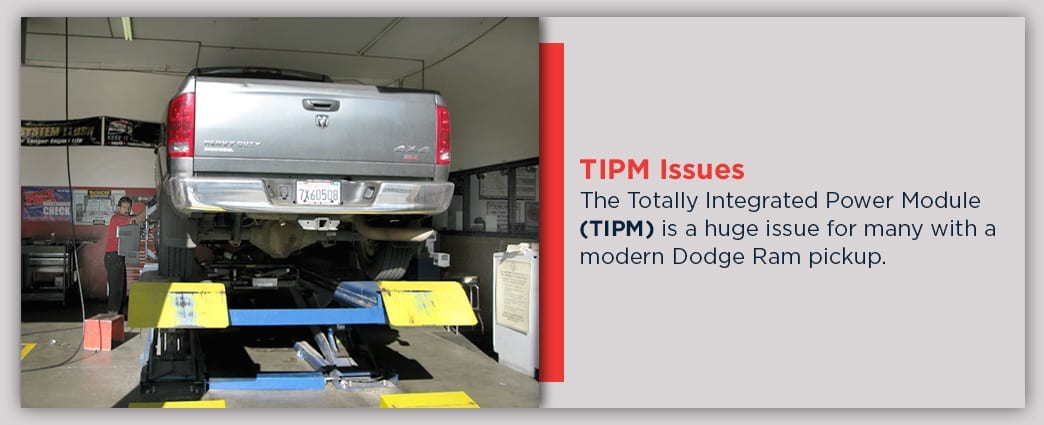
The Totally Integrated Power Module (TIPM) is a huge issue for many with a modern Dodge Ram pickup. When it starts to go, it wreaks havoc on any and every function that requires electrical input. When the TIPM starts to go out:

  • Airbags may not deploy in a crash and/or may deploy at random.
  • The horn may go off at random.
  • Power windows will stop working or start opening themselves.
  • The fuel pump may not shut off when the vehicle does.
  • The starter may crank, but the truck won’t start.
  • Doors may lock and unlock themselves.
  • Coolant fans may stop operating.
  • The ABS may have problems.
  • The A/C may go out.
  • The radio may randomly shut off while driving.

Most of these issues make it hard, or just plain embarrassing, to drive the truck, but the unreliability of airbag deployment is a life-threatening danger. Many Dodge Ram owners attempt to fix electrical problems individually when the TIPM is the real root cause. Sometimes you can correct the issues by re-flashing and re-configuring the modules, or replacing the relays.

Complete replacement is the only option in many cases. Changing out the TIPM is relatively straightforward, but the component itself costs in the $300 to $500 range for most models.

2. Cam and Lifter Failure

If your 2011 or other RAM in this model year range stalls when stopping, stalls at idle, or seizes up unexpectedly, you may have one of the most commonly reported problems for these trucks — cam and lifter failure. This issue can potentially affect all late models. All cams wear out eventually, but a huge number of RAM owners report severe problems with well under 75,000 miles on the vehicle.

The most common report is of the #3 or #2 cylinder misfiring, in combination with lifters seizing up. In these cases, the cam often shows premature wear and one or more lobes may be heavily grooved and damaged.

Cam and lifter failure

Unfortunately, this problem is often prohibitively expensive to fix once the truck is out of warranty. Costs of over $3,500 are not uncommon. The availability of replacement parts is an issue too, as the problem is so widespread that the required components are often on backorder, even as recently as 2018.

3. Body Structure Issues

One of the most irritating 2017 RAM 1500 problems also plagues other model years. Body structure should be the least of your worries if your car is less than 10 or so years old, yet 1500s are known for less-than-stellar construction. Some of the issues on newer RAM trucks include:

  • Tailgates falling open at random due to faulty lock mechanisms.
  • Bumper holes drilled too large.
  • Defective painting with bubbles underneath.
  • Rusting, especially on bolts and bumpers.
  • Rotting of the outer wheelhouse and upper wheel arch area of the bed.

In addition to being ugly, body structure problems can quickly compromise vehicle safety. If critical parts become rusty, they’ll affect performance and the structural integrity of the vehicle.

Coolant leaks in 09-14 Dodge trucks

4. Coolant Leaks

Multiple coolant leaks are one of the more common 2015 RAM 1500 problems, as well as affecting model years 2009-2014. Many owners report that the leaking is strange because it’s difficult to locate even with a pressure test and that the leak only occurs when the engine is cold. It’s possible not to notice the leak until the coolant runs so low that the engine begins to overheat, making this a repair that costs more the longer you let it go.

The sources of coolant leaks can be gaskets, the heater hose, hoses to the water pump or problems with the water pump itself. This can be one of the more irritating problems to fix because the source of the leak is not always apparent. That and the fact that these leaks tend to recur also means repair costs are tough to estimate.
Transmission issues in Dodge trucks

5. Transmission Problems

Transmission problems are extremely common with 2012 RAMs and also dominate the list of the 2014 RAM 1500’s most common issues. Problems in the transmission range from causing slight annoyance to making the truck dangerous to drive. There are a variety of ways transmission issues show up in these trucks, including:

  • Slow starts.
  • Engine running rough.
  • Bumping hard into 1st gear.
  • Jerk when shifting from 1st to 2nd.
  • Slipping into gear when in traffic.
  • Hard downshift to stop when slowing down.

In many cases, both owners and dealerships have a hard time diagnosing and fixing these critical issues. Even when the problem is pinpointed correctly, owners have reported frustration with necessary parts being on backorder for months at a time. Transmission issues are one of the leading reasons owners trade their trucks in or pursue lemon law claims.
Shop 2009-2017 Dodge Ram parts »

Common issues with 2002-2008 Dodge trucks

Common Issues With 2002-2008 Dodge Ram Pickup Trucks

While many of the same problems persist across generations, some issues affect 2002-2008 Dodge Rams more than others. 2002 Dodge Ram 1500 transmission problems are particularly frequent. It’s important to note that problems with this generation of Dodge Ram are often more difficult to get fixed because the vehicles are at least 10 years old and reaching the end of their warranties, if not outside the warranty period. The common problems range from quick fixes to significant part replacements that may not be worth the time and money if your Ram is toward the older end of the generation.

1. Exhaust Manifold Bolts

A bad or failing manifold leads to decreased engine performance, and broken manifold bolts are common in Dodge Ram 1500s of all ages. The most common symptom of broken or degraded bolts is a ticking sound on cold starts, frequently heard from the passenger side of the truck. The source of the sound is a cold manifold with damaged bolts, which allows gases to seep around the bolts rather than through the exhaust system as designed.

Luckily, this issue is relatively easy to fix or have repaired. However, some owners report having to get their manifold bolts replaced multiple times. There appears to be a real quality control issue for Dodge in these bolts, and owners have been stuck with the bill.

The cost of repair depends on how many new bolts are required and whether old bolts are difficult to remove. Sometimes the bolt head will degrade so much that it breaks off, leaving the rest of the bolt stuck and in need of expertise to remove. Some owners report having paid up to $1,000 to repair this issue.

2. Engine and Transmission Issues

There are a significant number of owners dealing with 2002 Dodge Ram transmission problems, and 2006 Dodge Ram 1500 transmission shifting problems are incredibly common as well. Anyone who has stalled out in an intersection or in the middle of traffic knows how dangerous it is to be stuck with no power steering and no brakes — and it’s one of the worst problems with these trucks.

It’s most common for the stalling to occur at slow speeds, such as when you’re driving around a parking lot or making a turn at an intersection. Some cases are solved by replacing the EGR valve or throttle body or resetting the PCM. However, it’s often quite challenging to pinpoint the root issue as there are around 50 different sensors on this vehicle.

Transmission issues — particularly 2005 Dodge Ram 1500 transmission problems — are equally common. Some 2004 Dodge Ram 1500s stall when braking and at idle, as well. The most common report is that on a cold start, the truck won’t move when put in gear. The transmission may also slip or refuse to shift at all, which is one of the main 2006 Dodge Ram 1500 transmission shifting problems. Sometimes switching out the solenoids can fix the problem for around $50 to $100 plus labor if you have it done by a shop.

3. Cracked Dashboard

A bizarre yet widespread issue is defective plastic dashboards that simply don’t hold up to the test of time. The dash will start with a few cracks that widen over time, often with chunks of plastic breaking off completely. Dodge has never formally acknowledged this happening, and owners rarely ever get any assistance from the manufacturer.

Although this problem is present in models 1998 to 2006, the highest rate of reports is in the 2001-2003 model years. 1996 Dodge Ram 1500 dashboard replacement is common, too.

4. Faulty Window Seals

While window seals are something you’d expect to go out in trucks this old, Rams have always had issues with this part. Window seals may not be a critical component for your truck’s functionality, but there are some definite issues once they fail. They tend to stick out, making for an eyesore, and they can make your A/C and heat work harder than they need to. The worst issues occur when the rain hits — your whole interior can get wet, and if it stays that way for a while, mold will form, eventually ruining the interior of your truck.

Luckily, window seals are an easy DIY fix with any number of adhesive kits. You can also purchase and install new window seals for under $25 per window.

5. Lighting Issues

Lighting issues are common in Dodge Ram trucks and are one of the most frequently-cited 2002 Dodge Ram 1500 electrical problems specifically. Owners find that their headlights, taillights or turn signals suddenly stop working, causing irritation at best and a safety hazard at worst.

In some cases, the issue is caused by pinched wiring in the trailer hitch. These cases are easy to identify since the lights shut off immediately after attaching the trailer. Other times, the issue is yet another symptom of problems with the TIPM. Either way, the fix is usually low-cost if you’re able to perform the work yourself.

6. Body Structure Issues

As with the most Dodge trucks, Dodge Rams are known for rotting away well before their time. The more common body issues on Dodge Ram trucks include:

  • Rotting of the outer wheelhouse and upper wheel arch area of the bed.
  • Rotting of both driver and passenger side cab corners.
  • Rotting of both driver and passenger side rocker panels, typically starting across the lower door weatherstrip seal.
  • Rotting of the oil pain.

These rust problems start out as a bubble or two in the paint, and then quickly turn into widespread cancer. In addition to regular undercarriage cleanings, we highly recommend applying some protective coating (rubberized or wax-based undercoating, Fluid Film, use motor oil if you’re old school and don’t care about the environment) to the underside of the truck. And, as soon as you see that first paint bubble, fix it.

7. Wheel Bearings

The 2002-2008 Dodge Ram trucks are notorious for wearing through front wheel bearings. Wheel bearing replacement in the 2002 Dodge Ram seems to be the most prevalent starting around 75,000 miles. Some owners reporting that they’ve replaced one or both sides multiple times with under 100,000 miles on the truck.

You can usually hear a wheel bearing going as it will make a higher pitched squeaking/squealing noise as you’re driving around. If you notice this type of noise, have it checked immediately. If you wait too long, the bear could lock up, causing that wheel to freeze and the truck to dart/roll in that direction. This could be extremely dangerous, especially at highway speeds.
Shop 2002-2008 Dodge Ram parts »

Common Issues With 1994-2002 Dodge Ram Pickup Trucks

The older the truck, the more likely it is to experience many of the problems we’ve already covered. The 1st gen Dodge Rams from model years 1994-2002 won’t surprise anyone when they experience engine or transmission issues, cracked dashes, or body structure issues. For example, many owners report the 1999 Dodge Ram 1500 stalls while driving.

Additionally, 2001 Dodge Ram 1500 transmission problems aren’t all that different from those you’d find in later model years, for example. Here are three of the issues that are common to find in 1994-2002 Rams.

1. Motor Sludge

Rams from this generation, especially the 2002, have a particularly nasty problem with sludge buildup in the engine. This notorious issue can blow the engine or lead to other problems like drops in oil pressure or overheating due to the radiator bursting from backpressure.

Unfortunately, since this issue takes a while to build up, the end result of engine failure usually appears after the warranty is up. This happens even to owners who religiously change their oil, and there’s not much you can do about it except replace the motor for a few thousand dollars. Depending on the condition of the rest of the truck this may not be a worthwhile investment.

2. Manifold Gasket Leaks

Engine components get leaky in older trucks, and the Ram is no exception. Many owners in this model year bracket experience excessive oil consumption, sometimes up to a quart every 50 miles. The truck may burn oil rather than leaking. Gas mileage can be cut in half, and oil pressure may suddenly drop before coming back up again.

1994-2002 Dodge Ram Manifold Gasket Leaks

Luckily, this is a relatively easy fix. Replacing the plenum gasket often does the trick at a cost of just a few dollars if you do it yourself.

3. Catalytic Converter Failure

If everything goes right, you shouldn’t have to replace a catalytic converter. However, the engine problems that many Dodge Rams tend to have can result in too much fuel entering the converter. It can form a coating on the catalyst and prevent the converter from working or cause it to overheat.

The truck might lose power, you might hear some rattling, and the check engine light may come on. The exhaust might have an unusual smell, too. If a misfiring engine has degraded your catalytic converter, you’re likely looking at around $1,000 or more for professional repair.

Evolution of the Dodge pickup truck
Shop 1994-2002 Dodge Ram parts »

Evolution of the Dodge Pickup Truck

Dodge is the product of two brothers and more than a century of innovation. Horace E. Dodge and John F. Dodge started out making bicycles, and at the turn of the 20th century, they opened their first machine shop. They started out making stove parts and branched out to auto components, selling them to the Ford Motor Company among others.

It didn’t take long for the Dodge brothers to try their hand at making automobiles themselves, with the first Dodge vehicle appearing in 1914. Both brothers died in 1920, but by then, Dodge was already one of the biggest players in the industry. Chrysler purchased Dodge in 1928. Dodge Ram history and the evolution of pickups from the company are fascinating topics, so we’ll break them down by era.

1928 to 1947 Dodge Trucks

Dodge has always offered light-duty truck models, but in the beginning, you’d be hard-pressed to tell the difference between passenger cars and trucks. Over a couple of decades, trucks began getting their own designs for chassis and body, as differentiation was needed in the growing market.

Light and medium-duty trucks were the first Dodges offered, with heavy-duty models appearing throughout the 1930s and 1940s. The Warren Truck Assembly plant opened in Michigan in 1938, and Dodge still makes trucks there today.

B Series (1948 to 1953) Dodge Trucks

The B series was designed to replace the prewar Dodge truck in a manner that appealed to civilians. It came in several variations.

  • B1-B: A 1/2 ton truck with 95 hp straight six flathead engine.
  • B1-C: A 3/4 ton truck with 108 hp straight six flathead engine.
  • B1-T: Variation with a semi-truck cab.
  • B1-V: Van variation.

C Series (1954 to 1960) Dodge Trucks

The C series was a complete redesign of the Dodge truck, with high-visibility wraparound windshields. The C series introduced a two-speed automatic transmission called the “PowerFlite.” After WWII saw the military successfully use four-wheel drive, Dodge produced a citizen version called the “Power Wagon.”

D Series (1961 to 1980) Dodge Trucks

Dodge has always been ahead of the game in terms of putting amenities in its trucks. They came out with the “Adventurer” package in the 1960s, which offered luxuries like padded front seats, carpeting, extra chrome trim and courtesy lighting. Dodge was also among the first to offer more spacious cabs like the ones in its “Club Cab” bodies in the 1970s.

In the later 70s, Dodge went after the people who wanted their trucks to be fun as well as functional. The “Lil’ Red Express” was a limited edition that packed a police interceptor motor and big-rig exhaust stacks into the vehicle.

Dodge Ram (1981 to Present)

The “Ram” name first appeared as a rebadge on a light Dodge truck in 1981, after production of the D series stopped. Dodge had some financial issues throughout the 80s, but two things helped revive the brand. The first was the addition of the reliable Cummins B Series turbo-diesel in 1989.

The second was the appearance of the brand-new styling of the Ram in 1994, which was highlighted on the show “Walker, Texas Ranger.” The V10 engine from the Viper made for another attractive option. In 2009, Dodge spun their trucks off into the Ram brand. Today, Ram trucks are known for having some of the best amenities and infotainment systems in the industry — making them the prime choice for people who want a luxury feel to their trucks.

Shop Dodge Repair Panels from Raybuck Auto Body Parts

When you need auto body repair panels and parts for your Dodge Ram, come to Raybuck. We have a wide selection of repair panels for your 2009-2017 or 1994-2002 Ram 1500. Whether you need cab corners, rocker panels, truck bed panels or another part, we have you covered with parts to replace your damaged or rusted panels.

Our parts are made using the latest in cutting-edge technology, and continuously update our product line to ensure you get only the best parts in the industry. The panels you get from Raybuck offer perfect fitment and durability thanks to the use of heavy-gauge stamped steel and 3D scans of an original part during the manufacturing process.

We’ve been a family-owned business since 1985, and we know a thing or two about quality customer service. If you need to contact us, you’ll always hear a human voice on the other end of the line who’s ready to answer your questions with expertise.

Shop Dodge truck repair panels

Categories
Rust Repair Tech Articles

Wheel Arch Repair and Replacement

Wheel arch repair and replacement

Whatever type of vehicle you drive, over time, it’s bound to collect moisture and road debris in its wheel arches. The wheel arch is the space just above and to the inside of your tires. And since your tires are constantly in contact with the road, every bit of debris they kick up has the potential to hit the wheel arch and wheelhouse area of your vehicle.

Most cars have an inner piece – the wheelhouse – and outer skin – wheel arch panel – that form this area that people commonly refer to as the “wheel opening,” while many trucks — especially around their rear wheels — may have three pieces that make up this area. Regardless of the make and model of your vehicle, once your wheel opening starts to rust you don’t want to wait too long to perform the wheel arch rust repair. Rust in your wheel arches will only get worse over time and eventually spread to other areas of the vehicle, causing even more costly damage.

To help you make a successful repair, we’ve put together this helpful article on how to repair badly rusted wheel arches. And remember, the knowledgeable staff at Raybuck Auto Body Parts is here to answer all of your questions. We have decades of experience helping restore and keep vehicles like yours on the road.

Quick links:

Shop Wheel Arches »

Why Wheel Arches Rot Out

Your wheel arches take a lot of abuse, even if you clean them regularly. Moisture accumulates in the groove between the inner wheelhouse and the outer skin. Plus, your wheel arches take a beating when your tires kick up dirt, water and other debris while driving.

These factors, combined with the way manufacturers make today’s pickup trucks, can lead to more frequent wheelhouse replacements. Most manufacturers put foam in between the two panels on newer pickup trucks. They claim this is for sound deadening purposes. The problem with the foam starts with how it’s installed. It’s heated to 200 degrees Farenheit, spread in, and then let to expand. The hot liquid foam tends to burn off any EDP or other coating on the areas that it touches, leaving bare metal. Once cooled, the expanded foam will hold moisture when exposed to it. Just think about how much water gets kicked up in this area while driving in the rain. That’s a lot of moisture. So now you have bare metal that has moisture-holding foam against it. This is what causes wheel arch panels to rot from the inside out, and it’s no wonder wheel arches are one of the most common areas to show the first signs of rust damage on your truck.

Foam will hold moisture

The sooner you replace the outer wheel arch panel, the more likely you are to prevent the further spread of rust. As rust eats away at the inside of your panel, the paint will bubble and flake on the outside of your wheel arches. Installing wheel arch panels as soon as you notice any rust can help stop any further damage and save you money.

How to Repair Rusted Out Wheel Arches

When determining how to repair rusted wheel arches, the most important step is to decide which pieces need to be replaced. The general process is quite similar for cars, trucks, vans and SUVs, though the replacement parts vary a bit. At Raybuck, we stock one of the widest selections of wheel arch panels and inner wheelhouse assemblies in the industry — so getting the right replacement parts is never an issue.

If your rust repair involves just the outer skin — or the wheel arch panel — it will be simpler than if you need to also replace the inner wheelhouse piece(s). But regardless of how extensive the rust damage is to your wheel arches, the following steps can help you make quick work of putting an end to those unsightly rusted areas around your vehicle’s wheels.

In preparation for repairs, you should first park your vehicle on solid, level ground where you can get a good look at both the outer and inner wheel opening areas. Always remember to set the emergency brake when you’re working on your vehicle to prevent any accidental rolling.

Next, gather the tools and supplies you’ll need during the repair process:

Tools and Supplies for Repairing Wheel Arch Panels

  • A power drill with bits for drilling through metal panels (and possibly a spotweld bit)
  • A clean respiratory mask
  • A magic marker and masking tape
  • A set of vice grips and panel clamps
  • A flange tool to help make solid weld joints
  • A hammer and screwdriver set
  • A metal saw and/or angle grinder
  • A wrench and socket set
  • Aftermarket wheel arch repair panels from Raybuck
  • Protective gloves and eyewear

Prep Steps

Continue prepping your vehicle by removing any fender flares, covers or overlapping pieces that may restrict your access to the affected wheel arches. Depending on your vehicle’s make and model, this step may also involve jacking it up to remove its wheels and/or taking off any trim panels and sill covers that can block your access. Now it’s time to remove the rusted panels — preferably using an angle grinder fitted with a cutting disc. When you’re removing rusted panels, remember to leave sufficient material for the replacement panel to be welded to.

Repairing Your Wheel Arches

As for the repair, the next steps depend on the level of rot you’re facing. If you only need to replace the outer skin — or wheel arch — it’s a basic cut and weld process that you’re looking at. If, on the other hand, you need to replace the inner wheelhouse too, the repair process is going to get a bit more involved. A number of spot-welds will need to be drilled out on the wheelhouse’s inner lip — as well as along the outer lip closest to the bed skin.

Regardless of the extent of the rot you need to repair, you can either butt-weld or flange and weld the replacement piece in place. The processes include the following steps:

  • Create a flange around the perimeter of the cut-out area while laying in the new panel using a handy flange tool from Raybuck
  • To butt-weld, figure out how much of the existing area needs to be cut out
  • Mark the area with a marker or tape and lay and clamp the replacement panel over it

Preparing to repair wheel arches

  • Use your grinder and cutoff wheel to cut both at the same time
  • Ensure the two panels are not touching all the way around, as they’ll expand and warp once heat from the weld is applied
  • Use clamps to hold the panels in place and help maintain the gap and panel alignment
  • Weld the panel in place, making sure to alternate weld areas so as not to apply too much heat to any one area, causing it to warp
  • Grind down high-weld spots with your angle grinder

Grind down high weld spots

  • Apply body filler as necessary, sand and prime
  • Paint over the outward-facing repair panel using automotive grade paint, or take it to a professional for painting
  • Paint or coat the inner panels (wheelhouse area) with undercoating

Shop Wheel Arch Repair Panels From Raybuck Auto Body Parts

Since 1985, we’ve been supplying high-quality aftermarket parts at competitive prices. That’s why our wheel arch repair panels are made of heavy gauge stamped steel of equal or greater thickness to the OEM parts they’re replacing — to save you money while extending the life of your vehicle.

Along with replacement wheel arches, we stock a huge inventory of cab corners, bed panels, door skins and much more. If you have any questions about which replacement parts to order, contact us for all the help and support your vehicle deserves.

Categories
Tech Articles Truck Talk

Common Issues With Full-Sized GM Pickup Trucks


Common issues with GM trucks

Full-sized GM pickup trucks are a staple of American culture. They have a rich history of hauling everything from construction materials to hay bales to camping gear, and they’re even a great choice for hauling your family around. General Motors has been one of the most popular truck manufacturers in the U.S. for decades.

Chevrolet introduced its first purpose-built truck, the One-Ton, in 1918, the same year the company merged with GM. Rapid Motor Vehicle Company, a precursor to GMC, produced some of the world’s first commercial trucks before joining GM in 1909 and merging with Reliance Motor Company to form GMC Truck. GM’s modern full-sized pickups, the Chevy Silverado and the GMC Sierra, are two of the most popular trucks on the road today.

While they’re reliable trucks overall, like all vehicles, GM pickups have their share of issues.

Quick Links:

Common Issues With 2007-2013 Chevy Silverado and GMC Sierra Pickup Trucks

GM’s modern full-sized pickups are the Chevy Silverado and the GMC Sierra. Mechanically and, for the most part, stylistically, these trucks are identical, but they sell under two different brand names. The Silverado is more of the standard model, while the Sierra offers more high-end interior options and has a boxier trim.

Because these two trucks are the same mechanically, they typically share the same frequent problems. Let’s take a look at the issues you’re most likely to run into if you own one of these vehicles.

Excessive oil consumption in 07-13 GMC/Chevy trucks

1. Excessive Oil Consumption

One of the most common 2007-2013 GMC and Chevy truck problems owners experience is excessive oil consumption.

This problem led vehicle buyers to launch a class-action lawsuit against GM, which alleged 2010-2013 vehicles with Generation IV 5.3 Liter V8 Vortec 5300 engines were defective. Specifically, the lawsuit claimed the active fuel management (AFM) system, piston rings and PVC system in these vehicles were faulty and caused excessive oil consumption, as well as premature spark plug degradation and engine malfunction.

The AFM system, which disables some of the engine’s cylinders at lower RPMs to reduce fuel use, is the most common cause of this issue. While the system accomplishes this, it also leads to oil use problems. Some drivers have reported using as much as a quart of oil every 1,000 miles. You’re most likely to start noticing excessive oil use around the 60,000-mile mark.

To help avoid problems, change your oil regularly. You might also consider carrying an extra quart of oil in your truck. Some drivers have used engine tuners to deactivate the AFM system which can be an effective solution if you use a quality tuner that’s configured correctly to avoid damaging your vehicle.

2. Defective Speakers

Another frequently reported issue is that the speakers in recent Chevy Silverados and GMC Sierras go out. Most of the problems involved the speakers in the door. They typically quit working one at a time over several months, but occasionally kick back on and then stop working again after a short time. The problem may result from moisture that gets into the doors.

Most of the time, broken speakers mean a lack of convenient entertainment while driving, but they could potentially cause safety issues, as they could prevent you from using OnStar if all of them were to go.

The way to fix this issue is to replace the speakers. If you want a quick fix, you can buy a cheap set of speakers. If you go this route, you may run into the same problem at a later point. Investing in a set of more durable speakers may keep the problem at bay for longer.

3. Failure of 4WD Transfer Case Encoder Motor Position Sensor or Selector Switch

The 4WD case encoder motion position sensor and selector switch on these vehicles have been known to fail, typically at around 150,000 miles. If this sensor or switch fails, the vehicle will display the service 4WD message. This faulty 4WD issue is among the most common problems with the 2008 Chevy Silverado, according to reports from owners.

Often, the failure stems from the two ground wires attached to the frame under the driver’s door. Over time, dirt, moisture and corrosion can affect the contacts on the bolts used to attach the wires to the frame.

Replace the switch

If you have a 2008 Chevy Silverado with 4-wheel drive problems, or a similar GMC or Chevy truck from another model year, replacing the switch will solve the issue. You can purchase a new switch for around $30 and install it fairly easily. To install it:

  1. Remove the bolts and clean the bolt threads and the ends of the wire attachments and clean down to the frame using a wire brush.
  2. Reattach the wires to the frame.
  3. Pull out the dash’s outer trim far enough that you can reach in and pull out the old switch.
  4. Unplug the two plugins from the switch and plug in the new ones
  5. Push the switch into the slot
  6. Push the trim back into place.

4. Frequent Battery Rundown

A considerable number of drivers have said the battery on their 2007-2013 Silverado or Sierra dies frequently. This could be caused by problems with the battery or other issues that cause the vehicle to run the battery down. Replacing your battery will cost around $200 and occurs on average at about 33,000 miles. You might also need to replace the alternator or body control module. Installing an extra battery in the extra tray in your truck can help you to avoid dead battery problems.

5. Failure of Heating and Air Conditioning Temperature or Delivery Mode Door Actuators

Many drivers have also reported their heat and air conditioning system is delivering the wrong temperature or amount of air. Often, this takes the form of the heater turning on unexpectedly or the system blowing hot air when it should be blowing cold. The cause of this issue is a failure of air delivery or temperature mode door actuators. Fault codes can help you make sure this is the cause of the problem. This issue usually begins to occur after around 125,000 miles.

If your HVAC system starts blowing hot air in the middle of the summer, restarting your vehicle will often work as a temporary fix. Replacing the actuators offers a permanent fix to the problem. Each actuator costs between $30 and $80.

Fuel level sensor

6. Incorrect Readings From Fuel Level Sensors

Another common issue with 2007-2013 Silverados and Sierras is that the fuel level sensor stops working. After approximately 120,000 miles, the fuel gauge may start misreading the fuel level or working inconsistently. You might find it always reads empty even right after you fill up the gas tank. It might also jump between full and empty. It may stop working entirely or alternate between working and not.

This problem has led some drivers to start keeping track of their mileage manually to avoid running out of gas. To fix this issue, you’ll need to replace the fuel level sensor. On vehicles with higher mileage, you may want to replace the entire fuel pump module, which typically costs around $1,000.

7. Erratic Speedometer and Other Instrument Panel Gauges

Some drivers have also reported problems with other instrumental panel gauges, especially the speedometer. The gauges may intermittently show the wrong reading or not work at all. The issue most often occurs after around 100,000 miles. To fix this problem, you may need to have the instrument panel replaced.

8. CD Player Failure

Another issue with the entertainment system in modern Silverados and Sierras is that the CD player is susceptible to failure because of a problem with the radio unit. Drivers have reported that their CD players have started making a whirring sound and then ejecting the disc whenever they try to put in a CD and eventually not accepting CDs at all. There have also been reports that the CD player continues to run as though it’s trying to eject a CD even if there isn’t a disc in the player. This may happen even after turning off the ignition, which could contribute to running the battery down.

This tends to happen after around 100,000 miles and usually requires you to send the radio unit in to a specialty repair shop.

9. Throttle Position Sensor Problems

If your check engine light comes on and you get a reduced power message, there may be a problem with your throttle position sensor. These sensors frequently have issues related to faulty wiring, a bad connection at the TPS or a failure of the TPS. If you suspect you have a problem with your TPS, you’ll need to get it inspected and potentially replace wiring or other parts. Replacing the entire TPS will likely cost between $100 and $250.

10. Continuous Running of Anti-Lock Brake System Pump

Drivers have also reported that the anti-lock brake system pump may continue running after turning off the ignition, causing the battery to die. This typically occurs at around 140,000 miles on average and may be caused by the transistor in the ABS unit burning out. To fix this problem, you’ll usually need to replace the ABS control module, which can cost between $683 and $839.
Shop 2007-2013 GM truck parts »

Common Problems With 1999-2007 Chevy Silverado and GMC Sierra Pickup Trucks

1999 marked the introduction of Silverado and Sierra models and the beginning of the modern era of GM full-sized pickup trucks. The most common Chevy truck problems include brake issues and a knock in the steering column. Let’s take a look at these common problems with 1999-2007 GM pickup trucks.

1999 marked the intro of Silverado/Sierra models

1. Parking Brake Failures

In 2005, Chevrolet and GMC issued a recall related to the parking brake system on specific pickup trucks with manual transmissions and either PBR or TRW parking brake systems. According to the recall, the friction linings on the parking brake may wear so severely that the parking brake cannot keep a parked vehicle immobile, which could result in a crash. You’ll likely notice this issue start to occur after around 60,000 miles, but it could emerge sooner.

To fix this flaw, Chevy and GMC dealers will install a low-force spring clip retainer for vehicles that have a PBR parking brake system. For those with a TRW parking brake system, dealers will put in a redesigned parking brake cable assembly. The recall number is 05V161000. Without the recall, this problem will typically cost around $250 to fix.

There are currently 15 active 2002 Chevrolet Silverado 1500 recalls, including this parking brake issue.

Rusted brake lines in early 2000s pickup trucks

2. Rusted-Out Brake Lines

Another common issue with 1999-2007 Silverados and Sierras is rusted-out brake lines, causing the brakes to fail. This problem typically starts to occur after 100,000 miles. To fix this problem, you need to replace the rusted brake lines. When replacing a brake line, it’s advisable to check the others as well. If one rusted out, the others may have as well. The typical cost to fix this problem is around $1,200.

Some drivers have also reported other corrosion-related problems on fluid lines, additional brake components, driveshafts, underbodies and other areas. Rusted-out brake lines and other brake issues are also common early 2000 Chevy Silverado problems.

3. Steering Column Noise

Many Chevy Silverado and GMC Sierra drivers have reported hearing a knock or a clunking noise coming from the steering shaft. You’ll notice this sound when you turn the steering column. According to owners, this noise is one of the most commonly reported 1999 Chevrolet Silverado 1500 problems.

The source of the GMC Sierra and Chevy Silverado steering column noise is usually a bad intermediate steering shaft. On these vehicles, the steering shaft gets mounted to the truck body and the steering box attaches to the frame. When the truck body flexes on the frame, the shaft moves slightly. The steering shaft has a splined slip joint that has grease in the slip portion. Over time, the grease slowly moves to one end of the joint. The slight movement of the shaft then causes the noise. This problem typically starts to occur at around 60,000 miles, but could begin as early as 10,000 miles.

There are two main ways to fix the Sierra and Silverado steering shaft clunk. Periodically re-greasing the steering wheel should stop the noise, but isn’t a long-term solution. If you go this route, try re-greasing it every time you change the oil. You can also replace the stock two-piece steering shaft with a single aluminum shaft, which costs about $250.

4. Fuel Pump Failure

Fuel pump failure is one of the more frequently reported 2002 5.3 liter Chevy engine problems, although this issue is less common than some of the other problems in this list. You may also find this issue on other Silverado and Sierra models from 2000 and 2014. Some drivers have reported their fuel pumps have failed, causing the engine to stall and not restart. At first, you may temporarily lose power and then get it back. If the problem goes untreated, the vehicle will eventually stall out completely. Watch out for this problem after 100,000 miles.

Replacing the fuel pump, which costs between $700 and $800, will fix this problem. Replacing the fuel filter every 30,000 miles can help prevent it by reducing the amount of strain put on the pump.

5. Transmission Failure

Another less common issue is transmission failure. After around 70,000 miles, you may find the transmission feels jerky. You may also hear loud noises coming from the transmission. It may eventually die completely. There have also been reports of the transmission going out suddenly. Rebuilding the transmission is the solution to this problem and can cost around $2,000.

Chevy/GMC truck jerky transmission

6. Flaking and Peeling Paint

The paint of Silverados and Sierras from this era may be more prone to flaking, peeling and chipping than the paint on many other vehicles. These issues can start to become relatively severe at around 90,000 miles. The only way to fix this issue is to have your truck repainted, which can cost approximately $3,500 to have it done professionally.

7. Electric Window Failure

Drivers of 1999-2007 Sierras and Silverados have reported problems with their electric windows. The windows in these vehicles may stop working due to faulty lifting mechanisms. At around 66,000 miles, you may find that your windows start to go out one by one. To fix these issues, you’ll need to replace the motors for the broken windows, which will cost approximately $1,000 to have done by a mechanic, slightly less if you choose to do the repair yourself.

Some drivers have said that they have had to replace motors multiple times.

8. Restricted Secondary Air Injection Valves

Silverados and Sierras made between 1999 and 2007 are prone to a problem in which the secondary air injection check valves become restricted, leading to reduced airflow and causing the check engine light to come on. Fixing this problem requires you to replace the check valves. Even if the fault code shows that the problem is only occurring with one bank of cylinders, you may want to replace both to avoid having the other one go out on you as well. This issue occurs on average at 133,000 miles, and may cost between $100 and $150 per valve.

9. Failed Steering Wheel Position Sensor

If you get a service stability message in your Silverado or Sierra, it may be because of a failed steering wheel position sensor. These errors may occur intermittently or more regularly, such as every time you start your truck or turn the wheel. Replacing the sensor, which will cost you about $200 to $300, should fix this issue. This issue could occur at any time, but the average mileage at which it occurs is around 90,000.

10. Problems Shared With 2007-2013 Models

1999-2007 Chevy Silverados and GMC Sierras are also known to experience some of the same common issues 2007-2013 models do. These include failed 4WD transfer case encoder motor position sensors or selector switches, failed HVAC temperature or delivery mode door actuators and failed fuel level sensors.
Shop 1999-2007 GM truck parts »

Common Issues With 1988-1998 GM Pickup Trucks

GM first introduced the Silverado and the Sierra in 1999, but the company produced these trucks’ predecessor, the C/K pickup, for many years before that. C meant two-wheel drive, while K indicated four-wheel drive. GM used the names Silverado and Sierra during this time, but instead of describing a model, they described trim packages for the C/K trucks. The fourth generation of C/K trucks, which became available in 1988, featured a more modern design and were the first to use the GMT400 platform. In this section, we’ll look at some common issues with GM pickup trucks produced from 1988 to 1998.

1. Windshield Wiper Motor Component Failure

The windshield wipers on models made between 1990 and 1999 may stop working intermittently due to a defective wiper motor control board. Auto manufacturers issued recalls for this problem on some models. If you experience trouble with your windshield wipers, check with a dealer to see if there is a recall on your vehicle.

If you have a faulty wiper motor control board, your wipers may, at times, stop working, fail to turn on or keep running after you turn them off. You might also find your wipers only work on one speed setting.

When the wipers are not working, you should hear the motor control box buzzing. As a temporary fix to the problem, lightly tap on the control box, and the blades should start working again. For a more permanent fix, replace the wiper motor control board.

External engine or coolant leaks

2. Coolant Leaks or Oil Leaks From Intake Manifold Gaskets

The intake manifold gaskets in 1988-1998 GM pickup trucks also often develop external engine oil or coolant leaks. These vehicles may also develop internal coolant leaks that cause coolant to mix with the engine oil, which can damage the engine. This problem most often occurs at around 175,000 miles.

To fix this problem, replace the intake manifold gasket, which will most likely cost somewhere between $300 and $450.

3. Front Wheel Speed Sensor Failure

Another common problem with these vehicles is that the front wheel speed sensors, or anti-lock brake system (ABS) sensors, may fail. This issue may cause the ABS warning light to turn on or the ABS to activate erratically. Many users report the ABS activates on dry roads at slow speeds. You’re most likely to start noticing this problem after 160,000 miles.

To fix this problem, you need to replace the wheel speed sensor, which costs between $150 and $200.

GM truck lurch to the side

4. Steering Assist Sensor Failure

Many drivers of Chevy and GMC pickups made after 1997 have reported their truck will suddenly lurch to the side, especially while making long, sweeping turns. If you feel the steering jerking while turning, the cause is most likely a bad steering assist sensor. Specifically, the culprit is the electronic variable orifice (EVO) sensor, which is on the steering shaft and determines how much power steering assist to provide. When this sensor goes bad, it may change the amount of power steering assist unevenly, causing the truck to veer to the side.

Replacing the sensor should fix this problem. The EVO sensor costs around $100 and takes around 20 minutes to replace. The sensor is a skinny black doughnut shape and about three inches in diameter. To remove the old sensor, remove the nut and bolt at the bottom of the steering shaft in the truck. The EVO is on the steering column, attached with three clips. Unplug the sensor and carefully lift the clips to remove it. Then slide the EVO off and install the new one.

5. Power Door Lock Actuators Failure

This issue is less common than some of the others on this list, but numerous drivers of GM trucks made from 1990 to 1999 have reported their door locks stop working after around 160,000 miles. This issue may affect the door locking, unlocking or both. A failed door actuator is the usual culprit. Replacing the failed actuators, which costs between $100 and $300, should fix this issue.

Door handles often break


6. Broken Door Handles

Another common problem is that the door handles on these older pickups often break. This issue affects both the indoor and outdoor door handles and most often happens after around 140,000 miles. The door may not open or unlock, or the handle itself may physically break. Typically, it’s not possible to fix these broken handles, and the only solution is to replace them.

7. Idling Problems

90s Silverados and Sierras may suffer from idling problems including a higher-than-normal engine idle. This causes the truck to waste fuel, and some drivers have also said that their engine shuts off when their vehicle is idling. The cause of this issue is most likely that the throttle body gasket has developed a vacuum leak. To fix this problem, you’ll need to replace any failed gaskets. On average, this problem occurs at about 160,000 miles.

8. Abnormal Noise From the Front or Rear Differential

If you drive a Sierra or Silverado made between ’88 and ’98, at around 165,000 miles, you may start to hear an abnormal noise in the front or rear differential. You may hear a clunking, banging or grinding noise and feel a vibration coming from under the driver’s seat. The problem is often caused by worn bearings but could also be the result of another fault. You may be able to fix this problem by replacing the axle bearings if you catch it early, but you often have to do a full rebuild of the affected differential.

9. Alternator Failure

In older Sierras and Silverados, the alternator may eventually fail, causing the battery to die and, possibly, an abnormal noise to occur. This may or may not cause a dash warning light to come on. If your alternator fails, you will need to replace it, which typically costs around $300 to $400. This problem occurs on average at around 125,000 miles.

Internal distributor faults

10. Internal Distributor Faults

Numerous drivers have reported that their truck developed internal faults in the distributor, although this problem isn’t as common as some of the others on this list. You may hear a squealing noise coming from the distributor, and the issue may cause the engine to run roughly or stall. The check engine light may or may not come on. You’ll need to overhaul or replace the internal distributor to correct this problem. Start watching out for internal distributor fault issues at around 130,000 miles.
Shop 1988-1998 GM truck parts »

The Evolution of GM Pickup Trucks (1939-1987)

Although the Chevy Silverado and GMC Sierra first became available in 1999, they have a long history here in the United States. They can trace their routes back to the first GM pickup truck in 1918 and, more specifically, to the C/K line of trucks.

Throughout their history, full-sized pickups from Chevrolet and GMC shared many characteristics. Most Chevrolet models had a nearly identical model that sold under a different name from the GMC brand. Chevrolet typically marketed toward individuals, while GMC marketed toward companies that managed fleets.

Let’s take a look at the evolution of GM’s pickup truck offerings over the years.

1973, 3rd generation of CK trucks


1. 1973-1987

In 1973, GM released the third generation of C/K trucks. These trucks were the first to feature the square body design with its rounded exterior, which improved its aerodynamic performance. They were also the first dual rear-wheel truck to have a crew cab option with seating for up to six people. These trucks also offered improved padded interiors and were the first to feature curved glass. The 1973 Chevy C30 One-Ton Dually featured a 5.7L V8 engine with 155 horsepower and 255 lb.-ft. of torque. Chevy introduced the Silverado luxury trim package in 1975. Many consider the C30 One-Ton Dually to be the first modern pickup.

2. 1967-1972

The second generation of the C/K series, the Action Line generation, came out in 1967. These trucks, also called the Glamour Pickups, started to focus more on comfort and convenience, rather than just utility. They were still practical, powerful trucks, however, and offered a wide range of engine options.

3. 1960-1966

The C/K line of trucks began in 1960. The first C/K generation offered two body styles. The Fleetside body on Chevy trucks or Wideside on GMC trucks had a smooth panel on each side of the bed. Chevy’s Stepside and GMC’s Fenderside had a contoured panel around the rear wheel wells and a step behind the doors.

Chevy/GMC stepside models

4. 1955-1959

Before the C/K series, in 1955, Chevy introduced the Task-Force generation of trucks. These trucks had the first wraparound windshields, an egg-crate grille, hidden running boards and updated headlights. The interior also got some updates, making the trucks more comfortable. Chevy also introduced its overhead valve V8 engine in 1955, a 265-cubic inch engine with 238 lb.-ft. of torque at 2,000 rpm. During this time, GMC produced its Blue Chip line of trucks, which were similar to Chevrolet’s Task-Force trucks.

5. 1947-1955

In 1947, Chevrolet introduced its Advance Design pickups, which featured a striking new look as compared to older models. These trucks featured a five-bar horizontal grille and a rounded profile, as well as a longer and wider cab that could comfortably fit three people. It also had some new interior features, including an in-dash radio and a fresh-air heater and defroster system.

The Advance Design series included three different truck sizes — a half-ton, three-quarter ton and one-ton models. The 3100 Series, the half-ton model, had a 3.5L I-6 engine with 78 horsepower and 170 lb.-ft. of torque. The three-quarter ton model was the 3600, and the one-ton model was the 3800. In 1954, Chevy released updated Advanced Design trucks, which had a new grille, windshield, steering wheel, instrument panel and parking lights, as well as a more powerful engine.

During the same period, GMC produced its New Design series, which was similar to the Advance Design series.

GM focused more on truck design after Great Depression


6. 1939-1946

As the United States began recovering from the Great Depression, GM started to focus more on the design of their trucks. Toward the end of the 1930s, the company introduced newly designed trucks with more powerful engines. World War II started in 1939, and the United States entered the war in December 1941. Because of the war, GM didn’t produce any civilian pickups from 1941 to 1945, but produced thousands of trucks for the U.S. Armed Forces.

In 1941, Chevrolet introduced the AK Series, which featured tougher, more versatile models. The AK Series was the broadest lineup in Chevy’s history. It included nine wheelbases, five axle ratios, three transmissions and two engines. GMC’s versions of the trucks were the C Series and E Series.

Trust Raybuck Auto Body Parts

Raybuck Auto Body Parts is your trusted source for Chevy and GMC truck body panels and other parts, including fuel tanks, interior parts and more. Whether you’re looking to repair a recent model or restore an older one, we have the parts and the expertise you need.

Choosing automotive aftermarket parts over original equipment manufacturer parts can save you a lot of money without a sacrifice in quality. Our rust repair panels feature high-gauge steel, and we offer parts for models as far back as 1947. You can purchase parts to replace just one specific panel section, so you don’t have to redo the whole panel. They also have overlapping metal to connect to the existing structure to prevent rust from spreading to the repaired area.

Want more information? When you contact Raybuck, you won’t have to deal with a phone tree, and you’ll always get a knowledgeable representative right away. Contact us today with any questions you may have.

Shop GM truck parts

Categories
Rust Repair Tech Articles

How to Remove Surface Rust From a Vehicle

How to Remove Surface Rust From a Truck or Car

Removing body rust can preserve the integrity and appearance of your vehicle. To do so, first identify the type of rust on your vehicle and equip yourself with the right tools to get the job done. You’ll find the goods you need here at Raybuck. Everything from rust prevention to replacement panels will help you solve any rust damage on your truck or car. Our parts and products are as hardworking as you are and will stand up to whatever you put your vehicle through.

Don’t let rust take over your vehicle. The best time to treat your vehicle is when you have small surface rust spots. But it’s never too late to remove rust. Even in some of the most advanced stages of rust development, you can still save your vehicle. Here’s what you need to know about getting rid of rust on your car or truck and preventing it from returning.

Quick Links:

Different types of vehicle rust

Different Types of Vehicle Rust

Rust can damage your vehicle in a variety of ways, and the problem will quickly progress if you wait too long to correct it. Over time, minor surface rust can penetrate deeper into the metal. Even worse, what looks to be minor surface rust may just be the tip of the iceberg, as it’s very common for rust to start from the inside of a panel and work its way outward. Ignore rust spots long enough, and you could find yourself with a vehicle filled with flaky rust holes.

There are three types of rust. Here is a look at each:

1. Surface Rust

Surface rust only affects the top layer of your vehicle’s body panels. This rust appears in nicks and chips in the protective paint coating. Treat rust at this stage for the most straightforward process. You will also get the best results with the least amount of effort if you treat surface rust immediately and do not allow it to spread further. Pro Tip: The best way to avoid surface rust is to keep a small bottle of automotive paint (color to match your vehicle) in your garage and touch-up minor nicks and scratches as they happen.

2. Scale Rust

Scale rust occurs when you leave surface rust to continue the corrosion process until it pits the metal. Chemical reactions cause rust that begins to damage the metal of the body panel itself. Road salts and salt spray are notorious causes of premature rust in cars and trucks, especially in Northern states. These salts create a chemical reaction that speeds up the corrosion process. Eventually, scale rust will work its way through the surface of a body panel and affect the integrity of the metal itself.

3. Penetrating Rust

Penetrating rust is, as the name suggests, rust that creates holes in the metal. This type of rust is the most advanced stage. You will need to replace portions of, or entire, body panels of your truck to repair the damage.

The best method to avoid penetrating rust is to prevent or repair surface rust in the first place. Pro Tip: Fluid Film applied to the undercarriage of your vehicle is an excellent way to protect the chassis and inner body panels from damage caused by road debris and road salts. This protectant is so effective that the marine industry has used it for over 50 years.

Tools You Will Need for Surface Rust Repair

Tools You Will Need for Surface Rust Repair

Getting rid of surface rust can take as little as 20 minutes of hands-on time for a small job. Larger areas of rust, or scale rust, require more time to repair than small areas. Penetrating rust takes more time to correct than surface rust. Don’t forget to factor in the time it takes for the paint and finishing coats to dry. If you use Zero Rust, which is both a primer and a base paint, you don’t need a separate primer. To save yourself time during the process, gather the tools and materials you need before you begin:

  • Plastic sheeting
  • Painter’s tape
  • Sandpaper (180-grit, 320-grit, and 600-grit, or finer)
  • Wire brush
  • Wax and grease remover
  • Lint-free cloth or microfiber cloth
  • Body filler and applicator
  • Automotive paint to match your vehicle

Optional items (depending on the amount and location of the rust)

Shop all Zero Rust products »

If the rust gets deeper than minor pits, you may need to spot sandblast or replace the body panel. If the rust is extensive, body panel replacements are typically easier to install than patches, and the final product often looks better.

When working with auto paint and sanding, protect your eyes, skin and lungs. At a minimum, protective goggles, gloves and a painting mask should be used.

How to Fix Small Rust Spots on a Car or Truck

How to Fix Small Rust Spots on a Car or Truck

The process to repair small rust spots depends on how far the rust has penetrated into the metal. Surface rust is a straightforward process that is similar to fixing a scratch or paint defect. Scale rust, which goes deeper, requires more effort to get rid of on your vehicle. If you have the right products, though, the process is fairly straightforward.

An Overview of Fixing Surface Rust Spots

To ensure your truck or car doesn’t deteriorate, it’s important to fix surface rust spots as soon as possible. Start by preparing and cleaning the area. Then, sand rust out with sandpaper or a grinding disk until you see clean metal. After you’ve removed the rust, protect the surface from future corrosion by using Zero Rust paint as a base layer. This product is designed to seal the affected area from oxygen, providing superior rust protection for whatever topcoat paint you apply. Once dried, you can apply an automotive paint to blend the repaired spot into the rest of your paint color.

Repair Small Surface Rust Areas

Surface rust areas require sanding out the rust stain and recoating the surface with paint. Here’s how to get the job done:

  1. Prepare the Area: Prep your workspace. Tape plastic sheeting over your vehicle, leaving a gap the size of the treatment area with a few inches on all sides.
  2. Don Safety Gear: Put on your protective eyewear, gloves and dust mask.
  3. Clean the Surface: Use wax and grease remover to clean the area that you are about to sand. If you don’t clean the area prior to sanding, then the sanding process can contaminate the metal.
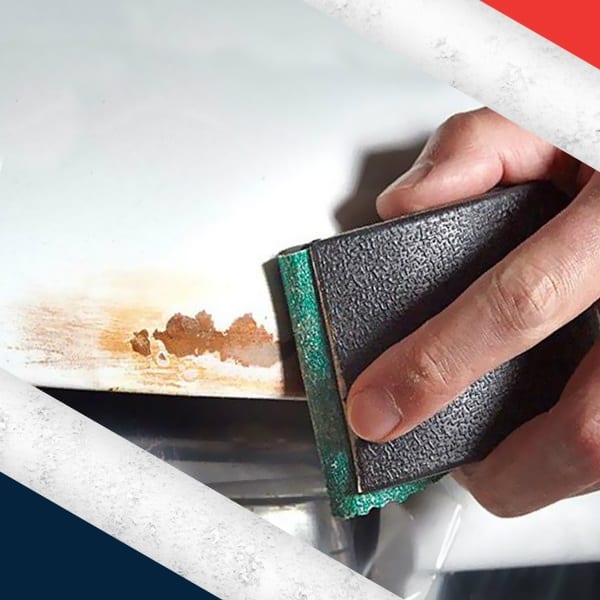
  4. Sand Away the Rust: Use sandpaper or a small grinding disc to sand out the rust spot, including the paint directly around the rust area. Keep going until all the rust has been completely sanded out and you see the shiny metal base.
  5. Clean the Surface Again: Clean the area with wax and grease remover to ready it for primer and paint.
  6. Wipe off Dust: Use a lint-free cloth or tack cloth to wipe away any dust from the surface.
  7. Apply Zero-Rust or Other Automotive Primer and Paint: If you use a rust-prevention paint like Zero Rust, you don’t need a separate primer. It should dry to the touch in 30 minutes, depending on temperature and humidity. Apply a second coat if needed after the first dries. Once your primer or Zero Rust dries, scuff it, clean it and then apply your topcoat of automotive paint.
  8. Buff the Finish: Buff the treated area with a microfiber cloth or a lint-free cloth.
  9. Wait for a Wax: Don’t wax your vehicle for at least 30 days. Putting off washing and waxing allows the finish to completely cure.

Tools Needed for Scale Rust Repair

Repairing scale rust requires most of the same tools as repairing surface rust. Here’s what you’ll need:

  • Plastic sheeting
  • Paint tape
  • Grinding discs and sandpaper (180-grit, 320-grit, and 600-grit, or finer)
  • Wire brush
  • Wax and grease remover
  • Grinding tool
  • Lint-free cloth or microfiber cloth
  • Body filler and applicator
  • Automotive paint to match your vehicle

Optional items (depending on the amount and location of the rust)

Remember to protect yourself when working with automotive paint and sanding. At a minimum, protective goggles, gloves and a painting mask should be used.

How to Fix Scale Rust

Scale rust pits into the metal, causing more than just surface damage. You will need to get more aggressive with your techniques to fix scale rust damage. Ignoring the problem will allow it to get worse until it eats through the metal completely. Keep in mind, fixing scale rust will require more effort and time than repairing.

Here’s what you need to do to repair scale rust:

  1. Prepare the Area: Cover the area surrounding the rusty portion with plastic sheeting. Tape it in place. Allow at least six inches on all sides of the rusty area for working space.
  2. Put on Safety Gear: Protect yourself by putting on safety goggles, gloves and a dust mask. These precautions are even more critical with scale rust removal because you will use a grinding tool to get rid of the problem.
  3. Clean the Surface: Use wax and grease remover to clean the area that you are about to sand. If you don’t clean the area prior to sanding, then the sanding process can contaminate the metal.
  4. Grind the Rust: Use a grinding tool (usually a right angle grinder) with a 2″ or 3″ grinding disc to remove the rust. You can start with an aggressive grit, such as 36, to remove heavy scale, and then move to a less aggressive grit, such as 80 or 120, to remove the remaining rust and surrounding paint.
  5. Mix Prep Step: Combine Zero Rust Prep Step with hot water. Use 12 ounces of product per gallon of water. Fill a spray bottle with this solution and spray the affected area.
  6. Rinse Prep Powder off: Use a rag and clear water to wipe off the rust conditioning powder solution.
  7. Fill in Depressions: Use body filler to fill in depressions in the pitted metal.
  8. Sand the Surface Smooth: Use sandpaper and a sanding block to smooth out the body filler, metal and surrounding paint edges. Start with 180 grit and work your way to 600 grit. Each grit will help remove sanding grooves left from a previous step.
  9. Clean the Surface Again:Clear off dust and debris and clean the area with wax and grease remover to ready it for primer and paint.
  10. Wipe off Dust: Use a lint-free cloth or tack cloth to wipe away any dust from the surface.
  11. Apply Primer and Paint: Apply two coats of Zero Rust paint or primer to the prepared, clean surface. Wait for each coat to dry before applying another. Once the primer or Zero Rust dries, sand the entire area again with 600 grit sandpaper, clean with wax and grease remover, and then topcoat with your automotive paint.
  12. Buff: Buff the dried coating with a lint-free cloth.
  13. Wait: Don’t wax the freshly restored area for at least a month.

If the scaled area that you’re working on is the undercarriage/frame of your vehicle, there is no need to topcoat over the Zero Rust paint. For added chassis protection, use Fluid Film. Fluid Film creates a barrier against the rust-causing agents your ride may encounter on the road.

What to do if rust gets serious

What to Do If Rust Gets Serious

Rust that penetrates deeply into the metal or that creates holes requires a replacement panel. For severe rust problems that cannot be repaired by the two processes outlined above, you will need to cut out and replace the body panel, or a portion of it. While you may be able to patch a portion of the affected area with a piece of sheet metal, it’s often easier to just replace the entire panel.

To install a patch, you must cut out the portion of the original panel that has the severe rust and holes and then weld the patch in its place. The finished appearance will depend on how good you are at welding and the quality/thickness of the sheet metal patch. For larger areas, or areas that overlap body lines, install a replacement body panel.

Choosing a new panel for your vehicle is simple. Enter your vehicle’s year, make and model into the search bar on this site to see what’s available. We have replacement panels for models dating as far back as 1947. Our replacement body panels are designed to precisely conform to the exact specifications of the original. Our panels are made from heavy-gauge stamped steel and utilize 3D scans of an OEM part to ensure perfect fitment. The engineering precision ensures the panels fit without modifications.

Here are just some of the many panels we have for repair or restoration:

  • Cab Corners: Cab corners face abuse from road salt and debris. Their shape can make rust removal difficult, and if you’ve put off the job you may need to replace the whole corner. We have cab corners for trucks back to 1947.
  • Truck Bed Panels: Truck beds take a beating from the elements and daily use. Whether rust or damage gets to them first, at some point you will need to replace some portion of them. We stock lower quarter panels and bed panels for both trucks and SUVs.
  • Wheel Arches: Wheel arches catch debris your tires kick up from the road, including corrosive road salt and water. These parts are prone to rust, but with our selection of wheel arches for vehicles from Chevy to Ford to Dodge, you can replace them easily.
  • Doors: Rusted through doors create a safety and security hazard. Don’t settle for subpar parts. Find replacement lower door panels and all the interior hardware you need, like window regulators, handles, strikers and more.
  • Rocker Panels: Rocker panels on almost every vehicle hold road salt, mud and road debris and eventually rot out. We carry a huge selection of slip-on and weld-on rocker panels for many makes and models of cars, trucks, vans and SUVs.

When your vehicle has reached the stage of rust damage that requires replacing a panel, turn to us at Raybuck. You will find high-quality panels made to OEM specifications at lower prices. Don’t forget the rust-inhibiting paint and rustproofing materials that we carry as well. With paint like Zero Rust you can protect your newly replaced panel, even in harsh conditions. Zero Rust performs exceptionally well in tests, exceeding the 2,000-hour salt spray test.

If the rust reaches the stage where the frame of your vehicle is penetrated, get a professional inspection. Rust can compromise the strength of your vehicle’s support system. A rusted frame could cause severe problems in the future, and most home mechanics will have trouble properly evaluating and properly repairing the damage.

If your vehicle’s frame is in good condition, you can help keep it that way by using Fluid Film to protect the undercarriage of your vehicle.

Rust Repair and Prevention With Raybuck

As much as auto manufacturers prepare their vehicles to prevent and reduce rusting, their efforts always seem to fall short. And in harsh climates, vehicles are even more susceptible to damaging rust. Take action now to prevent rust from forming on your vehicle. Start by applying rust inhibiting products such as undercoating or Fluid Film. If you already have rust damage, then look at applying a rust inhibiting paint, such as Zero Rust prior to an undercoating. Use these before rust takes hold on your car or truck or after treating a corrosion problem to prevent future issues.

When rust eats through the body on your vehicle completely, step up your game. Auto body replacement panels restore the integrity of your ride’s body. We have replacement panels that meet or surpass OEM standards. Never worry about buckling, warping or ill-fitting panels again. The parts we sell are crafted with thick gauge steel to ensure panel longevity and durability.

We have the materials you need for removing and preventing rust on your vehicles. Trust us to provide you with parts to keep your car or truck safe and looking great. Our product line also includes everything you need to restore your vintage vehicle. We have a history of more than 30 years of serving our customers and working on vehicles ourselves. Thanks to this longevity in the industry, we know what our customers need. Check out the high-quality products on our website to see long-lasting rust prevention, repair and restoration options.

Categories
Project Builds Tech Articles

How to Clean Up Old Aluminum Valve Covers

When we were building the 1953 Chevy pickup, we had an older small block chevy sitting around and decided to clean it up and use it for the build. Since our goal was to build a better version of what might have come from the factory around that time, we thought the small block would be appropriate, versus dropping an LS in. The small block was complete, and had a nice set of original Mickey Thompson aluminum valve covers on it, but it had been sitting for a number of years and was showing its age. We really wanted to keep the valve covers, but they were heavily corroded. After doing some research, we found a solution that we figured was worth a shot before we started looking for a different set. The solution – etching mag wheel cleaner. Yep, it was fantastic, and here’s what we did to clean these fine finned covers up.

  1. Degreased the heck out of them, inside and out. The old cork gaskets just didn’t want to let go. They were really stuck in place, so that took a little bit of time to get them worked out. Once they were out we thoroughly cleaned the covers to make sure there was no oil anywhere on them.
  2. Sprayed them with the etching mag wheel cleaner and let it do its thing. We let the cleaner soak on the covers for a few minutes, scrubbed them, and then cleaned them off as directed. The first picture below is what the covers looked like once they were cleaned and etched.
  3. Once dry, we primed them with high temp engine primer. The second picture below shows a primed cover.
  4. We top-coated with a rattle can Krylon semi-gloss black. It was not high temp paint. We did this because we wanted the paint to match the rest of the color and sheen of the other components in the engine compartment. We also didn’t think the valve covers would get hot enough to alter this paint. Even after putting 1,000 miles on the truck, the paint looks just as good as when we sprayed it.
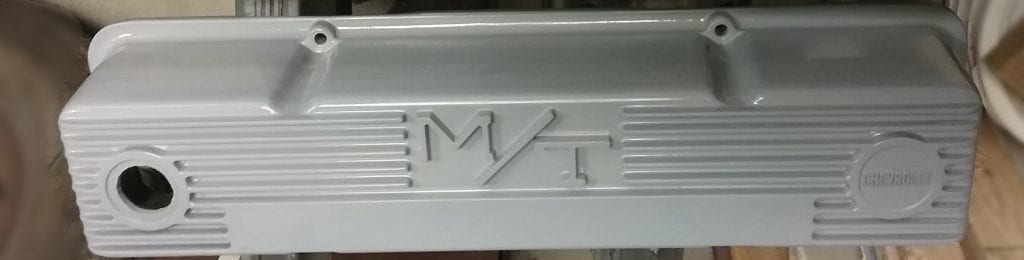
  5. Since these covers had the heat dissipating fins, and the raised M/T, we took a block with some 220 grit sandpaper and scuffed the paint and primer off of the top of the fins and the raised lettering. We then repeated this process with 400 grit and then 600 grit. The third picture below shows a painted cover (with some of the paint wiped off of the large rectangular area) and also a cover that was in the process of being sanded. The last picture shows the cover as it is today, after many miles on the road.


Valve cover etched

Valve cover primed

valve cover sanded

valve cover