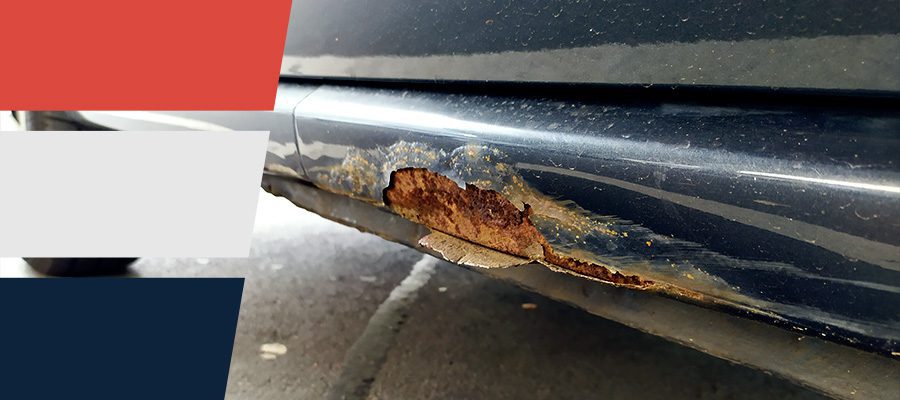
Categories
Ford

Ford Pickup Replacement Panels: Your Complete Buying Guide

Timely replacement-panel repairs preserve the strength, appearance, and resale value of Ford pickups. Corrosion and collision damage can compromise frame rails, bed sides, and rocker panels, leading to costly structural issues if left unaddressed. Raybuck Auto Body Parts has supplied professional-grade replacement sections since 1985, engineered for precise fit and built to last. This guide walks you through every aspect of choosing, ordering, and installing Ford pickup panels, so you can restore your truck to factory contours with confidence.

Key Takeaways

  • Replacement panels restore damaged or rusted areas of Ford pickups without replacing full assemblies, preserving structural integrity and resale value.
  • Raybuck offers OE-contour stamped panels for a seamless fit, coated with corrosion-resistant EDP primer and available for models from the 1950s to 2016.
  • Choosing the right panel requires accuracy in year, model, cab configuration, bed length, and damage severity—Raybuck’s fitment charts help ensure precision.
  • Aftermarket panels from Raybuck cost 30–60% less than OEM, with fast shipping, expert support, and a 1-year workmanship warranty.
  • Proper installation and maintenance are key—mock-up panels before cutting, use stitch-welding, apply protective coatings, and maintain undercoating yearly.

Aftermarket panels can save you up to 60% compared to OEM—and still match factory lines with EDP coating and laser-cut precision. Smart repair? Absolutely.

What Are Replacement Panels?

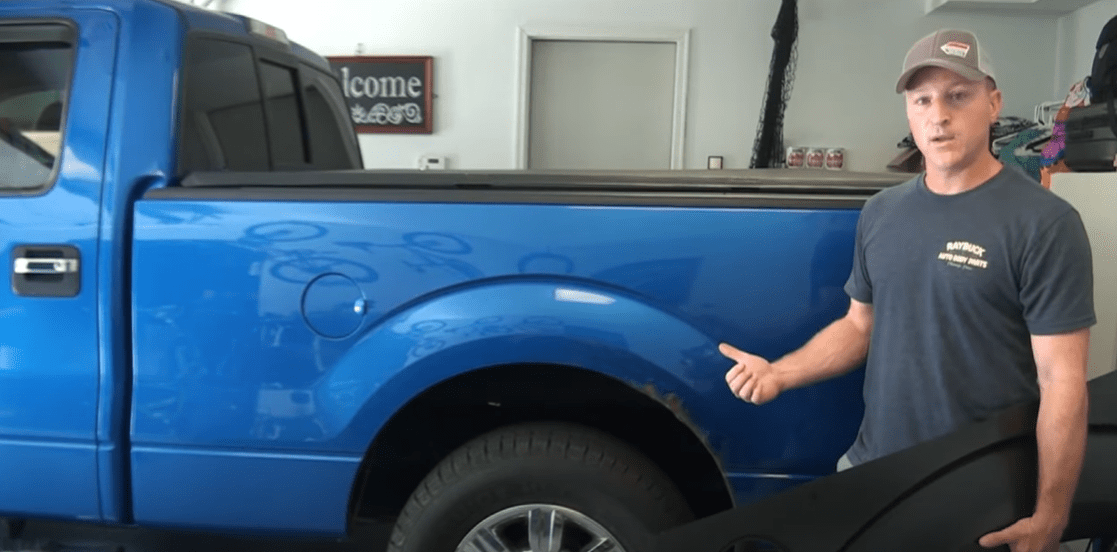
Phot of Replacement Panels

Replacement panels are stamped-steel sections designed to restore damaged or rusted areas without replacing entire assemblies.

Purpose

  • Repair collision-dented or corroded zones
  • Reinforce weakened structural points

Scope

  • Bedsides and cross sills
  • Cab corners and rocker panels
  • Wheel arches and floor pans

Advantages

  • Cost-effective compared to full OEM assemblies
  • Precise OE-contour stamping for a seamless fit
  • Corrosion-resistant electro-deposition (EDP) primer on inner surfaces
  • Simplified welding thanks to extended flange areas

Selecting the correct panel ensures structural integrity and restores factory lines while keeping repair costs under control.

Key Types of Ford Pickup Panels

Ford pickups span decades of models and configurations. Raybuck’s catalog covers common replacement needs across generations:

Panel Location Example Sections Model Years Covered
Truck Bed Bed sides, cross sills, floor assemblies 1948-2014
Rocker Panels Driver/passenger side for F-150 crew & reg 2009–2014
Cab Corners SuperCab & Crew Cab corner repair sections 1999–2016
Wheel Arches Rear inner and outer Arch skins 1973-2016
Floor Pans Front, mid, and rear floor sections 1948-2016

Whether tackling rust along the bedside or replacing a crumpled cab corner, choose panels matching your truck’s year range, cab style, and bed length.

Choosing the Right Replacement Panel
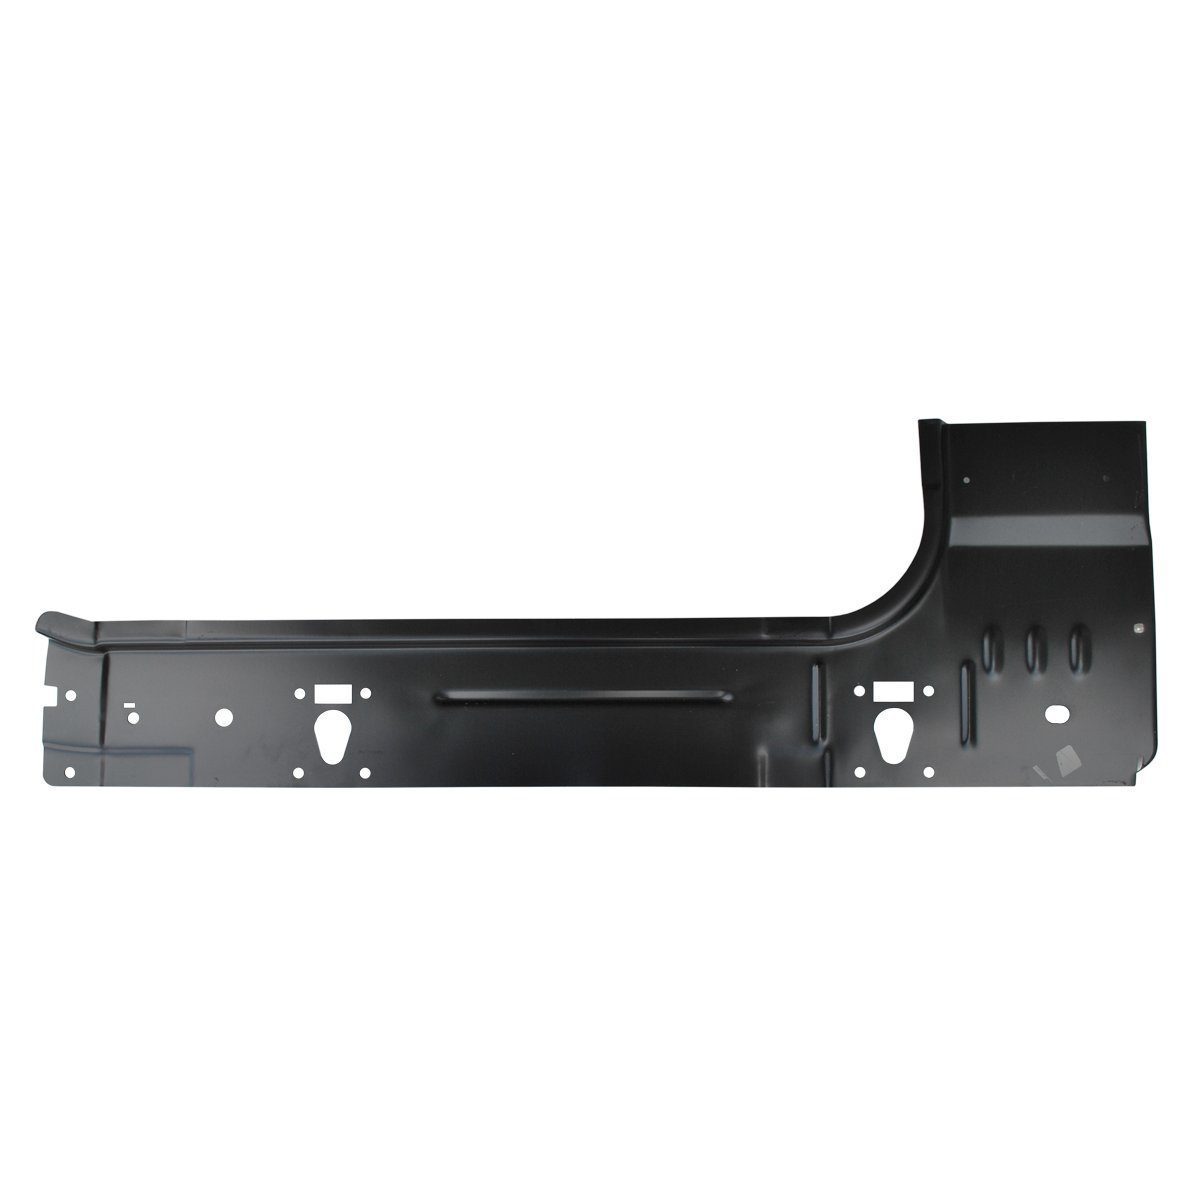
Choosing the Right Replacement Panel

Matching panels to your Ford pickup requires attention to detail:

Year, Make & Model

  • Reference your VIN or model year range (e.g., 2011–2016 Super Duty).

Cab Configuration

  • Regular Cab vs. SuperCab vs. Crew Cab determines corner and rocker dimensions.

Bed Length

  • 6.5-ft vs. 8-ft beds affect cross-sill and bedside panels.

Side & Position

  • Driver vs. passenger side; front vs. rear; inner vs. outer.

Extent of Damage

  • Surface rust may require only outer skin; deeper rot calls for inner wheelhouse or cross-sill kits.

Raybuck’s online fitment charts and live expert chat walk you through these specifications, ensuring you order the exact panel for a factory-correct repair.

Materials and Coatings

Raybuck replacement panels combine durable construction with corrosion protection:

  • Heavy-Gauge Steel
    Meets or exceeds OEM thickness for structural integrity.
  • Electro-Deposition (EDP) Primer
    Factory-style coating on inner surfaces stops flash rust during storage and before paint.
  • Galvanized/G90 Options
    Select panels feature added zinc layers for superior rust resistance.
  • Laser-Cut Accuracy
    Clean, precise edges reduce fitment prep and eliminate unwanted gaps.

These features deliver long-lasting repairs and streamline welding, grinding, and finishing.

OEM vs. Aftermarket: Which to Choose?

When restoring your Ford pickup, compare OEM and Raybuck aftermarket panels:

  • Cost Savings
    Aftermarket panels run 30–60% less than factory parts.
  • Availability
    In-stock inventory and fast shipping avoid OEM backorders.
  • Fit & Finish
    OE-contour stamping matches factory lines; proprietary flange lengths simplify welds.
  • Support
    Raybuck offers responsive technical guidance and expert fitment support on all panels.

For fleets, restorations, or personal projects, Raybuck aftermarket panels deliver high quality, rapid delivery, and exceptional value.

Identifying Your Truck’s Needs

A quick inspection reveals which panels to order:

Visual Scan

  • Inspect wheel arches, bedside seams, cab corners, and floor pans for bubbling paint, holes, or flange corrosion.

Probe Test

  • Use a screwdriver to test metal thickness; soft spots indicate advanced rot.

Measure Bed & Cab

  • Confirm bed length (6.5′ or 8′) and cab style (Regular, Super, or Crew).

Document Damage

  • Photograph affected areas from multiple angles; note location and severity.

Having these details and your VIN ready when ordering ensures you select the right Raybuck panel for a perfect fit.

Ordering Process at Raybuck

Purchasing Ford pickup panels from Raybuck is straightforward:

Search by Vehicle

Filter by Panel Type

  • Choose categories—Bed, Rocker, Cab Corner, Wheel Arch, Floor Pan—or enter keywords.

Verify Fitment

  • Check side, position, bed length, and cab configuration in product descriptions.

Add to Cart & Checkout

  • View real-time shipping rates or free shipping.

Technical Support

  • Contact Raybuck body-shop specialists at 888-789-7409 for fitment advice or installation tips.

With fast support and detailed fitment charts, ordering the correct panel has never been easier.

Installation Tips 

Follow these best practices for durable, factory-quality repairs:

  • Mock-Up Before Cutting
    Clamp panels in place and verify alignment before cutting metal.
  • Spot-Weld Removal
    Drill out inner wheelhouse seam welds cleanly to preserve flanges.
  • Panel Adjustments
    Trim edges lightly and use a body hammer for flawless gaps.
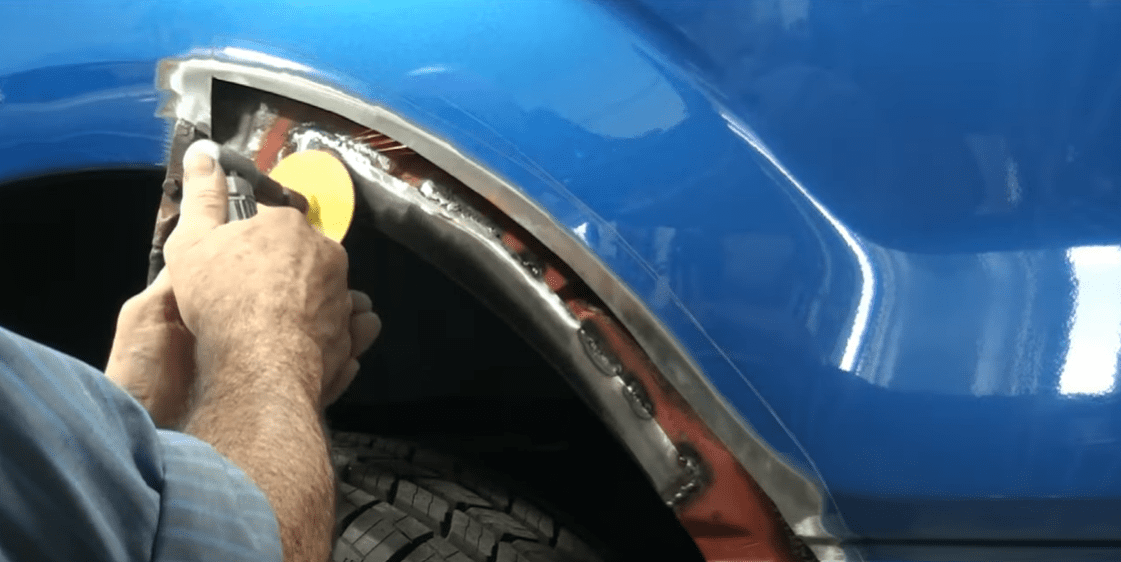
  • Stitch-Welding
    Employ short weld beads (10–15 mm), alternating sides to control heat and minimize warpage.
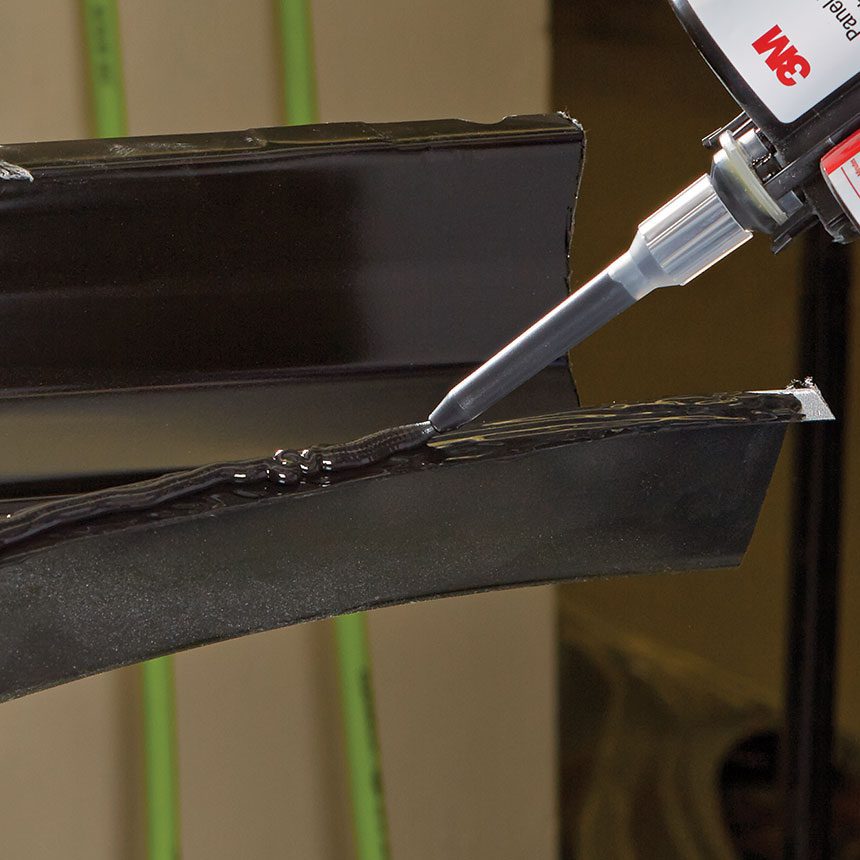
  • Epoxy Bonding Option

Many professional shops now use automotive epoxy adhesives instead of welding. This method can flange or overlay the new panel, forming a strong perimeter seal without warping metal. Epoxy simplifies the process, avoids heat damage, and provides corrosion resistance along the seam.

  • Immediate Prep
    Scuff cut edges and apply primer to prevent flash rust.
  • Professional Partnership
    Consult a certified body shop experienced with aftermarket panels for complex repairs.

Maintenance

Maintain your repair and protect against future rust:

  • Regular Cleaning: Rinse wheel wells and bedside seams monthly to remove salt and debris.
  • Chips & Touch-Up: Seal paint chips promptly with matching enamel.
  • Undercoating Renewal: Reapply rubberized liner to inner arches and cross sills annually.

Conclusion: Ford pickup replacement panels

Restoring your Ford pickup with precision-made replacement panels from Raybuck Auto Body Parts ensures structural integrity, rust prevention, and a factory-correct finish. Our heavy-gauge, OE-contour panels feature EDP primer and optional galvanized coatings to stand up to harsh road conditions. Whether you’re tackling a small patch repair or full-length bedsides and rockers, Raybuck’s fitment charts and live expert chat make the process simple and reliable. 

Browse our Ford Rust Repair Panels collection to find the exact section for your model year, cab style, and bed length. For personalized assistance or to place an order, call our body-shop specialists at 888-789-7409.

Further Reading

Categories
Repair and Replacement Tech Articles

How to Use Auto Body Panel Adhesives for a Secure Fit

Skip the Sparks: Why Bond Instead of Weld?

Bolted and spot‑welded flanges still rule in structural zones, but for many exterior skins, today’s automakers—and thousands of do‑it‑yourselfers—trust epoxy or urethane adhesives. Bonding eliminates weld‑heat distortion, keeps paint on the reverse side intact, and lets you work without a bulky welder or shielding gas. Adhesives also act as a continuous seam sealer, blocking future corrosion better than intermittent weld nuggets. That means less grinding, quicker finishing, and no pinholes to chase with filler. 

Raybuck Auto Body Parts carries the same OEM‑approved cartridges, guns, and mixing tips used in professional collision shops, all backed by tech help from gearheads who restore their own trucks.

Key Takeaways

  • Adhesive bonding offers a cleaner, safer alternative to welding for exterior body panels, reducing heat distortion and improving corrosion resistance.
  • Two-part epoxies like 3M 8116 and Fusor 108B provide strong, rigid bonds ideal for quarter panels, roof skins, and aluminum beds.
  • Silaprene one-part adhesive remains flexible, making it a great choice for seams, drip rails, and patch-panel overlaps.
  • Proper surface prep and controlled clamp pressure are essential for a strong, lasting bond—overclamping or skipping steps can weaken the joint.
  • Post-bonding care, including rustproofing and respecting cure times, ensures durability and factory-quality results for years to come.

Tool tip: Always purge the first inch of adhesive from a new mixing tip.
Skipping this step means unmixed product—and a weak bond.

Know Your Glue: Main Types of Panel Adhesives 

Know Your Glue: Main Types of Panel Adhesives 

Two‑part epoxies cure into a rigid, steel‑like bond. Our best‑sellers—3M 8116 Panel Bond and Fusor 108B—mix 1:1 inside the nozzle, giving 40‑ to 60‑minute open time and clamp‑free handling strength in about two hours. They’re OEM‑approved for quarter panels, bed sides, door skins, and even aluminum bonding when used with the correct surface primers. 

One‑part Silaprene urethane/silicone hybrid flows from a standard caulk gun, skins over in hours, and remains slightly flexible to absorb vibration—ideal for drip rails, interior seams, and patch‑panel overlaps on classics that flex. 

Quick‑Compare Adhesive Specs

Adhesive Mix Ratio Working Time @ 70 °F Clamp Time Full Cure Flexibility Typical Uses
3M 8116 Panel Bond 1 : 1 60 min 2 hrs 24 hrs Rigid Door/quarter skins
Fusor 108B Epoxy 1 : 1 40 min 2 hrs 6 hrs Rigid Roof & bed panels
Silaprene One‑Part N/A 4–6 hrs 6–8 hrs 24–48 hrs Flexible Seams & trim

Where Adhesive Bonding Shines


1967-1972 Ford Pickup Truck Lower Door Skin

Bonded seams excel any place you can access both mating flanges and don’t need to grind a visible weld bead. Common wins:

  • Door and quarter skins – perfect for large, thin panels that warp easily under heat.
  • Roof skins – no sparks near glass or headliner.
  • Aluminum truck beds – avoids galvanic corrosion from dissimilar‑metal welds.
  • Patch overlaps on antiques – preserve that original inner finish.

On structural rockers or cab mounts, follow OEM blend‑procedures that combine adhesive beads with spot welds for crash integrity.

Surface Prep & Safety First 

  • Strip to bare metal on both mating flanges; leave a toothy 80‑grit scratch for mechanical grip.
  • Clean twice—first with wax/grease remover, then with a lint‑free panel‑prep wipe.
  • Dry‑fit everything and scribe clamp locations; you won’t have time to think once the clock starts.
  • Protect yourself: nitrile gloves, eye protection, solvent‑rated respirator. Unlike welding, adhesives generate no UV arc but can irritate skin and lungs.

Temperature matters. Keep cartridges and the panel area between 70 °F and 90 °F for predictable flow and cure.

Gear Checklist 

  • Dual‑component applicator gun sized for 50 mL or 200 mL cartridges (Fusor or 3M models)
  • Static mixing tips—always start with a fresh tip.
  • Cleco pins, locking pliers, or panel‑holding clamps.
  • Plastic panel wedges to set consistent gaps.
  • Flanging tool and self‑piercing rivets, if duplicating OEM reinforcement.
  • Disposable acid brushes for smoothing fillets.

Everything above ships from Raybuck Auto Body Parts, and U.S. orders over $189 ride free to your door. 

Step‑by‑Step Bonding Guide

  • Warm and purge. Place the cartridge upright, snap on a new mixing tip, and dispense a one‑inch ribbon onto scrap cardboard to ensure equal parts are flowing.
  • Lay the bead. Apply a 3/8‑inch stripe on both mating flanges for full wet‑out; continuous contact equals strength.
  • Set the panel. Mate parts within the stated working time—40 to 60 minutes for most epoxies, several hours for Silaprene. Use plastic wedges to preserve a 0.020‑ to 0.040‑inch adhesive thickness; metal‑to‑metal squeeze‑out starves the joint.
  • Clamp lightly. Even pressure beats brute force. Too much clamp load will force adhesive out of the joint.
  • Add screws if required. Some OEM repair manuals call for self‑piercing screws along hem flanges. Install while adhesive is wet; remove them after cure and fill holes.
  • Tool the fillet. With a gloved finger or acid brush, smooth squeeze‑out into a concave bead that sheds water.
  • Clean excess. Wipe uncured epoxy with solvent; cured beads will require gentle scraping.
  • Wait. Respect the minimum clamp time—usually two hours at 70 °F for epoxies, 6–8 hours for Silaprene. Heat lamps or a closed‑door garage warmed to 90 °F can halve cure times, but never exceed 140 °F unless the TDS approves it.

Cure, Clamp, Repeat: Timing Matters

Adhesives continue to build strength after the clamps come off. Full cure for Fusor 108B reaches in six hours at room temperature; 3M 8116 needs a full 24 hours before you grind, prime, or paint. Silaprene remains sandable after roughly two days. Warmer temps speed everything—rule of thumb: every 10 °F rise cuts cure time by about 50 percent. Always let panels return to ambient temperature before painting to avoid solvent pop. 

Quick Quality Checks & Common Mistakes

  • Chisel test: Bond two scrap coupons, cure, then pop apart; metal should tear before adhesive.
  • Thickness gauge: Verify a 0.02‑in. adhesive layer; zero gap = zero strength.
  • Common pitfalls:
    • Over‑clamping until the bond line goes dry.
    • Forgetting to purge the first inch of unmixed product.
    • Bonding over factory E‑coat without first grinding to bare steel.
    • Re‑using a mixing tip after a coffee break—always install a fresh one.

Rust‑Proofing Bonded Seams

Before the adhesive skins, mist epoxy primer into hidden cavities through access holes; it will cure as the seam seals. After full cure, brush or spray cavity wax behind the joint and shoot rubberized undercoat on exterior wheel‑side seams. Repeat cavity‑wax treatment annually—adhesive bonds last decades, but only if protected from moisture and road salt.

Raybuck Auto Body Parts Advantage

Our warehouse stocks 3M, Fusor, and Silaprene cartridges, plus applicator guns and mixing tips—ready to ship the same day. Need help picking the right mix ratio or nozzle length? Call 888.789.7409 and speak with enthusiasts who glue sheet‑metal on the weekends, too. Free ground shipping on adhesive orders over $189 keeps projects on budget. 

Conclusion: Auto body panel adhesives

Panel adhesives deliver factory‑level strength without weld splatter or heat distortion. Follow the prep, gap, and cure guidelines above, choose a proven cartridge from Raybuck Auto Body Parts, and your next patch panel, roof skin, or door shell will bond securely for the long haul. Check our adhesive section online and start your no‑spark repair today.

Upgrade your repair game with professional-grade adhesives, tools, and expert support—shop now!

Further Reading

Categories
Rust Repair

A Beginner’s Guide to Rust Repair Body Panels for Your Vehicle

Rust never sleeps. Left unchecked, it eats through structural steel, compromises safety, and slashes resale value. Replacing small sections now is almost always cheaper than waiting until the damage spreads. At Raybuck Auto Body Parts, we specialize in direct‑fit rust‑repair panels stamped from heavy‑gauge steel, so even first‑time DIYers can restore strength and appearance without paying shop rates. Our catalog covers vehicles dating back to the 1940s and ships free on most U.S. orders over $189.

Key Takeaways

  • Identify rust early to determine whether to grind, patch, or fully replace a panel before structural damage worsens.
  • Raybuck’s heavy-gauge steel panels offer superior durability and fit compared to typical aftermarket options, making DIY repairs more reliable.
  • Proper prep and tools—including weld-through primer, MIG welding gear, and safety equipment—are essential for a lasting, seamless repair.
  • Step-by-step installation guidance ensures accurate alignment, strong bonding or welding, and rust-resistant sealing.
  • Ongoing maintenance like undercarriage rinses, paint touch-ups, and yearly rustproofing helps preserve your vehicle long after the repair. 

Surface rust is just the start—scale rust bubbles paint, and penetrating rust eats holes from the inside. Know the difference before you cut.

Benefits of Using Rust Repair Panels

Rust repair panels offer a practical, cost-effective solution for restoring your vehicle’s structural integrity and appearance. Instead of replacing entire body sections or making temporary fixes, you can use repair panels to address only the affected areas. This approach saves both time and money, making it ideal for DIYers and professionals.

One of the main benefits of using rust repair panels is preserving your vehicle’s safety. Rust spreads quickly and can compromise the safety and resale price of your car or truck. By addressing rust early with high-quality repair panels, you prevent further damage. This intervention is important for classic cars, trucks, and work vehicles, where authenticity and durability are essential.

Rust repair panels are designed for a precise fit, matching the contours, body lines, and mounting points of your specific vehicle. You’ll spend less time on modifications and get a more seamless final result.

Another advantage is accessibility. With the right tools and some basic skills, many vehicle owners can install these panels themselves, avoiding expensive body shop labor. Step-by-step guides and customer support make the process even more approachable.

Panel replacements provide reliable, long-lasting fixes that restore both the look and function of your vehicle, all while keeping costs manageable.

Understanding the 3 Stages of Vehicle Rust

  • Surface rust – cosmetic oxidation that hasn’t penetrated the metal.
  • Scale rust – pitting reaches deeper; paint bubbles or flakes.
  • Penetrating rust – full perforation, often hidden on the back of panels or inside seams.

Common hot spots include rocker panels, cab corners, lower door skins, wheel arches, and bed floors, because they trap moisture, salt, and debris. Identifying the stage accurately guides whether you’ll grind, patch, or replace an entire panel.

Inspecting and Assessing Damage

Inspecting and Assessing Damage

  • Tools: flashlight, inspection mirror, body pick, and—if available—an inexpensive borescope.
  • Probe from both sides whenever possible; rust often starts inside and works out.
  • Determine scope: A quarter‑size hole in an otherwise solid panel can take a small patch. Multiple perforations or widespread pitting usually justify a full replacement.
  • Match your skill level: MIG welding thin automotive steel takes practice. Adhesive‑bonded panels are an option, but structural areas (rockers, cab mounts) deserve welds. Factor in time for grinding, sealing, priming, and painting—the end‑to‑end job rarely finishes in a single afternoon.

Types of Rust Repair Panels

Rust can attack almost any part of a vehicle’s body. Certain areas are more vulnerable due to their exposure to moisture, road salt, and debris. To address these problem spots, manufacturers offer a variety of rust repair panels, each designed for a specific location and purpose.

Some repair panel options include:

  • Rocker panels run along the lower edge of the vehicle between the wheel wells. They provide structural support and are often the first to rust, especially when exposed to harsh weather.
  • Cab corners are the rear lower corners of a truck’s cab. This spot is another common rust zone due to trapped moisture and dirt.
  • Floor pans form the base of the vehicle’s interior. They can rust from the inside out, especially if water leaks go unnoticed.
  • Wheel arches are the curved sections above each tire. They take a beating from road spray and salt, so they’re prime candidates for rust repair.
  • Truck bed panels and bed floors are also frequently replaced. They go through heavy use and exposure to the elements.

Each type of panel is engineered to match the original shape and fit of your vehicle, providing a smooth installation and a factory-like finish. Some panels are full replacements, while others are partial “patch” panels designed to cover only the damaged area. By selecting the right type of rust repair panel, you can restore your vehicle’s strength and appearance.

Choosing the Right Rust‑Repair Body Panels

Choosing the Right Rust‑Repair Body Panels

Not all aftermarket steel is created equal. Our panels are stamped from 18‑ to 20‑gauge steel, often thicker than OEM sheet (20‑ to 22‑gauge). Heavier steel resists warping during welding and stands up to road abuse.

Panel Location Typical OEM Gauge Raybuck Gauge* Practical Benefit
Rocker panel 20–22 GA 18–20 GA Stronger weld flange, less distortion
Cab corner 20–22 GA 18–20 GA Better dent resistance
Bedside/Bed floor 18–20 GA 18 GA Matches or exceeds factory, ideal for hauling

Other selection tips:

  • Vehicle‑specific stamping: Holes, body lines, and flanges match factory parts—no guesswork.
  • Catalog depth: From ’40s classics to today’s trucks, we stock patch panels that others don’t.
  • Budget protection: Free ground shipping on qualifying orders keeps the total project cost predictable.

Tools, Materials and Safety Gear

Essentials

  • Angle grinder or cut‑off wheel
  • Step drill bits for plug‑weld holes
  • Body hammer and dolly set
  • Sheet‑metal flanging tool & cleco clamps
  • MIG welder (0.023–0.030‑inch wire) or two‑part panel‑bonding epoxy
  • Seam sealer, weld‑through primer, rust converter

Personal Protective Equipment

  • Nitrile‑coated gloves for grip without bulk
  • Auto‑darkening welding helmet, safety glasses, and ear protection
  • NIOSH‑approved respirator when grinding or spraying primer

Prep Work: Removing the Rusted Metal

  • Mask the surrounding paint to avoid accidental scuffs.
  • Mark cut lines at least one inch beyond visible rust; metal discolors internally before perforating.
  • Make the cut with an abrasive wheel, keeping sparks away from glass and wires.
  • Clean edges to shiny steel; treat adjoining metal with a phosphoric‑acid rust converter.
  • Test‑fit the new panel, trimming until gaps are no wider than 1/16 inch for welding or a consistent 1/8 inch for adhesive overlap.

Step‑by‑Step Installation Guide

  • Final fit: Clamp the new panel in place; ensure body lines flow uninterrupted.
  • Mark plug‑weld locations: Every 1.5–2 inches along the flange simulates the factory spot-weld pattern.
  • Drill or punch 5/16‑inch holes through the replacement panel’s flange only.
  • Apply weld‑through primer where metal will overlap; skip this if using panel‑bonding adhesive.
  • Secure with clecos or locking pliers so the panel sits flush
  • Weld in a staggered stitch, one‑inch beads spread out to limit heat. Jump around the perimeter, pausing to cool metal with compressed air.
  • Grind welds flush with a flap disc, checking that you haven’t thinned the steel.
  • Seal all seams on both sides. Brush‑on seam sealer inside the rocker or cab corner to keep future moisture at bay.
  • Adhesive method: If bonding, lay a continuous 3/8‑inch bead on the mating flange, clamp firmly for the manufacturer’s recommended cure time, then remove squeeze‑out before it hardens.
  • Structural check: Doors should close without rubbing, and gaps should match the opposite side.

Finishing Touches

  • Spray two coats of epoxy primer over bare steel within 24 hours.
  • Feather edges, apply a skim of filler only if body lines need tidying, then block‑sand.
  • Follow with a high‑build primer, guide‑coat, wet‑sand, and apply color/clear per paint‑system specs.
  • Finally, undercoat the backside and inject cavity wax through factory access holes to encapsulate seams.

Long‑Term Rust Prevention Tips

  • Rinse undercarriage and wheel wells after salty winter drives.
  • Touch up stone chips before they sprout corrosion.
  • Reapply an oil‑based rust‑proofing or wax annually, concentrating on seams and panel joints.
  • Park on dry surfaces and allow the chassis to cool before closing the garage to reduce condensation.

The Raybuck Auto Body Parts Advantage

Whether you need rocker panel repair or cab corner replacement, we have what you’re looking for. Every panel we ship is backed by real‑world enthusiasts who answer the phone, not a scripted call center. Need help measuring a cab corner or choosing an adhesive? Talk to our in‑house tech team at 888.789.7409 — we’ll walk you through it. 

Find Rust Repair Body Panels Near You

Quality steel, careful prep, and sound technique turn rusty nightmares into show‑ready sheet‑metal. Measure twice, order the right Raybuck Auto Body Parts panel, and tackle corrosion before it spreads. Your driveway can double as a body shop—and we’re here with parts, guidance, and fast shipping when you’re ready to begin.

Restore your vehicle with confidence—shop high-quality rust repair panels and get expert support every step of the way.

Further Reading

  • How to Prevent Exterior Rust: AutoZone provides practical tips on maintaining your vehicle’s exterior to prevent rust, emphasizing regular washing, waxing, and prompt touch-ups of scratches. 
  • How To Prevent Rusting on Cars (The 7 Best Ways): The Car Investor outlines seven effective methods to prevent rust, such as keeping the car garaged, applying underbody sealants, and regular inspections.
  • How to Repair Rust on a Car: Family Handyman offers a straightforward guide on removing rust from your car, including sanding techniques and painting tips to restore your vehicle’s appearance.
Categories
Repair and Replacement Rust Repair Tech Articles

Inner vs. Outer Rocker Panels

The inner and outer rocker panels are crucial components of your vehicle, welded together to support its strength, safety and handling. These panels are also an essential barrier against road salt, debris and moisture.

Failing to replace damaged or overly worn rocker panels can cause corrosion and weaken your vehicle’s core, leading to potential hazards. Replacing them as needed is key to keeping your ride safe and protecting its value.

If it’s time to replace your panels, you’ll need to know the differences between each one and whether you should replace one or both.

Key Differences Between Inner and Outer Rocker Panels

Inner and outer rocker panels serve slightly different purposes, and understanding each type is key to successfully navigating your repair or replacement project. When comparing inner versus outer rocker panels, note the following main differences:

Position and Function

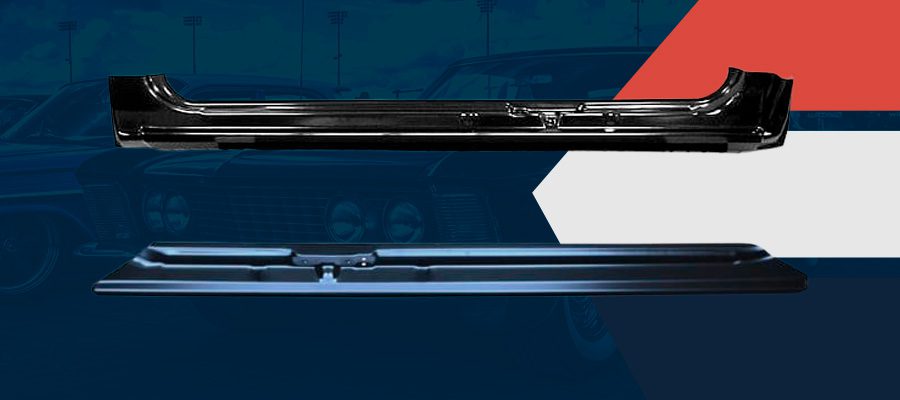
Also referred to as a rocker or rocker molding, a rocker panel is a long strip of metal that extends horizontally across the sides of a vehicle below the doors. An inner rocker panel is located behind the outer rocker panel but is still part of the cab/cabin. In comparison, the outer rocker panel is situated on the vehicle’s exterior between the front and rear wheel wells, also below the doors.

A distinct difference in each panel’s function is that the outer rocker panels are considered the more structural rocker panels, as they’re fundamental for the vehicle’s structural integrity. Without outer rocker panels, the “box” that is your vehicle’s body would be incomplete and much weaker, especially in the event of a collision. This strong connection between both ends of your vehicle also improves vehicle handling by reducing chassis flex.

These panels:

  • Keep doors aligned.
  • Support the floor and middle of the vehicle.
  • Provide rigid vehicle stability.
  • Add overall strength.
  • Keep out dirt, debris and other exterior contaminants.

Together, the inner and outer rocker panels provide even stronger structural support. With sturdy rocker panels, your vehicle is safer and better protected.

Repair and Maintenance

Due to their location, inner and outer rocker panels are prone to rust and corrosion. Keep your vehicle’s rocker panels as clean as possible, paying close attention to the outer rocker panels during regular car washes. Using compressed air and a corrosion protection product can be suitable for inner rocker panels.

If either panel experiences significant rust, it becomes a safety issue, as the vehicle’s body integrity is compromised. Although both panels serve different functions, you should replace either or both when corrosion is present. If a replacement is necessary, you’ll need to remove the old panels, clean the area properly and install the right replacement options.

Some trucks have three rocker panels — the inner, middle and outer. For example, General Motors trucks made from 1999-2006 have a middle panel. Most often, it’s only necessary to replace the inner and outer panels when they show signs of wear.

How Inner and Outer Rocker Panels Work Together

Each rocker panel plays a different role in protecting your vehicle. However, they also work together to maintain vehicle balance and functionality. These panels provide an essential connection point at the front and rear of the vehicle — in the event of a collision, both panels can absorb and distribute the energy of the impact.

The outer panel provides essential structural support, but it can also be seen as a protective guard. With the outer panel enhancing strength and acting as a shield against exterior contaminants, the inner panel is better covered from damage and can provide even more necessary strength and rigidity.

Which Rocker Panels Do You Need to Replace?

A damaged rocker panel often necessitates a replacement. A rusted, cracked or broken component — especially an outer rocker panel — can reduce vehicle structural integrity and reduce collision protection. It can also cause misaligned doors, decrease floor support and weaken the vehicle’s frame.

The rocker panel’s condition will directly impact whether you need to replace it. If you notice your outer rocker panel shows signs of rust and other damage, it’s worth inspecting the inner rocker panel, too, as rust can spread. Based on the amount of rust you find, you may be able to treat the rust with a primer and fill any rust holes with spray foam and sanding.

More extensive rust — as well as the presence of cracks and dents — will require a complete replacement. Inspect both panels and then determine whether you need to replace one or both. A worn outer rocker panel is more concerning because of its role in vehicle support and stability, but it’s also crucial to make sure your inner panel is in good condition, as both work together to support the entire vehicle.

Types of Rocker Panel Replacements

There are two main types of rocker panels:

  • Welded rocker panels: These are also called full, weld-on or original equipment manufacturer (OEM)-style rocker panels. They are welded to the body of a vehicle. These are commonly inner rocker panels, though you can also weld outer rocker panels to the side of your vehicle — this process can be lengthy, but it helps achieve a proper, secure fit.
  • Slip-on rocker panels: Alternatively, you can use an adhesive or fastener to attach a slip-on outer rocker panel to your vehicle. These panels are easier to install than welded panels. Still, they require preparation to remove rust and drill holes.

Select your rocker panel replacement part based on which panel you’re replacing and the type of work you’re comfortable completing. The replacement panel should fit tightly, with no gaps or misalignment. If installing an outer rocker panel, seal the seams to keep out moisture and paint over the final product to protect against rust.

Shop Rocker Panels From Raybuck Auto Body Parts

No matter what kind of work you’re completing on your vehicle, you want to be able to access high-quality parts from a trusted source. Since 1985, Raybuck Auto Body Parts has provided customers with a wide array of parts for various makes and models, plus expert customer service. Along with our large inventory of inner and outer rocker panels, we offer vehicle body parts, lights, engines, fuel tanks and much more.

Shop our selection of rocker panels today, or reach out to us with questions.

Categories
Repair and Replacement

Rocker Panel Repair Cost Considerations


Rocker Panel Repair Cost Considerations

It may be time to update your vehicle’s rocker panels if you are dealing with extensive rust, sagging or damage. The exact cost of repairing or replacing this part will depend on several factors. Expect to pay anywhere between $175 to $350 for the rocker panels. Professional replacement will cost more — you may pay between $1,000 to $4,000 and beyond for parts and service. Exploring the key cost considerations can help you determine whether this is a project you’re ready to take on.

Key Factors Affecting Rocker Panel Repair Costs

Explore the main factors impacting rocker panel repair or replacement expenses.

Extent of Damage

Rust and dents are often the most common issues with rocker panels. For both, the extent of damage will directly influence repair costs.

For minor rust damage, you can likely sand down rusted surfaces, treat them with a rust inhibitor and repaint them — this is an inexpensive process. However, if the rust has penetrated deeper and has weakened the panel’s structural integrity, you’ll need to either have a professional weld in a patch panel or completely replace the part.

Rocker panel dent repair costs will be relatively low for addressing small, shallow dents in easy-to-access sections. If a significant dent is in a hard-to-reach area, your panel may require more extensive bodywork. Fixing major damage, such as crushed or severely deformed panels, will be the most expensive project.

Vehicle Make and Model

Another important factor to consider for rocker panel repair costs is your vehicle’s make and model. Some cars may have more complex rocker panel designs with integrated features or unique structures, making repairs or replacements more complicated — and contributing to higher overall costs.

Similarly, the availability of replacement parts for your make and model will also affect expenses. For instance, finding affordable parts for rare, classic or exotic vehicles may be challenging, while common cars may have more easily accessible, lower-cost parts. Your vehicle’s overall design, age and structure will directly affect how much you spend on updating its rocker panels.

Material and Panel Type

Material and Panel Type

The material your car’s rocker panels are made from also influences overall project costs. Different options will impact your final expenses due to value, longevity, handling and availability.

For example, the cost of steel rocker panels will largely depend on gauge and quality. Aluminum panels tend to be more expensive and may require specialized welding techniques to tackle repairs or replacements.

Slip-on rocker panels, which allow you to replace damaged sections, will cost less than full rocker panels used to completely replace this part.

Rocker panels are one of the main structural pieces of a vehicle, so investing in durable, high-quality materials is best.

DIY vs. Professional Labor

You have two main options for repairing or replacing your rocker panels — you can perform the work on your own or hire a professional. If you work with a technician, expect to pay more for your project. Body shops typically charge an hourly rate for labor. Their base rate depends on several factors, including:

  • Technician experience
  • Shop size
  • Location

If your rocker panels require complex work, they may require additional hours to complete repairs or replacements, increasing your overall labor costs.

You should tackle only minor tasks, such as small dents and minor rust, if you don’t have experience working on cars. If you are well-versed in auto body work and have the time and tools needed, you can save money by doing repairs or replacements yourself.

Original Equipment Manufacturer vs. Aftermarket Parts

Another factor influencing your costs is whether you choose original equipment manufacturer (OEM) or aftermarket parts.

Both can be great options for your vehicle, but aftermarket options are generally more economical than OEM parts while providing you with the same quality.

When restoring older cars, you likely won’t find new OEM parts available for purchase. Aftermarket parts will work just as well for your project. Ensure you choose a reputable provider that prioritizes top-quality aftermarket parts designed for performance.

Additional Car Rocker Repair Cost Considerations

A few additional expenses can help you protect your new — or newly repaired — rocker panels and save costs in the future. Explore these considerations below.

Painting and Finishing

A quality paint job is important for a professional-looking repair and protecting your vehicle’s value. You may need a professional to perform the task, from surface preparation to color matching with specialized equipment to painting, for the best results.

The type of paint you choose will also impact overall expenses. Adding a base and clear coat can enhance color protection and gloss but contribute to higher costs. Similarly, choosing high-quality paint options with UV protection and scratch resistance will provide you with long-term benefits and a slightly higher price tag.

Rust Treatment and Prevention

Rocker panel rust repair costs depend on the treatment required to remove the affected sections. Surface rust will require less work and be cheaper to remove than significant corrosion. You may need rust converter products that create a chemical barrier to prevent further rust development.

If rusting is a serious issue, you likely need a patch panel to replace your damaged rocker panels. Adding protective coatings on your new or repaired rocker panels is key to combating future exposure to salt and moisture — the leading causes of rust for vehicles.

Insurance and Warranty Coverage

You may be able to spend less on your rocker panel repairs and replacements if you have insurance or warranty coverage.

Insurance providers may cover repairs depending on the cause of the damage and your policy details. For instance, if your rocker panel is damaged in a collision that was not your fault, your insurance may cover the majority of repair costs.

Ensure you understand the parameters of all warranty coverage as well. If you recently purchased your car or had a body shop perform work, you may have a warranty that can cover certain repairs, reducing your costs. Always keep detailed records of warranty and insurance coverage information and reference these documents before paying for repairs or replacement parts yourself.

Shop Rocker Panel Replacements From Raybuck Auto Body Parts Today

Raybuck Auto Body Parts has provided customers with high-quality replacement parts at fair prices since 1985. We partner exclusively with cutting-edge manufacturers using the latest factory technology to ensure you get the leading products in the industry.

Rely on us for knowledgeable, helpful customer service. Our friendly representatives will assist you in finding the right parts for your vehicle.

We prioritize fast, reliable shipping anywhere in the United States. Get started with your rocker panel replacement project by shopping for parts from Raybuck Auto Body Parts today.

Shop Rocker Panel Replacements From Raybuck Auto Body Parts Today