Categories
Restoration

Traditional Upholstery Techniques for Classic Cars

Classic car upholstery restoration requires skills and techniques that differ from modern automotive interior work. Original interiors often feature materials and construction methods rarely used in contemporary vehicles, so it’s essential to understand the correct strategies for your project.

Proper restoration maintains authenticity while preserving vehicle value. This guide covers essential traditional upholstery methods for restoring classic car interiors.

Understanding Traditional Upholstery

Traditional upholstery uses natural materials and hand-stitching techniques that were standard in automotive manufacturing before 1980. These methods include horsehair padding, jute webbing, coil springs and hand-sewn pleats.

Original classic car interior upholstery featured cotton batting, burlap and genuine leather or vinyl coverings installed using specific patterns and techniques unique to each manufacturer.

Traditional methods offer distinct advantages for restoration work, including:

  1. Factory specifications: Original construction techniques create seat contours that match factory specifications.
  2. Material integrity: Hand-stitching produces durable seams that maintain their integrity over decades.
  3. Longevity: Natural materials allow better air circulation than synthetic alternatives, reducing moisture buildup and extending material life.
  4. Precise matching: Traditional techniques enable you to match original stitch patterns, pleat spacing and material grain direction precisely.

Essential tools and materials needed for traditional upholstery work include:

  • Upholstery needles in various sizes
  • Hog ring pliers for securing materials
  • Spring stretchers for proper tensioning
  • Webbing stretchers for tight installation
  • Tack hammers for traditional fastening
  • Curved needles for difficult angles
  • Jute webbing for foundation support
  • Hog rings, tacks and heavy upholstery for assembly

How to Restore Classic Car Upholstery

Classic car interior restoration projects require a methodical approach and attention to detail. Following the proper process helps you achieve professional results that match factory specifications. This process applies to bucket seats, bench seats and rear seat assemblies across all classic vehicle makes and models.

1. Preparation

Remove the seats from the vehicle using the proper socket sizes to avoid damaging mounting bolts. Before disassembly, photograph every angle and detail of the original construction, or take a video capturing every angle of the seat. These images will be crucial for reassembly. As you remove the old covering, treat each piece as a pattern for cutting raw material.

Once stripped to bare frames, inspect thoroughly for rust or structural damage that needs attention. Repair damage before proceeding, as frame issues will impact your finished upholstery. Clean frames thoroughly and apply rust prevention coating.

2. Building the Foundation

Using a webbing stretcher, install strips across the frame bottom with 2 to 3 inches spacing between them. This spacing provides optimal support without excess material. Secure webbing with tacks or clips, depending on frame design.

Following your reference photos, position coil springs on the webbing foundation. Tie springs using the eight-way hand tying method for proper support and movement. Cover the springs with burlap, pulling it tight and securing the edges to the frame.

The padding layer is the most crucial. Start with rubberized hair or traditional horsehair, building thickness gradually while shaping proper contours. Stitch through the burlap to anchor everything and shape cotton batting carefully as the final padding layer to eliminate irregularities. A muslin cover pulled tight over everything compresses the padding and creates your working surface.

3. Shaping and Stitching

Shaping and Stitching

Original pieces make the best patterns, so use them as templates when cutting new material. Add extra inches for proper pulling and securing. For pleated designs typical in classic car interior restoration, mark stitch lines on the reverse side and calculate spacing. Most classics used 2- to 3-inch pleats, though some luxury models feature tighter spacing.

You’ll want to double-stitch pleat bases using heavy upholstery thread and appropriate needles since they endure the most stress. For seat edges, create listing wires using covered wire secured inside fabric channels. Starting at the center and working outward, install covering material, pulling it evenly to prevent wrinkles or bunching. Secure edges using hog rings or tacks.

Before assembly, attach piping or welting to seam edges, using matching or contrasting piping based on the original design. Install seat back covers using the same techniques, ensuring proper alignment with the seat bottom patterns. If button tufting was originally present, create it using proper spacing and pull-through technique.

4. Finishing Touches

Install finished seat assemblies into frames and verify proper fit. To test for successful reassembly, check for good spring action and appropriate padding compression. Add trim pieces, emblems or hardware removed during disassembly.

Install carpeting using bows and proper tensioning methods, ensuring all materials lay smooth without sagging or wrinkles.

Raybuck Auto Body Parts’ Upholstery Options for Classic Cars

Raybuck Auto Body Parts provides comprehensive interior restoration solutions for classic trucks and vehicles. With over 40 years of experience serving the restoration community, we stock complete upholstery lines for Chevy, Ford, Dodge and more from the 1940s through the 1990s.

Upholstery Kits

Our complete upholstery kits for classic cars and trucks contain the materials needed to reupholster classics. They include pre-sewn seat covers, door panels, and carpeting cut to exact specifications. The materials in our quality classic car upholstery kits match the original grain patterns and colors for authentic restoration.

Seat Covers

Raybuck Auto Body Parts offers seat covers for classic cars and trucks in multiple options to match your restoration needs. Standard covers use quality vinyl that matches original specifications for daily drivers and work trucks. Deluxe versions have upgraded materials, including leather options. All covers include proper stitching patterns, piping and listing wires for correct installation.

Individual Components

For selective restorative projects, Raybuck Auto Body Parts stocks individual interior parts. Pre-formed headliners feature proper bow pockets and sun visor cutouts for an exact fit. Door panels have correct grain patterns and mounting clip locations specific to each application.

Our carpet set options include jute backing and proper binding for extended life. Our selection of seat components includes springs, webbing, padding materials and complete hardware sets for frame-up restoration. All components meet original thickness and material specifications.

Tips and Tricks for Success

Small details make all the difference in getting professional results. Keep these strategies in mind as you work:

  1. Start with simple components like door panels before attempting seat assemblies.
  2. Document each step with photographs for future reference.
  3. Test fit all components before final installation.
  4. Practice stitching on scrap material to develop a consistent technique.
  5. Allow adhesives full cure time before stressing bonds.
  6. Use proper stretching tools rather than improvising.
  7. Match thread weight to material thickness.
  8. Mark all alignment points before removing old materials.
  9. Keep original parts as templates even if they’re damaged.
  10. Avoid low-quality materials.

Reupholster Your Classic Truck or Car With Raybuck Auto Body Parts

Traditional upholstery techniques produce authentic classic car interior upholstery restoration results. Using proper materials and time-tested methods helps you make repairs that match factory quality and last for decades.

Raybuck Auto Body Parts brings over 35 years of restoration expertise to your project. We offer complete upholstery solutions at competitive prices, and orders ship within one business day. Our knowledgeable staff works on classic vehicles and understands your restoration needs.

Shop upholstery kits for classic cars today, or contact us for expert restoration advice.

Reupholster Your Classic Truck or Car With Raybuck Auto Body Parts

Categories
Dodge

Dodge Truck Body Repair Parts: Fixing Common Issues

Dodge trucks are built tough, but years of work, weather, and road wear inevitably take their toll. From rust-eaten rocker panels to cracked cab corners and dented fenders, body issues are common—especially in older models. Fortunately, many of these problems can be repaired easily with the right parts and preparation.

At Raybuck Auto Body Parts, we offer a full line of Dodge truck body panels and rust repair parts to restore your vehicle to its original condition. Whether you’re tackling a full frame-off restoration or just fixing problem areas, this guide outlines the most common issues and how to resolve them with our trusted solutions.

Key Takeaways

  • Rust is the most common issue in Dodge trucks, especially affecting rocker panels, cab corners, floor pans, and wheel arches.
  • Model-specific vulnerabilities exist, with 1994–2002 Rams suffering major rocker and floor pan rust, and 2002–2008 models prone to rear wheel arch corrosion.
  • Early rust repair is essential to prevent structural damage, maintain resale value, and reduce long-term restoration costs.
  • Raybuck Auto Body Parts offers precision-fit panels for Dodge trucks from the 1970s through current, made from heavy-gauge steel with rust-inhibiting primer.
  • Successful repair depends on proper prep and installation, including matching panels to your VIN, checking for hidden rust, and using quality tools.

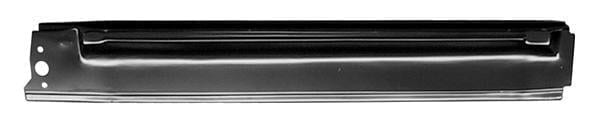
Rocker panels on Dodge trucks take a beating from salt, water & debris—especially in northern states. No wonder they’re one of the first parts to rust out.

Common Body Issues in Dodge Trucks

Body Issues in Dodge Trucks

Dodge trucks are known for performance and reliability, but exposure to salt, mud, and moisture can lead to some recurring body challenges over time. Here are the most frequent problem areas:

Rust-Prone Zones

  • Rocker Panels: These are especially vulnerable due to constant exposure to water and road debris.
  • Cab Corners: Rust often starts from the inside and works its way out, hidden behind trim.
  • Floor Pans: Salt from boots and poor drainage can corrode floors from the top down.
  • Wheel Arches: The design of Dodge wheel wells traps debris, allowing moisture to accelerate corrosion.

Structural Weak Points

  • Bed Floors: Particularly on work trucks, constant hauling and exposure to the elements can weaken the metal.
  • Lower Door Skins: Drain holes can clog, causing water buildup that leads to rot.

Cosmetic Deterioration

  • Dents, scratches, and sun damage not only affect appearance but can also open the door (literally) to more rust.

Timely repair of these areas preserves your truck’s look and resale value while maintaining safety.

Model-Specific Problem Areas

Different Dodge truck generations have their own quirks. Here’s a breakdown of what typically goes wrong by model era:

Model Years Common Problem Areas
1972–1993 Cab floors, rocker panels, outer wheel arches
1994–2002 Rocker panels, cab corners, dashboard cracks
2002–2008 Rear wheel arches, rocker panels, lower quarters
2009–2018 Rocker panels, cab corners, internal electronics (e.g., TIPM)

Notable Details

  • 1994–2002 Dodge Ram 1500/2500: Known for significant rocker and floor pan corrosion, especially in northern states. The dash is also infamous for cracking due to heat exposure and plastic degradation.
  • 2002–2008 Dodge Trucks: These models frequently exhibit bubbling paint and rust-through in the rear wheel wells and cab corners. Many owners opt for replacement panels over costly factory repairs.
  • 2009–2018 Rams: Though better rust-proofed, these still suffer rocker panel degradation, especially in salt states. Internal electrical issues like TIPM failure are separate but often occur alongside physical deterioration.

Raybuck offers replacement panels for all these problem areas—built to fit and made to last.

Why It’s Critical to Fix Rust Early

Rust spreads fast—especially on untreated or aging panels. What starts as a small bubble can expand into a structural issue within months. Left alone, water seeps behind damaged paint and accelerates decay.

Fixing body issues early:

  • Prevents further corrosion
  • Preserves resale value
  • Ensures safety during operation
  • Reduces long-term restoration costs

Many of our customers come to us after trying patches or filler jobs that didn’t hold up. The most effective solution is cutting out the rust and welding in quality steel panels—just like those Raybuck manufactures and stocks.

Raybuck’s Dodge Truck Body Repair Parts

Dodge Truck Body Repair Parts


Raybuck Auto Body Parts is proud to supply high-quality repair panels for Dodge trucks dating back to the early postwar era. From workhorse pickups to collector restorations, our parts are trusted by shops and DIYers across the country.

What We Offer

We carry rust repair panels and structural replacements for:

  • 1972–1993 Dodge Pickup
  • 1994–2002 Dodge Ram 1500, 2500, 3500
  • 2002–2008 Dodge Ram
  • 2009–2017 Dodge Trucks
  • Plus select classic models from the 1940s–60s

Commonly Replaced Panels

  • Rocker Panels (inner and outer)
  • Cab Corners
  • Bed Panels
  • Floor Pans
  • Lower Door Skins
  • Inner/Outer Wheel Arches

Why Choose Raybuck?

  • Heavy-Gauge Steel: Most parts are die-stamped from 18- or 20-gauge steel—matching OEM strength.
  • Precision Fit: Our panels are engineered to fit the original contours, so you spend less time fabricating.
  • Primed & Paint-Ready: Most panels arrive with rust-inhibiting primer so you can prep and paint right away.
  • Fast Shipping: Most orders leave our warehouse within 1 business day.
  • Expert Customer Support: Our team knows these trucks and can help you find the right part the first time.

Whether you’re patching up a farm truck or restoring a showpiece, Raybuck offers reliable, cost-effective solutions for Dodge body repairs.

Tips for Selecting and Installing Body Panels

Getting the job done right starts with choosing the correct panel and preparing properly.

Quick Tips

  • Match Model and Trim: Use your VIN and build sheet to confirm compatibility.
  • Inspect for Hidden Rust: Check behind trim, under carpet, and inside seams.
  • Prepare the Surface: Clean thoroughly and use weld-through primer on contact areas.
  • Measure Twice, Cut Once: Pre-fit panels before welding or bonding.
  • Use Quality Tools: Proper clamps, grinders, and welders make a huge difference.

Need help? Our team is available by phone or chat to guide you through your project.

Conclusion: Dodge truck body repair parts

Dodge trucks are built to endure, but their bodies aren’t immune to the elements. Whether you’re dealing with rusted cab corners, soft floor pans, or dented fenders, Raybuck Auto Body Parts provides the parts you need to get back on the road—or show field.

We back our panels with decades of experience, fast shipping, and a commitment to helping you do the job right. Explore our Dodge collection today and find out why Raybuck has been the go-to source for truck body repair parts since 1985.

Restore your Dodge truck with confidence—shop high-quality, rust-resistant repair panels.

Further Reading

Categories
Chevy/GMC

Classic Chevy Truck Body Parts: Where to Find the Best Replacements

Classic Chevy trucks have long stood as icons of American craftsmanship, loved for their rugged lines, durable performance, and nostalgic appeal. Whether you’re restoring a 1947 Advance Design pickup or maintaining a late-model Square Body, finding the right replacement body parts is essential to preserving both the value and visual character of your truck.

At Raybuck Auto Body Parts, we specialize in helping restorers and DIYers alike find high-quality, affordable body panels and components for Chevrolet and GMC trucks. Here’s your complete guide to sourcing the best replacements for your project.

Key Takeaways

  • Classic Chevy truck body parts vary by generation, with specific needs for models from 1947–1987 including Advance Design, C/K Series, and Square Body trucks.
  • Rust-prone areas like rocker panels, cab corners, and floor pans are the most commonly replaced components during restoration.
  • Aftermarket quality can be inconsistent, making fitment, durability, and corrosion resistance major concerns when choosing panels.
  • Raybuck Auto Body Parts offers OEM-equivalent replacements, featuring heavy-gauge steel, precision fit, and corrosion-resistant coatings.
  • Fast shipping and expert support make Raybuck a trusted one-stop shop for classic Chevy and GMC truck restorations.

Most rust damage on classic Chevy trucks starts with rocker panels and cab corners—thanks to trapped moisture and old seals.

Start your restoration from the bottom up.

Understanding Classic Chevy Truck Generations

Each generation of classic Chevy and GMC trucks has its own personality and structural characteristics. Here’s a breakdown of key generations and what makes them unique from a body restoration perspective:

1947–1955 (Advance Design)

  • Rounded body styling with distinctive horizontal grille bars.
  • Common restoration parts: cab corners, fenders, bed panels.

1960–1966

  • Known for a smoother ride thanks to the new independent front suspension.
  • Restoration focus: rocker panels, cab mounts, and front floor sections.

1967–1972 (Second Generation C/K)

  • The popular “Action Line” series featured more modern styling and improved interiors.
  • Frequently replaced parts: cab backs, outer wheel arches, drip rails.

1973–1987 (Square Body)

  • Boxy design with robust steel panels.
  • Still widely available and often require fenders, bed floor panels, and inner rockers.

Most Common Body Parts That Need Replacing

Common Body Parts That Need Replacing

Over decades of wear, classic truck bodies inevitably accumulate rust, dents, and fatigue—especially in areas prone to moisture retention and road salt exposure.

Top Replacement Categories

  • Rocker Panels
  • Cab Corners
  • Floor Pans
  • Fenders
  • Bed Panels
  • Inner & Outer Wheel Arches

Why These Parts Fail

  • Trapped moisture in seams and corners
  • Worn weather seals
  • Poor drainage designs in early models
  • Harsh weather and salt exposure

Why Aftermarket Body Parts Can Be Hit or Miss

When it comes to aftermarket replacements, quality can vary drastically. Fitment issues, thin-gauge metals, or non-primed panels can lead to wasted time and money.

Typical Pitfalls of Inferior Parts

  • Poor fit requiring excessive modification
  • Metal too thin to match OEM durability
  • No corrosion-resistant coating
  • Lack of correct contours and bends

For reliable restoration, it’s vital to choose suppliers that prioritize structural integrity and OEM-equivalent fit.

What Sets Raybuck Auto Body Parts Apart

Raybuck Auto Body Parts


At Raybuck Auto Body Parts, we’ve been supplying body panels and rust repair solutions since 1985. Our mission is simple: make restoration easier and more affordable without compromising quality.

Why Raybuck?

  • Heavy-Gauge Steel Panels: Most panels are die-stamped from 18- or 20-gauge steel to match factory specs.
  • Exact Fit: Designed to align with OEM lines and contours—saving time on install.
  • Primed & Ready: Most parts come coated for immediate painting and corrosion resistance.
  • Broad Coverage: We carry parts for Chevy and GMC trucks from 1939 through modern classics.
  • Fast Shipping: Orders typically ship within 24 hours.

Table: Sample Body Parts by Chevy Truck Generation

Generation Common Replacement Parts Available at Raybuck
1947–1955 Bed strips, rear fenders, cab corners
1960–1966 Rocker panels, front floor pans, cab supports
1967–1972 Cab backs, wheel arches, rear cab corners
1973–1987 Inner fenders, lower door skins, floor supports

Key Chevy Truck Offerings from Raybuck

Let’s break down some of our most in-demand categories by truck era:

1947–1955 Advance Design

  • Front bed panels, cross sills, angle strips, and cab mounts.
  • Ideal for full-frame restorations or light patchwork.

1960–1966 Models

  • Precise-fit rocker panels, toe boards, and floor supports.
  • Great for trucks that saw work duty and show floor ambitions.

1967–1972 C/K Series

  • Full replacement rear cab corners, inner/outer wheel wells, and cab floors.
  • Popular for both professional shops and home restorers.

1973–1987 Square Body

  • Fenders, hood supports, and lower door skins for both fleetside and stepside models.
  • Restoration-friendly due to wide parts availability.

How to Choose the Right Replacement Panels

Picking the right panel doesn’t have to be daunting. Here are some essential tips for making informed choices:

Know Your Model Year

Even one year’s difference can impact part fitment—always match your VIN and build plate before ordering.

Prioritize Rust-Prone Areas

Begin restoration in high-deterioration zones like rocker panels, cab corners, and lower fenders.

Use Reference Diagrams

Raybuck offers diagrams and product photos to help verify compatibility before checkout.

Seek Expert Help

Not sure what fits your model? Our customer service team can help match you with the right part the first time.

Why Restoration is Worth It

Restoring a classic Chevy or GMC truck isn’t just about looks—it’s about preserving a piece of American heritage. Whether you’re flipping a Square Body or preserving Grandpa’s ’51 3100, sourcing quality panels helps ensure safety, resale value, and longevity.

And with the right supplier, your restoration can be both efficient and rewarding.

Conclusion: Classic Chevy truck body parts

Classic Chevy trucks continue to inspire a passionate following, and the demand for reliable restoration parts isn’t slowing down. At Raybuck Auto Body Parts, we’ve spent over 35 years ensuring that restorers have access to quality panels at fair prices.

From Advance Design to Square Body, we’re proud to be your one-stop shop for rust repair and body restoration.

Start your project off right. Browse our full collection of Chevrolet and GMC body panels and give your classic truck the treatment it deserves.

Further Reading

Categories
Restoration

DIY Interior Restoration: Reviving Seats, Carpets and Headliners on a Budget

Interior restoration is one of the most cost-effective ways to add value and comfort to a classic car or truck. Whether you’re working on a worn-out bench seat, faded carpet or sagging headliner, do-it-yourself (DIY) restoration offers control, savings and satisfaction. With the right tools, materials and patience, you can get factory-style comfort on a set budget.

This guide focuses on restoring classic car interiors as well as classic truck interior restoration using proven techniques. From material sourcing to proper installation, here’s how to determine your budget and start the restoration process.

Assessing the Damage

A thorough inspection is critical before starting a classic truck interior restoration project. Interior wear varies by vehicle age, usage and storage conditions. Accurately identifying problems helps determine whether simple fixes or full replacements are necessary. Common problem areas include:

  • Seat covers: Look for torn upholstery, cracked vinyl or faded cloth. Pay close attention to side bolsters, stitching and high-contact areas.
  • Seat foam: Press down on the seat base and backrest to feel for compressed or crumbling foam. Sagging or uneven support is a clear indicator of deterioration.
  • Carpet: Check for stains, fading, moisture damage or wear-through, especially near pedals, under seats and in footwells.
  • Sound deadening and padding: Lift a section of the carpet to inspect the padding. Signs of mold, odor or water intrusion suggest deeper damage.
  • Hardware and trim: If applicable, inspect seat tracks, recline mechanisms and plastic trim panels for function and completeness. Note any missing hardware for sourcing.

Once the scope of damage is documented, the restoration plan should prioritize safety, such as securing seat frames. After that, you can address visible wear. Match your strategy to your budget and time frame.

Choosing the Right Approach

Deciding whether to restore or replace interior components depends on the part’s condition, material type, cost and your end goal. Small cracks or faded areas may be fixable, but severe wear, structural damage or missing parts usually require replacement. Keep in mind that replacements offer better long-term value, especially for high-wear parts.

Setting a Budget

Setting a budget for a DIY classic truck interior or car interior project begins with a clear assessment of the vehicle’s condition and restoration goals. From there, prioritize restoration based on safety, function and appearance. Set goals by deciding which areas need full restoration, functional fixes and aesthetic upgrades.

Research prices on supplier websites, and be specific about the year, make, model and trim level for each part. For example, you’ll need a specific dash pad for your 1967-1972 Chevy or GMC pickup. List necessary tools and supplies, too, from adhesives to fasteners, trim tools and potential tool rentals.

Seating Restoration Options

Seating restoration starts with assessing the damage. Minor wear, small tears in upholstery or sagging padding typically warrant a restoration. You can fix small tears with leather or vinyl repair kits. For large-scale damage, you may need to replace the seat covers or even the full seats if the frame is damaged or broken. A complete replacement is recommended if the seat frame is rusted or broken, or if the upholstery is too damaged for patching. For collapsed padding, use molded seat replacements and weld cracks in the frame.

Use fabric or leather-specific cleaners to clean upholstery and remove stains. Steam extraction works well for cloth, while leather and vinyl respond to foam or gel cleaners.

Carpeting Restoration Options

Carpeting Restoration Options

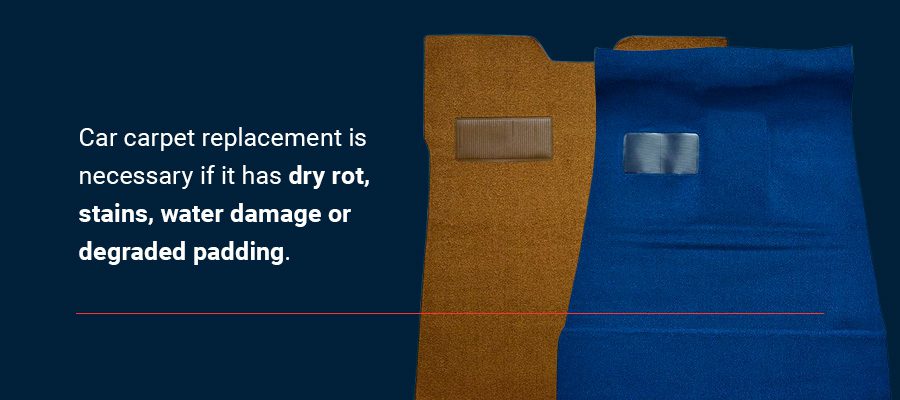
Car carpet replacement is necessary if it has dry rot, stains, water damage or degraded padding. Installation requires:

  1. Removing seats, kick panels and sill plates.
  2. Cleaning and treating the floor pan for rust.
  3. Laying down jute padding.
  4. Aligning the molded carpet.

The material, usually loop or cut-pile, is available in factory colors and backed with sound-deadening jute for insulation and fitness.

If there are small rips or burns in otherwise intact carpet, use a patch kit matching its color and texture. Cut the patch to fit, glue it in place with high-temperature automotive adhesive, and hide the seams under factory molding. Deep clean the rest of the carpet with a hot water extractor and carpet shampoo. Surface stains may lift with a brush and spot remover.

Headliner Restoration Options

You can fix the headliner if there is minimal sagging and the fabric is still pliable. If the headliner is foam-backed cloth, which is common in vehicles from the 1970s through the 1990s, re-glue the original cloth with high-temperature headliner adhesive. When the board is broken or warped, or the fabric has deteriorated, you need a full replacement.

For board-type headliners, removal involves detaching the trim, pulling the board, cleaning it and covering it with new fabric using spray adhesive. Proper fitment requires aligning the seams with bow locations and using a heat gun to remove wrinkles. Replacement bows and backing boards are available for most classic and domestic cars.

Sourcing Materials and Tools

Select high-quality, vehicle-specific parts and tools from trusted restoration suppliers. Look for a supplier offering model-specific parts, a U.S.-based inventory, technical support and clear product listings with fitment details. Recommended tools and materials include:

  • Seating: Use hog ring pliers, hog rings, seat foam and seat upholstery kits.
  • Carpeting: Source trim removal tools, a utility knife, jute padding, high-temperature spray adhesive and a molded carpet kit.
  • Headliner: Stock up on screwdrivers, trim tools, headliner adhesive, a heat gun for bow-style installs and pre-cut headliner board or fabric.

Tips for Saving Money

DIY classic car or truck interior restoration can significantly reduce expenses, but proper planning and part selection are key to avoiding costly errors. Money-saving strategies include buying complete kits over individual components and buying model-specific parts to ensure proper fitment and avoid problems.

Buy High-Quality Interior Restoration Parts From Raybuck

Buy High-Quality Interior Restoration Parts From Raybuck

Successful interior restoration requires the right tools, the correct parts and some attention to detail. Whether you’re fixing cracked seat foam, replacing worn carpet or installing a new headliner, prioritizing restoration budgets and partnering with a reliable supplier can deliver professional-grade results.

Since 1985, Raybuck Auto Body Parts has provided customers with high-quality vehicle parts at reasonable prices. We offer interior replacement parts that meet OEM specifications, such as vinyl and carpet flooring and reupholstery kits. Thanks to the Raybuck Advantage, we ship in-stock orders within two business days and most special orders within three to five business days.

Shop interior truck parts and accessories, or contact us today to find the replacement interior parts your project needs.

Categories
Restoration

Wheel Arch Repair Sections: Fixing Rust and Damage with Ease

Rust and damage along the wheel arch are among the most common—and most neglected—issues affecting vehicle bodies. Once corrosion takes hold, it can spread rapidly, compromising structural integrity and leading to costly repairs down the road. Addressing rust the moment it appears not only restores the arch’s appearance but also prevents further deterioration of adjacent panels. 

At Raybuck Auto Body Parts, we supply precision-stamped wheel arch repair sections engineered to simplify installation and maximize longevity. Our panels feature corrosion-resistant EDP coatings and factory-matched contours, enabling enthusiasts and professionals alike to replace damaged areas with confidence and ease.

Key Takeaways

  • Early rust repair prevents structural damage: Addressing wheel arch corrosion promptly stops rust from spreading and avoids costly long-term repairs.
  • Wheel arches trap moisture and debris: The design of inner wheelhouses and outer arch skins creates an environment where rust can form from the inside out.
  • Accurate inspection ensures proper repair: Identifying whether surface rust or deeper damage exists helps determine if full panel replacement is needed.
  • Raybuck panels simplify installation: OE-style contours, EDP coatings, and included flange tools make repairs faster, cleaner, and longer-lasting.
  • Proper prep and welding matter: Clean cuts, stitch welding, and thorough undercoating help preserve fit, finish, and rust resistance.

Modern cars use foam in wheelhouses to dampen noise—but that foam traps moisture and accelerates rust from the inside out. Know what’s hiding behind your fenders.

Why Wheel Arches Rot Out 

Wheel arches are especially vulnerable to rust because they sit at the junction of road debris, moisture, and chemicals. Two main pieces comprise the wheel opening:

  • Inner Wheelhouse: Shields suspension components but traps road salt and mud in the cavity. 
  • Outer Arch Skin: Forms the visible fender lip but offers limited drainage.

When paint chips or sealant erodes, water and salt penetrate the gap between inner and outer panels, creating a micro-environment that accelerates corrosion. Modern vehicles often include foam insulation inside the wheelhouse to damp noise; however, that foam absorbs moisture and concentrates it against bare metal, allowing rust to initiate from the inside out. Without timely intervention, surface pitting evolves into through-holes, weakening weld flanges and threatening panel alignment.

Identifying Damage: Inspection and Assessment 

A thorough inspection is the first step toward a successful repair:

  • Early Signs: Look for bubbling paint, blistering clearcoat, and small rust flakes along the arch’s edge. 
  • Surface Rust vs. Penetration: Light surface rust can often be wire-brushed and sealed; deep pitting or holes demand panel replacement. 
  • Scope of Replacement: Determine whether only the outer arch skin needs swapping or if the inner wheelhouse’s spot-welded flange must also be removed.

Accurate assessment ensures you order the correct Raybuck repair section and avoid rework down the line.

Tools and Materials Needed 

Equip your workspace with the following essentials:

Tool / Material Purpose
Angle grinder with cut-off wheel Precision cutting of old panel
Spot-weld drill bit Safe removal of inner wheelhouse spot welds
Raybuck flange tool Forms consistent flange on repair panel
Welding equipment (MIG/TIG) Seamless joining of new panel to existing structure
Body filler and spreader Smooth transition between old and new metal
Automotive primer and paint Corrosion protection and factory-matched finish
Respirator, gloves, eye protection Essential personal safety gear

All steel repair sections from Raybuck Auto Body Parts are heavy-gauge, pre-coated with electro-deposition primer, and stamped to OE contours for an exact fit.

Preparation Steps 

Preparation Steps 

Proper preparation streamlines the repair process:

  • Position Vehicle: Park on a flat surface, engage the emergency brake, and chock the opposite wheels. 
  • Remove Obstructions: Take off the wheel, fender liner, trim, and any flares covering the arch. 
  • Clean and Mark: Degrease the area, wire-brush away loose rust, and outline cut-out boundaries on both old panel and new Raybuck section using pencil and tape.

A clean, well-marked work area reduces cutting errors and helps maintain proper alignment between old and replacement panels.

Removing the Rusted Section

Execute panel removal with precision to preserve surrounding structure and flange:

  • Maintain Flange Integrity: Leave at least 10–15 mm of solid metal around the spot-weld flange to serve as a welding anchor. 
  • Dual-Cut Technique: Align the new Raybuck panel against the old arch; mark matching cut lines on both to ensure perfect fit. 
  • Drill Out Spot-Welds: Use the spot-weld drill bit to eliminate inner wheelhouse attachment points without damaging the new panel. 
  • Control Heat Warping: Make multiple small cuts rather than one long pass. Let the metal cool between cuts and avoid grinding excessively near weld flanges. 

By following these steps, you’ll preserve alignment and minimize surface distortion, paving the way for a seamless join.

Fitting and Welding the Repair Panel

Photo of Repair Panel

Accurate fitting and welding are critical for both appearance and strength:

Test-Fit Panel

  • Clamp the Raybuck section in place with C-clamps or vice grips. 
  • Check that gaps match OEM specifications (typically 2–3 mm).

Form Flange

  • Use Raybuck’s flange tool to bend the repair panel’s lip, matching the factory angle.

Choose Welding Method

  • Flange Welding: Simple and forgiving, uses the formed flange to lap over original metal. 
  • Butt Welding: Offers a flush finish but requires precise edge preparation.

Welding Best Practices

  • Use stitch welding—small 10–15 mm welds spaced evenly to manage heat. 
  • Alternate sides of the panel to prevent warping. 
  • Grind each bead flat before proceeding to the next to maintain panel contour.

Grinding, Filling, and Finishing

Once welded, blend the repair into the vehicle’s surface:

  • Grind Weld Beads: Use a flap disc on the angle grinder to level welds flush with surrounding metal. 
  • Apply Body Filler: Spread a thin layer of polyester filler over minor irregularities; let cure fully. 
  • Sand Smooth: Progress through 120, 220, and 400-grit sanding blocks for a seamless finish. 
  • Primer and Paint: Apply 2–3 coats of automotive primer, sand lightly between coats, and finish with factory-matched base and clear coats. 
  • Protect Inner Panel: Scuff the EDP-coated inside surface and spray with rubberized undercoating.

Undercoating and Rustproofing

A thorough undercoat repels moisture and extends repair life:

  • Use a high-build rubberized liner sprayed across inner wheelhouse cavities. 
  • Pay special attention to edges and flanges, where water tends to collect. 
  • Consider a wax-based cavity-seal product applied via nozzle for hard-to-reach spots. 
  • Allow all coatings to cure per manufacturer instructions before reassembling trim and wheel.

Maintenance and Prevention Tips

Keep rust at bay with simple routines:

  • Regular Cleaning: Hose out wheel arches monthly to remove salt and gravel. 
  • Visual Inspection: Check for new paint chips or bubbling every three months. 
  • Touch-Up Paint: Carry a small pot of matching enamel to quickly seal chips. 
  • Protective Wax: Apply a thin coat inside the arch lip each winter for added water resistance.

Conclusion: Wheel Arch Repair Sections

Timely wheel arch repairs safeguard your vehicle’s appearance and structural integrity. With Raybuck Auto Body Parts’ precisely stamped, EDP-coated repair sections, even complex arch replacements become straightforward. Our panels extend beyond common rust zones, ensuring ample metal for solid welding and long-term protection. Whether tackling surface pitting or through-holes, you’ll find the exact panel to match your make and model in our extensive catalog. 

For expert advice, detailed fitment information, or to place an order, visit Raybuck Auto Body Parts online or contact our customer support team—your success is our priority.

Further Reading

  • How to Prevent Exterior Rust on Your Car: A practical guide outlining essential maintenance steps—like regular washing, waxing, and touch-up techniques—to protect your vehicle from rust.
  • Cathodic Protection: An overview of cathodic protection techniques used to control the corrosion of metal surfaces, applicable to various structures including vehicles.