Categories
Ford

Ford Super Duty History, Model Year Breakdown, and Common Rust Areas

Why Ford Super Duty Trucks Matter Today

Ford Super Duty trucks have built a reputation for durability, strength, and long service life. Introduced as Ford’s dedicated heavy duty pickup line, Super Duty models such as the F-250 and F-350 are designed to handle demanding work, heavy towing, and long-term ownership. Because of their strong frames and dependable powertrains, many remain on the road for decades.

That longevity comes with a reality that most truck owners eventually face. Over time, rust and body corrosion can begin to appear, especially on trucks that operate in regions where road salt, moisture, and debris are common. The good news is that rust damage does not automatically mean the end of a truck’s life. With the right replacement panels and repair methods, many rusted areas can be restored effectively.

At Raybuck Auto Body Parts, we specialize in replacement body panels and rust repair sections designed to help truck owners extend the life of their vehicles. From rocker panels and cab corners to wheel arches and truck bed repair panels, replacement parts make it possible to restore structural strength and appearance without replacing the entire vehicle.

This guide explores the history of the Ford Super Duty lineup, breaks down major model year generations, and highlights the most common rust areas owners should inspect.

Key Takeaways

  • Ford introduced the modern Super Duty lineup in 1999 as its dedicated heavy duty truck platform.
  • Many Super Duty trucks remain on the road for decades, which makes rust repair a common part of long term ownership.
  • The most common rust areas include rocker panels, cab corners, wheel arches, and truck bed sections.
  • Rust typically develops from road salt, moisture, debris buildup, and damaged paint exposing bare metal.
  • Replacement rust repair panels can restore damaged sections and extend the life of a Super Duty truck.

Did you know? Many Ford Super Duty trucks from the early 2000s are still working today, which is why rust repair panels remain one of the most common restoration parts.

What the Ford Super Duty Is

The Ford Super Duty lineup represents Ford’s heavy duty pickup truck segment. These trucks were created to provide greater towing capacity, stronger frames, and increased durability compared with lighter duty pickups.

Super Duty trucks typically include several models:

  • F-250 Super Duty
  • F-350 Super Duty
  • F-450 Super Duty
  • Chassis cab variants used for commercial and specialty vehicles

Unlike lighter trucks designed primarily for everyday driving, Super Duty pickups are engineered for heavier workloads. Many are used for towing trailers, hauling equipment, and supporting demanding work environments.

Because of their durability, these trucks often remain in service far longer than the average vehicle. It is common to see Super Duty pickups that are ten, fifteen, or even twenty years old still operating reliably. For owners who depend on their trucks, maintaining the body and structural panels becomes an important part of long-term ownership.

Choosing the right replacement parts plays a key role in successful repairs. Understanding panel types, material quality, and proper fitment can make the difference between a repair that lasts and one that fails prematurely.

Learn more about selecting the correct replacement panels here:
https://v5l35cpss7j.c.updraftclone.com/how-to-choose-the-right-auto-body-replacement-parts-for-your-vehicle/

A Brief History of the Ford Super Duty

Ford introduced the modern Super Duty truck lineup for the 1999 model year. This marked a major change in the Ford truck family because the heavy duty models were separated from the lighter F-150 platform and designed on their own dedicated chassis.

The goal was to create trucks capable of handling significantly heavier workloads while maintaining durability and reliability. These trucks were engineered with stronger frames, upgraded suspension systems, and more powerful engine options.

Since its introduction, the Super Duty lineup has gone through several major redesigns and updates. Each generation has refined towing capabilities, structural strength, and technology while maintaining the heavy duty reputation that owners rely on.

Super Duty trucks are commonly used across many industries including construction, agriculture, transportation, and contracting. Their ability to tow large trailers and carry heavy payloads has made them one of the most recognizable heavy duty pickup platforms in North America.

The longevity of these trucks is one reason rust repair and body restoration have become such common topics among owners. A well maintained Super Duty truck can remain mechanically reliable for many years, but exposure to moisture, road salt, and harsh working environments can lead to corrosion on body panels and structural areas.

Fortunately, rust damage is often localized. This means that repairing specific panels such as rocker panels, cab corners, and wheel arches can restore the truck without requiring major structural replacement.

Raybuck Auto Body Parts carries a wide selection of rust repair panels designed specifically for pickup trucks, helping owners restore their vehicles and keep them working for years to come.

Ford Super Duty Model Year Breakdown

Understanding the different Super Duty generations can help owners identify their truck and determine which parts may be needed for repairs.

Ford Super Duty Generations Overview

Generation Model Years Key Notes
First Generation 1999–2007 First dedicated Super Duty platform with heavy duty frame
Second Generation 2008–2010 Updated styling, interior, and towing improvements
Third Generation 2011–2016 New engines with increased power and efficiency
Fourth Generation 2017–2022 Aluminum body and fully boxed high-strength frame
Fifth Generation 2023–Present Advanced tech, towing systems, and modern updates

1999–2007 Super Duty Trucks

1999–2007 Super Duty Trucks

Image Credit

The first modern Super Duty trucks appeared in 1999. This generation marked a major shift by separating heavy duty trucks from the F-150 platform and introducing multiple cab configurations and higher-capacity models like the F-450 and F-550.

This generation introduced a fully boxed frame, solid front axle, and heavy duty suspension designed for serious towing and payload capacity. Engine options, including the Power Stroke diesel, helped establish the Super Duty’s reputation for long-term durability and work capability.

Because they have been on the road for more than two decades, many trucks from this generation are now experiencing rust in common body areas.

Owners restoring these trucks often replace panels such as:

  • Rocker panels
  • Cab corners
  • Wheel arches
  • Bedside panels

If you are new to vehicle body restoration, this beginner guide can help explain how rust repair panels work:
https://v5l35cpss7j.c.updraftclone.com/a-beginners-guide-to-rust-repair-body-panels-for-your-vehicle/

2008–2010 Super Duty Trucks

2008–2010 Super Duty TrucksImage Credit

The 2008 model year introduced a full redesign, including updated styling, a more durable and corrosion-resistant frame, improved suspension, and new engine options such as the 6.4L Power Stroke diesel. These updates built on the proven heavy duty platform while improving performance and durability.

Updates included a redesigned front end with a larger grille, along with improved interior materials and comfort features. Mechanical revisions focused on towing performance, suspension refinement, and diesel engine updates to meet stricter emissions standards.

Today, trucks from this era are entering the stage where rust may begin appearing in key areas. Owners frequently inspect areas where debris and moisture accumulate, including lower cab sections and wheel arch edges.

Early rust detection can prevent larger repairs later. Identifying surface rust before it spreads allows owners to replace smaller panel sections rather than performing more extensive body restoration.

2011–2016 Super Duty Trucks

2011–2016 Super Duty TrucksImage Credit

The 2011 update was extensive enough to be considered a new generation, introducing new gasoline and diesel engines along with a redesigned body and improved overall performance.

This generation brought major powertrain upgrades, including new gas and diesel engines with increased horsepower and torque. Improvements to towing capacity, fuel efficiency, and in-cab technology made these trucks more versatile for both work and daily driving.

These trucks are still commonly used for work and towing. Because many remain daily drivers, body wear and rust exposure can occur in the same areas seen in earlier generations.

Typical inspection points include:

  • Rocker panels beneath the doors
  • Rear cab corners
  • Wheel arch edges
  • Bedside panels

Even when rust begins to develop, replacing these sections can restore both structural integrity and the appearance of the truck.

2017–2022 Super Duty Trucks

2017–2022 Super Duty TrucksImage Credit

The 2017 redesign introduced significant structural changes to the Super Duty lineup. The switch to a high-strength aluminum body reduced weight by hundreds of pounds while improving corrosion resistance, and the frame was strengthened with high-strength steel to support higher towing and payload capacities. These updates significantly increased towing and payload capability while reducing overall vehicle weight.

Although these trucks are newer, rust prevention and maintenance remain important. Trucks used in snowy regions or heavy work environments may still experience corrosion over time.

Owners often focus on preventative maintenance during this stage. Protecting vulnerable areas and addressing small rust spots early can extend the lifespan of the truck’s body panels.

2023–Present Super Duty Trucks

2023–Present Super Duty TrucksImage Credit

The newest generation of Super Duty trucks continues the long running legacy of Ford’s heavy duty pickup lineup. This generation introduced updated engine options, including higher-output diesel engines approaching 500 horsepower, along with a standard 10-speed automatic transmission and significantly improved towing capability. 

In addition, advances in connectivity, safety features, and work-focused tools make these trucks more capable and user-friendly than ever.

Because this generation is still relatively new, rust is typically not yet a concern for most owners. However, the same body areas that develop corrosion on older trucks remain the most vulnerable over time.

Understanding where rust commonly appears allows owners to monitor their trucks and address issues early, which can prevent more expensive repairs later.

Why Rust Becomes a Problem on Older Super Duty Trucks

Rust Becomes a Problem

Rust is one of the most common issues affecting older pickup trucks. While Super Duty trucks are built for durability, exposure to harsh environmental conditions can eventually lead to corrosion.

Several factors contribute to rust formation on trucks.

Common causes of rust on pickup trucks

  • Road salt used during winter driving
  • Moisture trapped in body seams
  • Mud and debris buildup in wheel wells
  • Scratches or paint damage exposing bare metal
  • Years of exposure to outdoor conditions

Rust typically begins as small surface corrosion. Over time it can spread beneath the paint and weaken the metal underneath. When left untreated, rust can eventually create holes in body panels and structural sections.

The good news is that rust often appears in predictable areas. By inspecting these locations regularly, truck owners can identify damage early and repair affected panels before corrosion spreads.

Raybuck Auto Body Parts offers rust repair panels designed to replace damaged sections and restore the truck’s body structure.

Learn more about rust repair panels here:
https://v5l35cpss7j.c.updraftclone.com/truck-rust-repair-panels-a-must-have-for-restoring-your-pickup/

If you plan to perform the repair yourself, this installation guide explains the process step by step:
https://v5l35cpss7j.c.updraftclone.com/a-step-by-step-guide-to-installing-truck-rust-repair-panels/

Common Rust Areas on Ford Super Duty Trucks

Certain areas of pickup trucks are especially vulnerable to corrosion. Dirt, water, and road salt tend to accumulate in specific body seams and structural sections.

Understanding these common rust areas can help truck owners identify problems early and plan repairs before damage spreads.

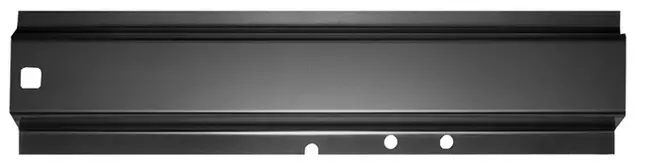
Rocker Panels
Rocker Panels

Rocker panels run along the lower edge of the cab beneath the doors. They provide structural support and connect the front and rear sections of the cab body.

Because rocker panels sit close to the road surface, they are constantly exposed to:

  • Road salt
  • Gravel and debris
  • Water spray from tires

Over time, this exposure can cause rust to form along the outer rocker panel surface. Once corrosion begins, it can spread inside the panel and weaken the structure of the cab.

Common warning signs include bubbling paint, flaking metal, or visible holes along the lower cab area.

Replacing rocker panels is one of the most common truck rust repairs. Replacement panels restore both structural strength and the appearance of the vehicle.

Check out the Ford Super Duty Rocker Panel Installation Guide here:
https://v5l35cpss7j.c.updraftclone.com/ford-super-duty-rocker-panel-installation-guide/ 

And learn how rocker panel repairs work here:
https://v5l35cpss7j.c.updraftclone.com/how-to-fix-rocker-panels-on-your-truck-without-professional-help/

Cab Corners

Cab Corners

Cab corners are located at the rear lower corners of the truck cab. These sections often collect mud, water, and debris that become trapped behind the panel.

Over time, this trapped moisture can cause rust to develop from the inside out. Many truck owners do not notice cab corner rust until it becomes visible on the exterior surface.

Signs of cab corner rust include:

  • Rust bubbles under the paint
  • Soft metal when pressed
  • Visible holes or flaking metal

Replacing cab corner panels is a common repair that restores the structure and appearance of the truck cab.

A detailed guide to cab corner repairs can be found here:
https://v5l35cpss7j.c.updraftclone.com/ford-super-duty-cab-corner-replacement-guide/

And find out the secret to a rust free pickup here:
https://v5l35cpss7j.c.updraftclone.com/truck-cab-corners-the-secret-to-a-rust-free-pickup/

Wheel Arches and Lower Bed Panels

Wheel arches and the lower bed panel areas experience constant exposure to tire spray, dirt, and road salt. This makes them one of the most common rust areas on pickup trucks.

Rust often begins along the lip of the wheel arch where paint chips from gravel impact. Once corrosion starts, it can spread along the outer panel and eventually affect the bedside section.

Truck owners should regularly inspect wheel arches for:

  • Paint bubbling
  • Surface rust
  • Metal flaking

Replacing damaged wheel arch sections can restore the appearance of the truck and prevent rust from spreading further.

Learn more about wheel arch repair sections here:
https://v5l35cpss7j.c.updraftclone.com/wheel-arch-repair-sections-fixing-rust-and-damage-with-ease/

Bed Floors and Cross Sills

Truck beds experience heavy use. Hauling cargo, tools, and equipment can cause scratches and damage to the protective paint coating inside the bed.

When bare metal becomes exposed, rust can develop quickly. Water accumulation inside the bed can also accelerate corrosion.

Common rust areas include:

  • Cross sills
  • Wheel well sections inside the bed
  • Bed floor panels

Regular inspection and repair can prevent rust from spreading to structural bed supports.

Learn how to repair rusted truck bed sections here:
https://v5l35cpss7j.c.updraftclone.com/pickup-truck-bed-repair-panels-how-to-fix-rust-and-damage/

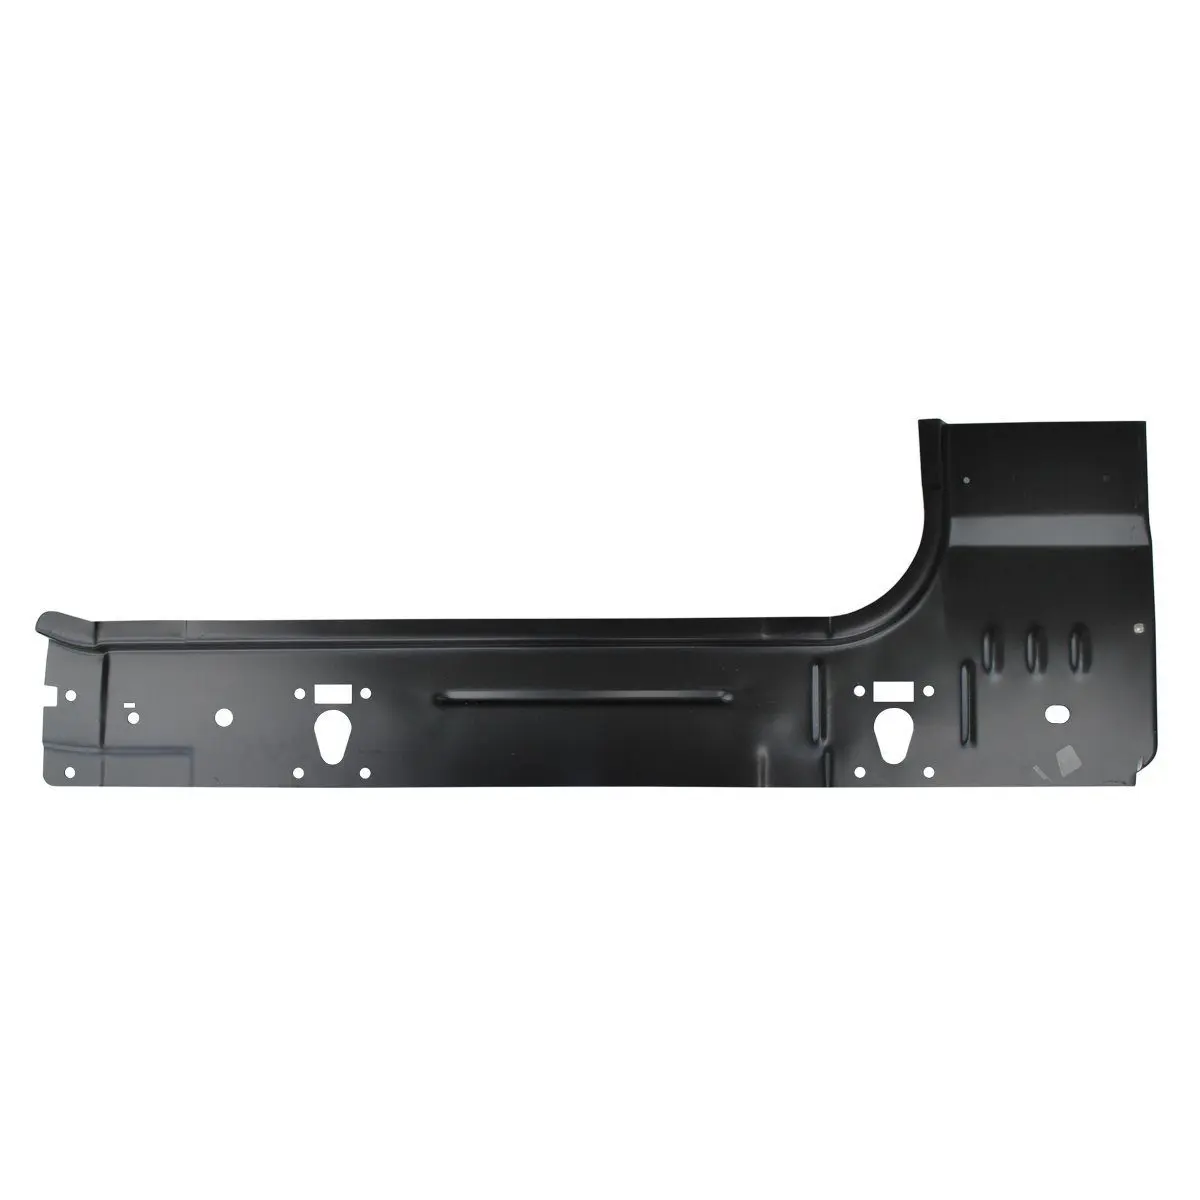
Floor Pans and Inner Cab Corners

Floor pans are located beneath the interior flooring of the cab. These panels can develop rust when water enters the cab through worn seals, damaged weatherstripping, or clogged drain channels.

Moisture trapped beneath carpeting can slowly corrode the metal floor pan without being immediately visible.

Warning signs may include:

  • Damp carpeting
  • Musty interior odors
  • Soft spots in the floor

Repairing damaged floor pans restores structural strength and protects the interior of the truck.

Learn more about replacement automotive flooring here:
https://v5l35cpss7j.c.updraftclone.com/replacement-automotive-flooring-guide-custom-fit-carpet-kits-vinyl-mats-padding-backing-options/

Repairing Rust on a Ford Super Duty
Rust on a Ford Super Duty

Repairing rust on a pickup truck often involves replacing damaged metal sections with rust repair panels. These panels are designed to match the original body shape and restore structural strength.

Several installation methods are commonly used depending on the repair.

Common rust repair methods

  • Welding replacement panels into place
  • Using panel bonding adhesives
  • Securing panels with automotive fasteners

Professional repair shops often weld panels for permanent repairs, but many DIY restorers successfully complete repairs using adhesives and mechanical fasteners.

Panel adhesives can provide strong bonds when applied correctly. They are commonly used in modern automotive body repairs.

Learn how automotive panel adhesives work here:
https://v5l35cpss7j.c.updraftclone.com/how-to-use-auto-body-panel-adhesives-for-a-secure-fit/

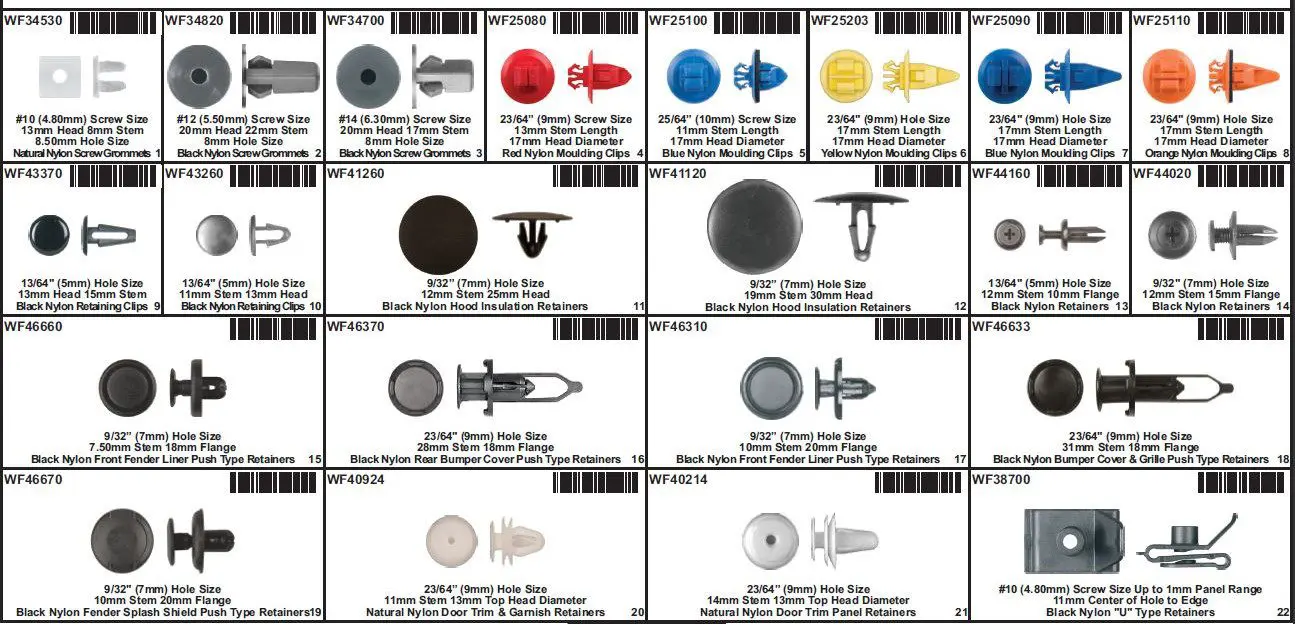
Fasteners also play an important role when securing trim pieces and interior components after repairs are completed.

Read more about auto body fasteners here:
https://v5l35cpss7j.c.updraftclone.com/everything-you-should-know-about-auto-body-fasteners/

Why Many Owners Repair Rust Instead of Replacing the Truck
Repair Rust

Heavy duty pickup trucks are often built to last for many years. When rust begins to appear, replacing damaged panels can be far more practical than replacing the entire vehicle.

Many truck owners choose restoration because:

  • The truck remains mechanically reliable
  • Repair panels are available for common rust areas
  • Restoring the body can extend the truck’s lifespan

Repairing rust early can prevent corrosion from spreading into larger structural areas. This helps maintain the strength and usability of the truck.

Raybuck Auto Body Parts provides replacement body panels designed to help truck owners complete these repairs with quality parts that match original panel shapes.

Learn more about Ford replacement panels here:
https://v5l35cpss7j.c.updraftclone.com/ford-pickup-replacement-panels-your-complete-buying-guide/

Conclusion: Ford Super Duty

Ford Super Duty trucks have earned a reputation for strength and durability since their introduction in 1999. Many remain in service for decades, which makes rust repair an important part of long term ownership.

By understanding common rust areas such as rocker panels, cab corners, wheel arches, and truck bed sections, owners can identify problems early and restore their trucks effectively.

With the right repair panels and installation methods, many Super Duty trucks can continue working for years to come.

Explore high quality rust repair panels and replacement body parts for Ford trucks at Raybuck Auto Body Parts to keep your Super Duty on the road longer.

Further Reading

Categories
Ford Repair and Replacement

Ford Super Duty Rocker Panel Installation Guide

Ford Super Duty Rocker Panel Installation Guide

At Raybuck Auto Body Parts, we know rocker panels play a critical role in the strength and durability of a Ford Super Duty truck. These panels sit beneath the doors and help support the truck’s body while shielding it from road debris and corrosion. When rocker panels rust or become damaged, they compromise both appearance and structural integrity.

This installation guide walks you through selecting the correct replacement panels and provides clear steps for preparation, removal, installation and finishing.

Key Takeaways

  • Rocker panels protect your Ford Super Duty from corrosion, debris and structural weakening.
  • Proper preparation and accurate cutting are critical for a clean installation.
  • Raybuck Auto Body Parts offers replacement rocker panels for 1999 to 2016 Ford Super Duty models.
  • Test fitting before final attachment ensures correct alignment and professional results.
  • Seam sealing, priming and undercoating help prevent future rust and extend panel life.

Did you know rocker panels are among the first body components to show corrosion because of their proximity to road moisture and debris?

What Rocker Panels Are and Why They Matter

Rocker Panels

Rocker panels are body sections located along the lower side of a truck between the front and rear wheel wells. They help protect the truck’s underbody from moisture, salt, road debris and impact damage. Rocker panels also contribute to the vehicle’s structural rigidity by linking major body sections beneath the doors.

Failure of these panels due to rust can lead to softened metal, compromised structural support and accelerated body corrosion. On heavy-duty trucks like the Ford Super Duty, rocker panels are often among the first body parts to show rust and wear because of their location near the road surface. Proper installation of quality replacement rocker panels restores protection and helps maintain long-term body strength.

When to Repair or Replace Your Ford Super Duty Rocker Panel

Because of their position on the truck, the rocker panels take the most damage from years of wheeling across various terrains. These parts are often overlooked during maintenance, and damage is only noticed once telltale signs begin to show.

There are several visible cues to look out for. It’s time to replace or repair your rocker panels if you notice:

  • Corrosion and rust: Rust is caused by a buildup of trapped moisture, road salt and debris. It causes severe structural damage over time, requiring repair or replacement panels.
  • Soft spots: If the rockers are soft or crunch when pressed, the internal structure is damaged.
  • Warped or misaligned panels: Uneven rocker panels indicate prior damage or collision repair.
  • Seam separation: Gaps in rocker seams result from improper sealing and create hiding places for corrosion.
  • Peeling or blistering paint: Bubbling or peeling paint can indicate the spread of rust underneath.
  • Dents and scratches: Impact from rocks and debris can dent and damage the rockers.

To prevent damage and extend the lifespan of your rocker panels, inspect them often to stay on top of any changes in their appearance.

To prevent damage and extend the lifespan of your rocker panels, inspect them often to stay on top of any changes in their appearance. After a muddy drive, clean your rockers of debris, then wipe them down to remove water. Also, have panels recoated with anti-rust coating and sealant regularly to discourage rust spread and corrosion.

Selecting Replacement Panels From Raybuck Auto Body Parts

Replacement Panels

Raybuck Auto Body Parts offers a collection of quality rocker panels for many vehicles, including Ford Super Duty trucks from model years 1999 to 2016. These replacement Super Duty rocker panels are manufactured to fit your truck and are available online through our parts catalog.

Key Product Highlights

  • Panels designed to fit 1999-2016 Ford Super Duty trucks
  • Heavy-gauge steel construction for durability
  • Replacement panels available for different cab styles and configurations
  • Accurate fit based on OEM scanning to match original contours

Welded vs. Slip-On Rocker Panels

Depending on your preferences and the condition of your existing rockers, we offer two styles to either repair or replace the damage caused by wear and tear. Welded or full rocker panels are installed to replace your damaged rockers, while slip-on rockers fit over your existing panels. Each has its own advantages and drawbacks.

Welded Rocker Panels Slip-On Rocker Panels
Durability Restores structural strength and provides superior, long-term durability. Less durable and can trap moisture, which accelerates rust spread if it’s not installed properly.
Installation Requires removing damaged metal and welding the new panel in place. Fits over the existing rocker and is secured with a superior adhesive.
Appearance Flush with body lines and a seamless finish. Slips over existing panels, but might not align with body lines and can show edges.
Repair time and cost More expensive, requires skilled welding and takes more time due to labor intensity. Less expensive and faster installation time, and can be done on your own.
Best suited for Extensive rust and corrosion, long-term repairs and structural restoration. Ideal for high-value vehicles. A quick cosmetic fix for minor rust and corrosion. Ideal for high-mileage trucks.
Considerations A welded rocker is necessary if the Super Duty inner rocker panel is damaged. Ensure the slip-on panel does not interfere when closing doors.

A new rocker panel is an investment. To get the most value, prioritize safety, longevity and quality over the repair expense and aesthetics. Over time, a long-term solution will offer more value and resilience. Our expert auto body technicians can help you evaluate the damage and determine the best solution for your Ford Super Duty rocker panel replacement.

How to Choose the Right Panels

  1. Identify your truck’s model year, cab style and door configuration.
  2. Use the Raybuck product filters to select rocker panels for your vehicle.
  3. Review product descriptions to confirm fit and compatibility.
  4. Consult the Raybuck team via online chat or customer service if you need assistance with part selection.

Tools and Materials Needed

Before beginning rocker panel removal and installation, gather the following tools and materials:

Safety and Prep Tools

  • Safety glasses, gloves and respirator
  • Jack and jack stands or vehicle lift
  • Tape measure and marker

Cutting and Preparation Tools

  • Angle grinder with cutting and sanding discs
  • Drill and metal drill bits
  • Wire brush or rust removal tool

Attachment and Finishing Tools

  • Welder or rivet gun, depending on attachment method
  • Clamps to hold panels in place
  • Seam sealer, primer and paint matching your truck

Having these tools ready before you begin will save time and help ensure a successful install.

Preparation and Safety

Proper preparation sets the foundation for a smooth rocker panel installation and ensures safety throughout the process:

  1. Secure the truck: Park on a level surface and support with jack stands to prevent movement.
  2. Disconnect battery: Remove the negative terminal to prevent electrical hazards while cutting or welding.
  3. Remove obstructions: Take off trim panels, mud flaps or other components that cover the rocker panel area.
  4. Clean and inspect: Use a wire brush to remove loose rust and paint around the panel area to clearly see where to cut.
  5. Mark cut lines: Use a marker to outline the section of the old panel that will be removed. Accuracy at this stage simplifies alignment of the new panel.

Following these steps helps protect the surrounding bodywork and provides clear visibility for cutting and fitting tasks.

Step-By-Step Rocker Panel Removal

Removing the old rocker panel material requires patience and precision:

1. Cut out the Old Panel

Locate the factory spot welds along the rocker panel flange and drill them out using a spot weld cutter such as a Blair Rotabroach 3/8 inch kit. Removing the welds first allows you to separate the original rocker panel cleanly from the underlying structure without damaging surrounding metal.

After the welds are released, use an angle grinder to cut along your marked lines where necessary. Follow factory seams whenever possible to preserve solid metal. Once the rusted panel is removed, inspect and prepare the exposed inner structure for installation of the new rocker panel.

2. Clean the Exposed Area

After cutting, remove rust, debris and paint using a wire brush or grinding disc. Cleaning the metal back to bare steel provides a solid surface for welding or attaching the new panel.

3. Check Structural Soundness

Inspect the floor pan, rocker inner support and adjacent frame areas. If rust has spread further than expected, additional repairs may be necessary before installing the new panel.

4. Test Fit New Panel

Position the replacement rocker panel from Raybuck to ensure it matches the contours and edges of the cut area. Minor trimming may be required for perfect alignment.

Installing New Raybuck Rocker Panels

With the old panel removed and the area prepared, you are ready to install the replacement rocker panel.

1. Align the New Panel

Place the new rocker panel in position and adjust until gaps match the truck’s body line evenly. Use clamps to hold it securely.

2. Attach the Panel

Use the preferred method for securing the panel to the truck:

  • Welding: Tack weld at multiple points first, then complete the weld around the perimeter.
  • Rivets or bolts: Drill holes through overlapping metal and fasten with rivets or bolts.

Check your alignment again as you attach to avoid shifting. Taking time here helps maintain a clean final appearance.

3. Finish and Smooth Attachment Points

Once secured, grind any welds or edges smooth and clean the surface to prepare for corrosion protection.

Finishing Touches and Corrosion Protection

Protecting your new rocker panel installation from future rust is important:

  • Apply seam sealer to all seams and joints between the new panel and existing body.
  • Prime the repaired area with quality automotive primer.
  • Paint your truck to match using multiple thin coats for a durable finish.
  • Consider undercoating the rocker area to block moisture and debris in the long term.

These protective measures help keep corrosion at bay and ensure the panel lasts for years.

Final Checks and Maintenance Tips

After installation, complete the following checks:

  • Confirm all fasteners and welds are secure.
  • Inspect seals and seam sealer coverage.
  • Wash and inspect the rocker panel area regularly for chips or damage.
  • Touch up paint or primer where needed to prevent rust from returning.

Routine inspection and maintenance prolong the life of the repair and keep your Ford Super Duty looking its best.

Find the right replacement rocker panels for your Ford Super Duty today at Raybuck Auto Body Parts

Conclusion: Ford Super Duty Rocker Panel Installation

Replacing your rocker panels with quality parts from Raybuck Auto Body Parts restores structural performance and long-term protection for your Ford Super Duty. Follow this guide to complete your installation confidently and explore our online catalog for the right parts for your project.

Find the right replacement rocker panels for your Ford Super Duty today at Raybuck Auto Body Parts and restore your truck with confidence. Contact us with any questions.

Further Reading

Categories
Ford Repair and Replacement Tech Articles

Ford Super Duty Cab Corner Replacement Guide

What Are Cab Corners and Why They Matter

Cab corners are the lower rear panels on the cab of a truck. On Ford Super Duty pickup trucks, these panels often experience corrosion due to exposure to moisture, dirt and road salt. When water collects around the wheel wells and lower cab areas it can lead to rust forming from the inside out. Corrosion in the cab corner area can weaken the truck structure and detract from the appearance of the vehicle.


For Ford Super Duty owners, addressing rust early can prevent further damage. When rust has eaten through the panel or the area has been dented by impact, a replacement panel is usually the best option. Raybuck Auto Body Parts provides quality replacement cab corners designed to restore strength and appearance to your truck cab.

Key Takeaways

  • Ford Super Duty cab corners are prone to rust due to moisture and road salt buildup.
  • Visible rust holes, paint bubbling, and panel separation are signs replacement is needed.
  • Raybuck Auto Body Parts offers stamped steel cab corners for 1999 to 2016 Super Duty models.
  • Panels are coated for corrosion protection and ready to be painted after installation.
  • Proper cutting, welding, sealing, and finishing are essential for long term durability.

Did you know moisture often causes cab corners to rust from the inside out before surface damage is visible?

Signs Your Ford Super Duty Needs Cab Corner Replacement

Inspecting your cab corners regularly can help you identify rust or damage before it spreads. The following are common indicators that a cab corner panel needs to be replaced.

Visible Rust and Metal Loss

Rust that has progressed into holes or heavy pitting suggests the panel cannot be restored by simple patching. Visible metal loss indicates the area may need a full panel replacement.

Paint Bubbles or Flaking Paint

Bubbles in the paint or paint peeling near the lower rear of the cab often means corrosion is forming beneath the surface. This can spread if left untreated.

Panel Separation or Weakness

If the panel appears to be pulling away from the cab or feels weak when pressed, the underlying metal could be compromised. Corrosion can cause separation at seams and joints.

Dents and Impact Damage

Dents in the cab corner can trap moisture which speeds up rust formation. Severe impact damage can also weaken the panel and surrounding structure.

Choosing Replacement Cab Corners from Raybuck Auto Body Parts

Replacement Cab Corners


Raybuck Auto Body Parts offers replacement cab corner panels for 1999 to 2016 Ford Super Duty trucks. These panels are designed to match the fit and form of the original metal while addressing common areas of rust.

Available Panel Configurations

We offer a range of options to fit different cab styles:

Panel Type Description
Regular Cab with Extensions Designed for cab body rust repair with extra material for overlap
Crew Cab with Extensions Includes extensions to cover larger rust areas
Super Cab with Extensions Fits extended cab models with broader coverage
Without Extensions Basic panel for direct replacement where extension material is not needed

These options allow you to choose the correct panel for your truck model and rust repair needs.

Side and Fitment Options

Raybuck replacement cab corners are available for both the driver side and passenger side of the cab. Panels are manufactured to fit specific cab configurations such as regular cab, crew cab and super cab.

Panel Construction Features

Each panel is manufactured from stamped steel. Steel panels from Raybuck Auto Body Parts are treated with an e coating to help protect the replacement metal from corrosion once installed. The surface is black and ready to be painted after installation.

Tools and Preparation Needed for Replacement

Preparation and the right tools are important for a successful cab corner replacement. The tools and steps listed below will help guide the process and improve efficiency.

Tools You Will Need

Before you begin, gather the following:

  • Angle grinder with cutting and grinding wheels
  • MIG or TIG welder
  • Clamps or welding magnets
  • Seam sealer
  • Rust inhibitor
  • Primer and body filler
  • Sandpaper and paint supplies
  • Safety gear including gloves, eye protection and a welding helmet

Preparation Steps

  1. Clear the work area around the rear cab corner so you have room to work safely.
  2. Raise the truck on jack stands if necessary to gain clear access to the lower panel. Depending on the extent of the rust damage, you may need to unbolt the truck bed and slide it back slightly to access the rear of the cab corner. This provides a better working room for cutting, welding, and sealing. Be sure to disconnect wiring, fuel filler components, and properly support the bed before moving it.
  3. Clean the surface to remove loose rust and dirt. This helps you see where the existing panel needs to be cut.
  4. Label parts and hardware so you can keep track of components during disassembly and reassembly.

Proper preparation reduces the risk of mistakes and helps make each step of the replacement process more efficient.

Step by Step Replacement Process

Replacement Process

This section outlines a general process for removing the old cab corner and installing a new replacement panel from Raybuck Auto Body Parts.

Remove the Old Panel

After ensuring you have adequate rear access to the cab corner, use the angle grinder to carefully cut away the rusted or damaged panel area. Focus on removing only the metal that needs to be replaced, keeping surrounding bodywork intact. After cutting, use a grinding wheel to smooth edges and remove remaining rust.

Test Fit the New Panel

Hold the replacement cab corner in place to ensure it fits correctly. Verify that the panel aligns with the adjacent body lines and covers the area to be replaced. Adjust as needed before you begin welding.

Tack and Weld the Replacement Panel

Clamp the panel in place and start with tack welds. This allows you to confirm the fit and make minor adjustments before completing the full weld. Once alignment is correct, continue welding the panel in place.

Smooth Welds and Prepare for Finishing

After welding, grind down the weld beads to create a smooth surface. Clean the area and prepare it for sealing and finishing work.

Protect and Seal the Repair Area

Apply seam sealer around the welds and along the edges of the replacement panel. Use a rust inhibitor on exposed metal surfaces. This protects against moisture infiltration which can lead to future corrosion.

Fill, Sand, and Paint

Apply body filler to blend the new panel into the existing cab surface. Sand the filler smooth and prepare the area for paint. Apply primer and finish with paint that matches your truck color.

Post Replacement Care and Long Term Maintenance

After the installation and painting process is complete, preserving your cab corner repair will help it last longer.

Sealing and Protection

Apply seam sealer thoroughly to all joints and welded areas. This stops moisture from entering and causing rust beneath the surface.

Regular Washing and Inspection

Regularly wash your truck, especially after winter driving or exposure to salty roads. Inspect cab corners periodically for signs of rust, paint chips or damage.

Touch Ups and Paint Care

Address any paint chips or scratches immediately. Small areas of exposed metal can become rust spots quickly if left unattended.

Conclusion: Ford Super Duty Cab Corner Replacement

Replacing a rusty or damaged cab corner on a Ford Super Duty pickup truck can restore strength and improve appearance. Raybuck Auto Body Parts offers quality replacement panels for Super Duty models, including options for different cab styles and configurations. 

With the right tools and preparation, you can complete a professional repair. Long term maintenance such as regular washing and inspection will help protect the repair and keep your truck looking its best.

Shop quality Ford Super Duty cab corners at Raybuck Auto Body Parts and restore strength and protection to your truck today. Contact us with any questions.

Further Reading

Categories
Restoration

Replacement Automotive Flooring Guide: Custom-Fit Carpet Kits, Vinyl Mats, Padding & Backing Options

At Raybuck Auto Body Parts, we understand how important interior flooring is to the overall condition and comfort of your vehicle. Automotive flooring plays a key role in protecting the floor pan, reducing noise, and maintaining a clean interior appearance. Over time, original flooring can become worn, stained, or damaged from daily use. 

Replacing it can dramatically improve how your vehicle looks and feels. Whether you are restoring a classic car or refreshing the interior of a truck, selecting the right replacement automotive flooring helps ensure long lasting results and a better driving experience.

Key Takeaways

  • Replacement automotive flooring improves interior comfort, appearance, and protection
  • Carpet flooring offers a classic look and added comfort for cars and restorations
    Vinyl flooring provides durability and easy cleaning for trucks and utility vehicles
  • Padding and mass backing options enhance insulation and underfoot feel
  • Custom floor mats help protect new flooring and extend its lifespan

Did you know? Heat molded flooring is shaped to match floor contours, helping improve fit and interior appearance.

What Raybuck Auto Body Parts Offers in Flooring

Raybuck Auto Body Parts offers a full selection of replacement automotive flooring designed to restore and protect vehicle interiors. Our flooring category includes replacement carpet kits and vinyl mats for cars, trucks, vans, and SUVs. These products are ideal for replacing worn factory flooring or upgrading interiors during restoration projects.

Our replacement carpet and vinyl mats are custom made in the USA by ACC (Auto Custom Carpets). Most flooring options are heat molded to follow the contours of the floor pan for a more precise fit and cleaner appearance. This helps reduce loose edges and improves overall interior presentation.

Flooring options available include:

  • Replacement carpet kits for restoring factory style interiors
  • Vinyl mats designed for durability and easy cleaning
  • Multiple color choices to match or customize interior appearance

These flooring solutions are well suited for vehicles with faded, torn, brittle, or outdated interior flooring.

Carpet vs Vinyl: Which One Should You Choose

Carpet vs Vinyl

Choosing between carpet and vinyl flooring depends on how your vehicle is used and the type of interior experience you want.

Carpet Flooring

Carpet Flooring

Automotive carpet is a popular choice for drivers who want a comfortable and finished interior look. Carpet flooring provides insulation, reduces noise, and offers a factory style appearance. Custom fit carpet kits are molded to the floor for better coverage and a more original appearance. Carpet works well for classic cars, restored vehicles, and daily drivers where comfort and aesthetics are priorities.

Vinyl Flooring

Vinyl Flooring

Vinyl flooring is a durable alternative to carpet and is often chosen for trucks and utility vehicles. Vinyl mats are easier to clean and more resistant to moisture, dirt, and spills. This makes vinyl a practical option for work vehicles, off road use, or situations where flooring sees heavy wear.

Carpet vs Vinyl Comparison

Feature Carpet Flooring Vinyl Flooring
Comfort High Moderate
Ease of Cleaning Moderate High
Durability Good Excellent
Interior Style Classic appearance Utility focused
Vehicle Use Cars and restorations Trucks and work vehicles

Both options provide reliable flooring solutions. Carpet emphasizes comfort and appearance, while vinyl emphasizes durability and ease of maintenance.

Comfort and Protection Upgrades: Padding and Backing Options

Beyond choosing carpet or vinyl, padding and backing options can further enhance your flooring upgrade.

Jute Padding

Jute padding is commonly used beneath automotive carpet to provide cushioning and support. It adds comfort underfoot and helps protect carpet fibers in high traffic areas. Jute padding also contributes to a more substantial feel when entering or driving the vehicle.

Mass Backing

Mass Backing

Mass backing is a heavier backing option available on many molded carpet kits. This backing helps reduce noise and heat transfer from the floor pan into the cabin. Vehicles driven frequently or over long distances often benefit from this added insulation.

Choosing the Right Option

  • Choose jute padding for added comfort and carpet support
  • Choose mass backing for improved sound and heat insulation

These upgrades can significantly improve driving comfort and overall interior quality.

Installation Basics

Installing replacement automotive flooring involves removing the old flooring, cleaning and preparing the floor pan, and fitting the new carpet or vinyl mat. Heat molded products are designed to follow the shape of the floor but still require careful placement and trimming for best results.

Many vehicle owners choose professional installation to ensure a clean fit around trim, seats, and pedals. Others prefer a do it yourself approach using basic hand tools and careful measuring. Preparation is key to achieving a smooth installation and long lasting fit.

Proper alignment and trimming help ensure the flooring stays secure and maintains its appearance over time.

Keeping New Flooring Looking Good

Maintaining new automotive flooring helps preserve its appearance and lifespan. Carpets should be vacuumed regularly to remove dirt and debris. Spot cleaning helps prevent stains from setting in. Vinyl flooring can be wiped clean with a damp cloth, making it easy to maintain.

Using protective floor mats can help reduce wear on new flooring by trapping dirt and moisture before it reaches the surface. Routine care keeps interiors looking clean and well maintained.

Custom Floor Mats and Accessories

Raybuck Auto Body Parts also offers custom floor mats designed to complement replacement flooring. These mats are custom made in the USA and designed to fit vehicle footwells closely. Custom floor mats help protect carpet and vinyl flooring from daily wear, moisture, and debris.

Adding floor mats is an effective way to extend the life of new flooring while maintaining a clean interior appearance. Floor mats are easy to remove and clean, making them a practical addition to any vehicle interior upgrade.

Conclusion: Replacement Automotive Flooring

Replacing automotive flooring is an effective way to improve comfort, durability, and interior appearance. Whether you choose a custom fit carpet kit or durable vinyl mats, Raybuck Auto Body Parts offers quality USA made flooring solutions to meet your needs. 

Consider how you use your vehicle, select the right material, and enhance performance with padding or backing options. Complete the upgrade with custom floor mats to protect your new flooring. Explore the interior flooring options at Raybuck Auto Body Parts to find the right solution for your vehicle.

Explore replacement automotive flooring from Raybuck Auto Body Parts and find the right carpet or vinyl solution for your vehicle. Get in touch with any questions.

Further Reading

Categories
Jeep Just For Fun

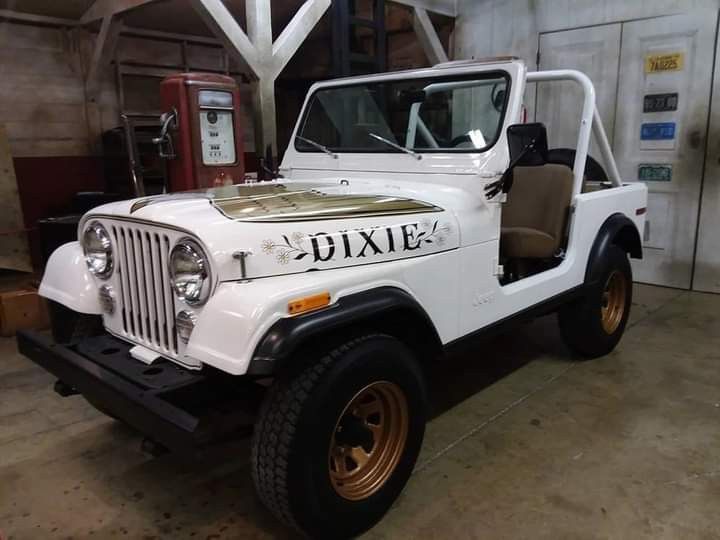
Daisy Duke’s Jeep CJ-7 and the Timeless Appeal of a TV Icon

Some vehicles become famous because of horsepower or performance. Others earn their place in history because of where they appeared and who drove them. Daisy Duke’s Jeep CJ-7 from The Dukes of Hazzard belongs firmly in the second category. Long after the final episode aired, her Jeep continues to influence how people view the CJ-7 and what a classic Jeep should feel like.

On The Dukes of Hazzard, Daisy Duke was played by Catherine Bach, whose confident, playful performance helped turn the character into a cultural icon of the late 1970s and early 1980s. Daisy was known for her quick wit, self-assurance, and independence, traits that came through as much in her attitude as in the way she carried herself. Her Jeep CJ-7 felt like an extension of that personality rather than a prop built for television.

While the General Lee often gets most of the attention, Daisy Duke’s Jeep quietly shaped the image of Jeep ownership for an entire generation. It represented freedom, practicality, and an easy confidence that still resonates with Jeep owners and classic vehicle enthusiasts today.

Key Takeaways

  • Daisy Duke’s Jeep CJ-7 helped shape the cultural image of the CJ-7 platform
  • The CJ-7 remains popular due to its simplicity, capability, and timeless design
  • Many modern builds take inspiration from the show without copying it exactly
  • Interior details like Jeep CJ-7 flooring play a key role in making a build feel complete
  • Subtle upgrades can improve comfort while preserving the vehicle’s original character

Did you know? Auto Custom Carpets offers standard automotive flooring materials in more than 230 color options, allowing CJ-7 owners to match factory interiors or create a personalized look.

A Jeep That Fit the Character

Daisy Duke’s CJ-7 worked because it felt authentic. Catherine Bach’s portrayal made Daisy confident, capable, and unapologetically herself, and the Jeep matched that energy without feeling staged or overbuilt. The CJ-7’s short wheelbase, removable top, and open interior gave it a relaxed, ready-for-anything attitude that fit perfectly with the character.

The Jeep is commonly identified as a CJ-7 and is often associated with Golden Eagle styling and period-correct graphics seen throughout the show’s run from 1979 through 1985. At the time, the CJ-7 was already a popular choice for drivers who wanted a vehicle that could handle daily use and weekend adventure.

Unlike many TV vehicles built strictly for spectacle, Daisy’s Jeep looked like something a real person would actually drive. That realism is a big reason it remains so influential today.

Why the CJ-7 Became an Icon

The CJ-7 arrived at a moment when drivers wanted versatility. It offered:

  • Straightforward, rugged construction
  • Strong off-road capability without excessive complexity
  • A clean and recognizable Jeep silhouette
  • An interior focused on function rather than luxury

Daisy Duke’s Jeep showcased these strengths without exaggeration. It reinforced the idea that a CJ-7 did not need to be flashy to be memorable.

From TV Inspiration to Real-World Builds

Many CJ-7 owners today grew up watching The Dukes of Hazzard. That influence often appears in subtle ways rather than full replicas. Clean paint, classic wheels, and uncluttered interiors are common nods to Daisy Duke’s Jeep.

The interior is where that inspiration often becomes practical. CJ-7s are used, not just displayed. Over time, floors take the brunt of dirt, moisture, and daily wear. Worn carpet, cracked vinyl, or exposed metal floors can make even a well-maintained Jeep feel incomplete.

Why Interior Details Matter

A CJ-7 interior does not need luxury to feel right, but it does need to feel finished. Proper Jeep CJ-7 flooring helps reduce noise, improve comfort, and visually tie the interior together.

Carpet is often chosen for cruisers and restored Jeeps, offering insulation and a traditional look. Vinyl flooring is popular for off-road or utility builds due to its durability and easy cleanup. Molded flooring designed to match the original floor pan creates a cleaner appearance than flat, universal materials.

Preserving the Spirit Without Overbuilding

Daisy Duke’s CJ-7 was never about excess. It was simple, capable, and comfortable enough for everyday use. Modern builders often aim for the same balance.

Small upgrades like properly fitted Jeep CJ-7 flooring support that goal. They improve usability without changing the vehicle’s personality. The best builds are the ones where upgrades feel invisible until you notice how much better the Jeep feels to drive.

How Raybuck Auto Body Parts Supports CJ-7 Builds

At Raybuck Auto Body Parts, we help Jeep owners maintain the character of their vehicles while making them more enjoyable to use today. Our Jeep CJ-7 flooring options, including replacement carpet, vinyl flooring, and custom floor mats, are designed to fit correctly and hold up to real-world use.

These products are custom made in the USA by Auto Custom Carpets and are available in a wide range of colors and configurations. Whether you are restoring a CJ-7 or refreshing a daily driver, the right flooring helps complete the interior without stealing the spotlight.

Finish Your CJ-7 the Right Way

Daisy Duke’s Jeep CJ-7 remains iconic because it blended style and practicality without trying too hard. That same approach still works today. A well-finished interior, supported by properly fitted flooring, helps preserve the feel that made the CJ-7 so memorable in the first place.

Explore Raybuck Auto Body Parts Jeep CJ-7 flooring options to finish your interior with a fit that looks right and holds up to real use.

Further Reading