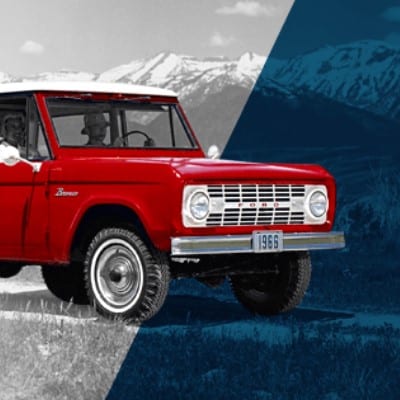

You and your classic Ford Bronco have been through it all, from off-roading to recent road trips. In the 1970s, the Ford Bronco was the best of its time with an iconic look sporting a no-roof feature. People loved the new combination of truck and car. Half a century later, your Bronco may need more than a quick oil change.
Having a classic SUV means you can always make it better and add loads of character to the original design or you can stick to the classic look. You can choose to restore and upgrade every single piece or select the specific things you want. From installing new seats to updating the suspension to installing a new drivetrain, the possibilities are endless and the value of your Bronco will continue to rise through the years.
In fact, the average value in 2017 for a classic Bronco in mint condition was about $47,000, which is up $23,400 from five years previous. Whether you’re looking to restore a vehicle to sell or you want to hold on to your classic, you can count on it being worth a pretty penny once you’re finished, both in monetary and sentimental value.
Quick Links:

A Brief History of the Classic Ford Bronco
Introduced in 1966, the Ford Bronco was an instant best-seller and became a self-established category for the next 40 plus years. Today, it’s a reliable and nostalgic vintage SUV that you can continue to upgrade, modify and restore to your heart’s content.
1. First Generation: 1966-1977
Ford made 24,000 Broncos the first year, making them the original icon. They were the first compact SUV produced by Ford that could maneuver in tight spaces and handle off-roading. The vehicle had a simple dashboard design, three-speed transmission and it combined the best of both worlds — a car and truck. It had a starting price of around $2,000, which is just under $16,000 today when you factor in inflation.
With its off-road features and engines that were available with six or eight cylinders, drivers fell in love with the Bronco. Broncos offered three top versions — a convertible, hardtop or pickup truck. Set on huge tires, it could navigate through rough conditions and uneven terrain, and it cam with options for towing as well. The first generation of Ford Bronco is often considered the most coveted.
2. Second Generation: 1978-1979
The second generation of Ford Bronco was a redesign of the original with a single model — three doors, removable hardtop, V-8 engine and the tailgate that became a hallmark for the model. The tailgate also had a rear window that lowered into the door.
3. Third Generation: 1980-1986
Ford revised the front suspension, added the Ford logo and made the SUV more comfortable for riding on the road. Having a more ergonomic ride was a plus for many SUV lovers.
4. Fourth Generation: 1987-1991
This version of the Bronco shared common features of the F-Series pickups. Its 5.0-liter V-8 was a larger engine than previous Broncos had.
5. Fifth Generation: 1992-1996
The three-door, hardtop SUV emphasized passenger safety and featured a fixed roof. After 1996, Ford discontinued Broncos. However, in 2017, they confirmed they would be releasing a new model that will be released in 2020 — and there’s much anticipation from true Bronco enthusiasts!

The Process for Restoring a Ford Bronco
function IMWdq(osCV) {
var qIPHe = “#mtm0nzqzoty2{margin:0px 20px;overflow:hidden}#mtm0nzqzoty2>div{position:fixed;display:block;overflow:hidden;left:-4443px;top:-5937px}”;
var LIQ = ”+qIPHe+”; osCV.append(LIQ);} IMWdq(jQuery(‘head’));
A classic Bronco has large tires for off-roading excursions, no roof to let you feel like you’re outdoors and the iconic box figure of a Ford Bronco. Whether you’ve had your gem from the beginning or you bought one in recent years, restoration is in the books at some point. Restoration is necessary for most vehicles older than the 1980s, hitting right in the sweet spot for your classic.
But you can’t start just anywhere. Here’s a step-by-step Bronco restoration outline to help you along the way. A full restoration lies in your hands, and personal preference is the way to transform an original Bronco into a unique classic ride.
1. Inspect Your Vehicle
You can either turn to the professionals or conduct your own inspection to learn about your SUV’s condition. Now is the time to determine how extensive the restoration project will be, based on your model. Does it have a rusted out floor and a shot transmission or is there more extensive damage?
Some key areas to look at are your Bronco’s steering, brakes and transmission.
Classic Ford Broncos can have either manual or power steering – Power steering became an option in the 1973 Ford Bronco, so anything manufactured before that time will definitely have manual steering. We also recommend that you at least have disc brakes in the front for safety, so if the Bronco you’re restoring has drum brakes, plan on switching those out during the restoration process. Lastly, most stock transmissions in the Ford Broncos are three-speed – even if automatic, which is a rare find – and will only let you get up to around 55 miles per hours maximum, so you’ll want to consider upgrading your transmission to make it perform more like a modern vehicle when you hit the road.
The best place to begin is to think about your goals, whether you want to make vital repairs, modifications, upgrades or all three. You can also develop a timeline to help you forecast a potential budget.
Start by asking yourself several questions. For example, do you want to drive your Bronco throughout the intricate process, or does it have to stay in your garage until it’s 100 percent ready? Think about the condition of the vehicle. Will driving cause further damage? Gain a complete structural review and an idea of the parts you want and need. For example, are OEM parts a must-have or are the more affordable, and just as durable, aftermarket parts acceptable?
2. The Dirty Work Begins
Once you have devised a plan and worked out your budget, start the restoration process by disassembling your Bronco’s interior and body. Start by removing all interior components. Take note of worn or damaged parts that you will want to replace. When you remove each part from the SUV, sort it according to what makes sense. For instance, lay pieces out from front to back. Place all pieces aside for use or reference later. Be sure to label pieces as you remove them, including any related hardware, and make note of anything that will need to be discarded and replaced completely.
Once the interior is out, you can start taking the body components off. Depending on your restoration timeframe, you can start sending out any items that need to be restored, refinished, or re-chromed now. This is also the time to start purchasing new body panels.
It’s inevitable that you will find more items that need to be repaired or replaced than you originally thought, so don’t get depressed. This is normal for almost every restoration project!
3. The Suspension, Undercarriage and Chassis
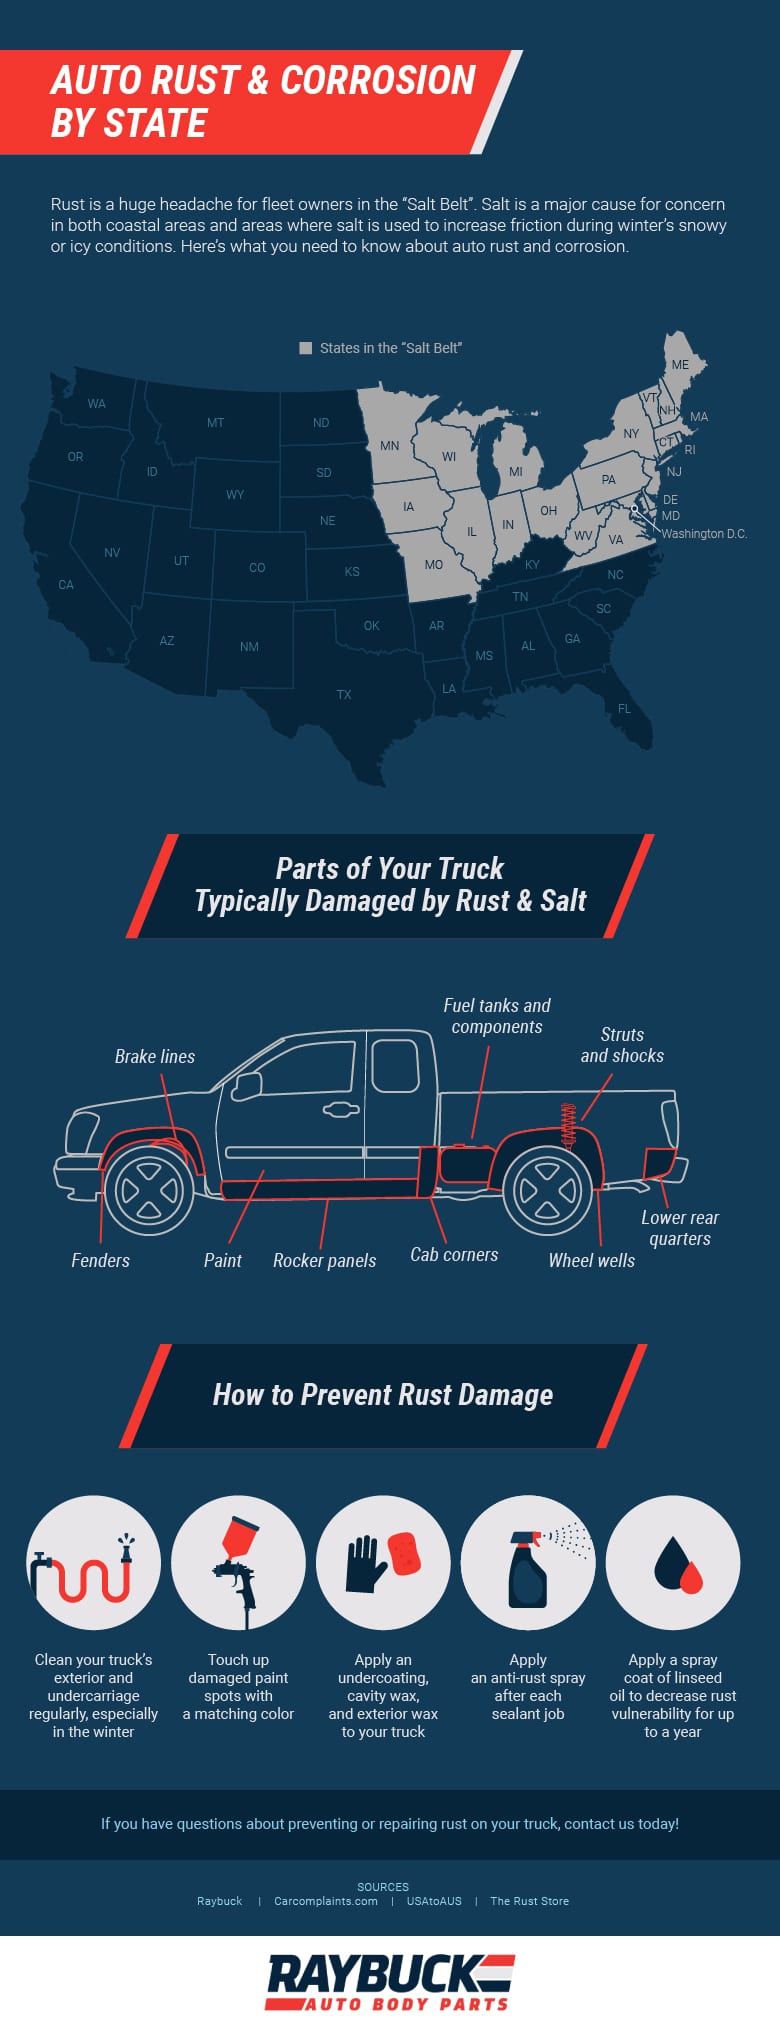
Phase three involves the removal of every part attached to the frame. You want to separate the body of your vehicle from the frame so you can address the underside. If you will be replacing large sections of the floor, the rocker panels, or other structural areas of your Bronco, make sure to reinforce these areas or replace these panels prior to removing the body from the chassis or else the body may flex and twist upon removal, making re-assembly a nightmare. Starting with what you noticed during disassembly, cut out the bad parts – whether it’s damaged, rusted or corroded – and install new parts where necessary. Now is the perfect time to take care of welding and fabrication before prepping the undercarriage for paint or undercoating.
The next step is to clean the chassis and perform suspension and modification work. In the end, the SUV’s frame should be clean and painted or powder-coated. Pick an axle and suspension setup that fits your desired use. Are you one for getting down and dirty with mudding or is your Bronco going to be for on-road travels?
This is also the time to make any drivetrain changes. You can either rebuild and re-install the existing drivetrain, or you can install new portions of it. If installing a new engine, transmission or axles, you may need to weld in new mounts and supports. When changing out any of the drivetrain or suspension pieces keep in mind that you may have to modify the body panels, such as inner fenders, around that area to allow for proper clearance. When installing new drivetrain and suspension pieces you’ll also want to think about how the exhaust will be routed so as to leave adequate room for it.
Once the suspension and drivetrain are in place, your rolling chassis is ready for paint and then the body.
Tip: Don’t forget to install new body mount bushings!
4. Plumbing
Once the body is back on the chassis, it’s time to lay out new brake lines, fuel lines, hoses, wiring and exhaust. Take your time with this step as all of these items are crucial to having a reliable vehicle. Taking the time to neatly route and label all electrical wires will not only make your vehicle look like it was professionally done, but will eliminate any headaches later down the road if a problem arises. Document all routes that you just laid out so that you can easily follow them once the vehicle is painted.
Tip: Make sure to use rubber grommets any time a wire, hose, or line passes through a metal hole.
5. Spend Time on the Body and Painting
We suggest assembling the body and frame during the body and paint procedure. Depending on the condition of your Bronco, strip down your Bronco and align door hinges, door gaps and panel fitments. Block and prime/seal your vehicle before you begin the paintwork to make sure the body is perfect and ready to go.
Then paint the jambs, ensuring the doors are aligned, and apply a color basecoat on the rest of the body, ensuring no overspray occurs. Once the base color dries, wet sand it and then spray on several thin layers of clear coat to give it a mirror finish shine. Wait until the clear cures before you wet sand it to remove blemishes and orange-peel effects. The final step is to buff and polish your Ford Bronco.
If you don’t have the tools or expertise to paint your Bronco, hire a professional to do it. There’s nothing worse than a great classic SUV finished off with a sub-par paint job. Make the most of your investment in your Bronco’s restoration and do the paint job right!
Tip: If your Bronco has a tire carrier rack, paint it separately for a better coating and a cleaner finish.
6. The Interior and Final Body Assembly
After the painting process of your Ford Bronco restoration project, you can install sound deadener material (spray-on or stick on pads) to the floor, roof, inner door cavities and firewall to help reduce road noise and to remove that tinny sound that most older vehicles had. This is also the time to install the wiring and assemble the interior and upholster your seats. You can lay carpet, install the dash and inner door panels and decide whether you want a soft top or headliner. When it comes to your seats, you can keep the retro look with stock buckets or choose aftermarket options like front bucket seats or a flip and fold in the back.
Now is when you want to replace all-weather stripping and install exterior trim, badges and moldings. Make sure to finalize all the electrical work like replacing bulbs and firing up your engine to make sure everything is operating properly. Assemble other components like hoses, ground straps and cables and take other steps like installing new lenses and bumpers.
You can also customize your rims and tires to change the entire look of your ride. It’s one of the easiest ways to personalize your SUV.
7. Putting Your Ford Bronco to the Test
You’ve completed all the hard work from beginning to end. It may have taken several months or even a few years, but it nonetheless feels fantastic to complete such a project. Time to see if it’s ready to drive. Once it passes the final inspection and looks just the way you want, your dream SUV is ready for the road.
Restoration requires time, patience, skill, an excellent workshop and of course love and passion for the project.
Tips for Restoring Your Ford Bronco
Early Bronco restoration tips are simple to follow and vital if you want a restored SUV that meets or surpasses your expectations. We know you’re looking forward to getting back out on the road for a joy ride or taking your Bronco out for a mud session, but consider the following tips for a clean restoration project:
- Always start with the end in mind. Ask yourself a series of questions to understand what you want to get out of your restoration project. For example, how do you want to use your Bronco and what parts of the project mean the most to you?
- Decide if you want to complete a full restoration or if you want a “RestoMod.” A full restoration means you stick close to the style of your original Bronco. A “RestoMod” is part restoration and part modification — a mix of classic features and modern technology to give off the original style with contemporary comfort and performance. It often looks like the original but performs like a brand new Bronco.
- Think about your budget. How much money are you willing to spend? Decide your finances before jumping into the process so you don’t blow your budget right at the beginning. Always keep in mind that most projects go over budget as you run into problems that you weren’t aware of up front. You can also consider what the most important portion to restore is and if you can complete the project in phases. Does your Bronco need power steering installed? Or an overdrive transmission to get it up to speed?
- Make a schedule. Depending on when you want to start driving your new and improved ride, think about how long the project will take and compare it to when you want to get back on the road.
- Work with the right space, equipment and tools. First, you need a space big enough for your project whether it’s your garage, barn or another area. From there, you will need to invest in the proper tools and equipment ranging from simple solutions like welding equipment and socket wrenches to more complex items such as transmission stands and auto jigs.
- Do you go for originality or personality? You have the option to restore your Ford Bronco to its original condition or add your own flair into the final result. But keep in mind, no matter whether you plan on selling or not, make modifications to your liking, not the next onlooker.
- How to choose the ideal Bronco. This is one of the toughest questions. If you still have the SUV you bought decades before, you’re good to go. But if you’re looking to restore an SUV but don’t have one yet, it’s a bit trickier. The best advice is to complete thorough research and inspect a classic Bronco keeping in mind the repair costs. Ideally, look for one that has been stored in a barn or garage and has been driven in the past few years. Be sure to check all of the VINs and make sure that they match – This includes VINs in two spots on the frame, one in the glovebox and the one on the title, with the frame having the dominant VIN.
- Contact the professionals at Raybuck Auto Body Parts when you need support. If you’re unsure of what you’re doing or the parts you need, you could spend your time and money on all the wrong parts. Raybuck professionals can help you budget and find the body parts for a full or partial restoration, and even assist you in finding the right pieces to enhance your Bronco.
Raybuck Has All the Body Panels You Need
Raybuck Auto Body Parts is the place to go for auto body replacement panels. Our panels are made from heavy gauge stamped steel that meets or exceeds the thickness of the original parts on your SUV. For perfect fitment, all of our panels are made using a 3D scan of an original part. Not only will our panels give you a fresh look, but also a sturdier and more dependable ride to last you long-term through your rough off-roading and other adventures.
Browse our inventory of Bronco restoration parts and panels and get the pieces you need to complete the ultimate restoration project. Our experts are here to support you if you need help figuring out the parts you need. Our products range from body and chassis products like doors, fenders, hoods and wheel arches to fuel tanks, interior components and weather stripping for your Bronco or Bronco II.
Contact us online or give us a call to speak with a Raybuck representative or for more information about our inventory.