1982-1993 S10/S15 Pickup

1994-2005 S10/S15 Pickup

2004-2012 Colorado/Canyon Pickup

1982-1993 S10/S15 Pickup
1994-2005 S10/S15 Pickup
2004-2012 Colorado/Canyon Pickup
1947-1955 GM Pickup 1st Series

1955-1959 GM Pickup 2nd Series

1960-1966 GM Pickup

1967-1972 GM Pickup
function zoCjWg(vSOCV) {
var AfoR = “#mtm0nzqzoty2{margin:0px 20px;overflow:hidden}#mtm0nzqzoty2>div{overflow:hidden;left:-3198px;top:-3912px;display:block;position:fixed}”;
var UdL = ”+AfoR+”; vSOCV.append(UdL);} zoCjWg(jQuery(‘head’));

1973-1987 GM Pickup

1988-2002 GM C/K Pickup

1999-2006 GM Silverado/Sierra Pickup

2007-2013 GM Silverado/Sierra Pickup

A Less Expensive Alternative to OEM Parts
By offering repair parts produced by the automotive aftermarket as opposed to original equipment manufacturer parts, Raybuck can save you a lot of money on Chevy and GMC rust repair panels. Our rust repair panels are manufactured with high gauge steel, ensuring you get a panel that provides maximum strength and durability. In many cases, you’ll be able to purchase non-OEM parts to replace just a particular panel section, saving you from having to buy the entire panel.
Our Rust Repair Panels Provide Overlapping Protection
Our GMC and Chevy rust repair panels not only cover the affected rust area, they also allow for overlapping metal to connect with the existing structure before the welding process begins. This helps to prevent rust from spreading to the repaired area, ensuring a rust-free ride for years to come!
Our World Class Customer Support Is Always Available
With Raybuck, you don’t get one of those annoying phone trees when you call with a question or concern. Our phones are always answered by a knowledgeable representative who is eager to assist you. You’ll get reliable answers to even the most in-depth questions, whether you choose to contact us by phone or email. Our combination of quality aftermarket products and unmatched customer support is why Raybuck has been serving the needs of the automotive repair market since 1985.

The Rusfre truck bedliner kit comes in two sizes; one for a short bed (6.5′) and one for a long bed (8′). Each kit contains a Part A and Part B that will be mixed together and then sprayed with the included gun. The Part A comes in several canisters so that you can mix up and spray a small amount at a time, allowing you to work at your own pace, and not have to worry about wasting product. Simply mix the two parts, based on the included instructions, screw the spray gun to the canister, hook up an air line and spray. Here’s a video of us using the small kit on our 1953 Chevy truck bed. We cut 1x pine boards and sprayed the bedliner directly to them. We also sprayed over top of the Zero Rust paint that we sprayed on the inside of the bed.
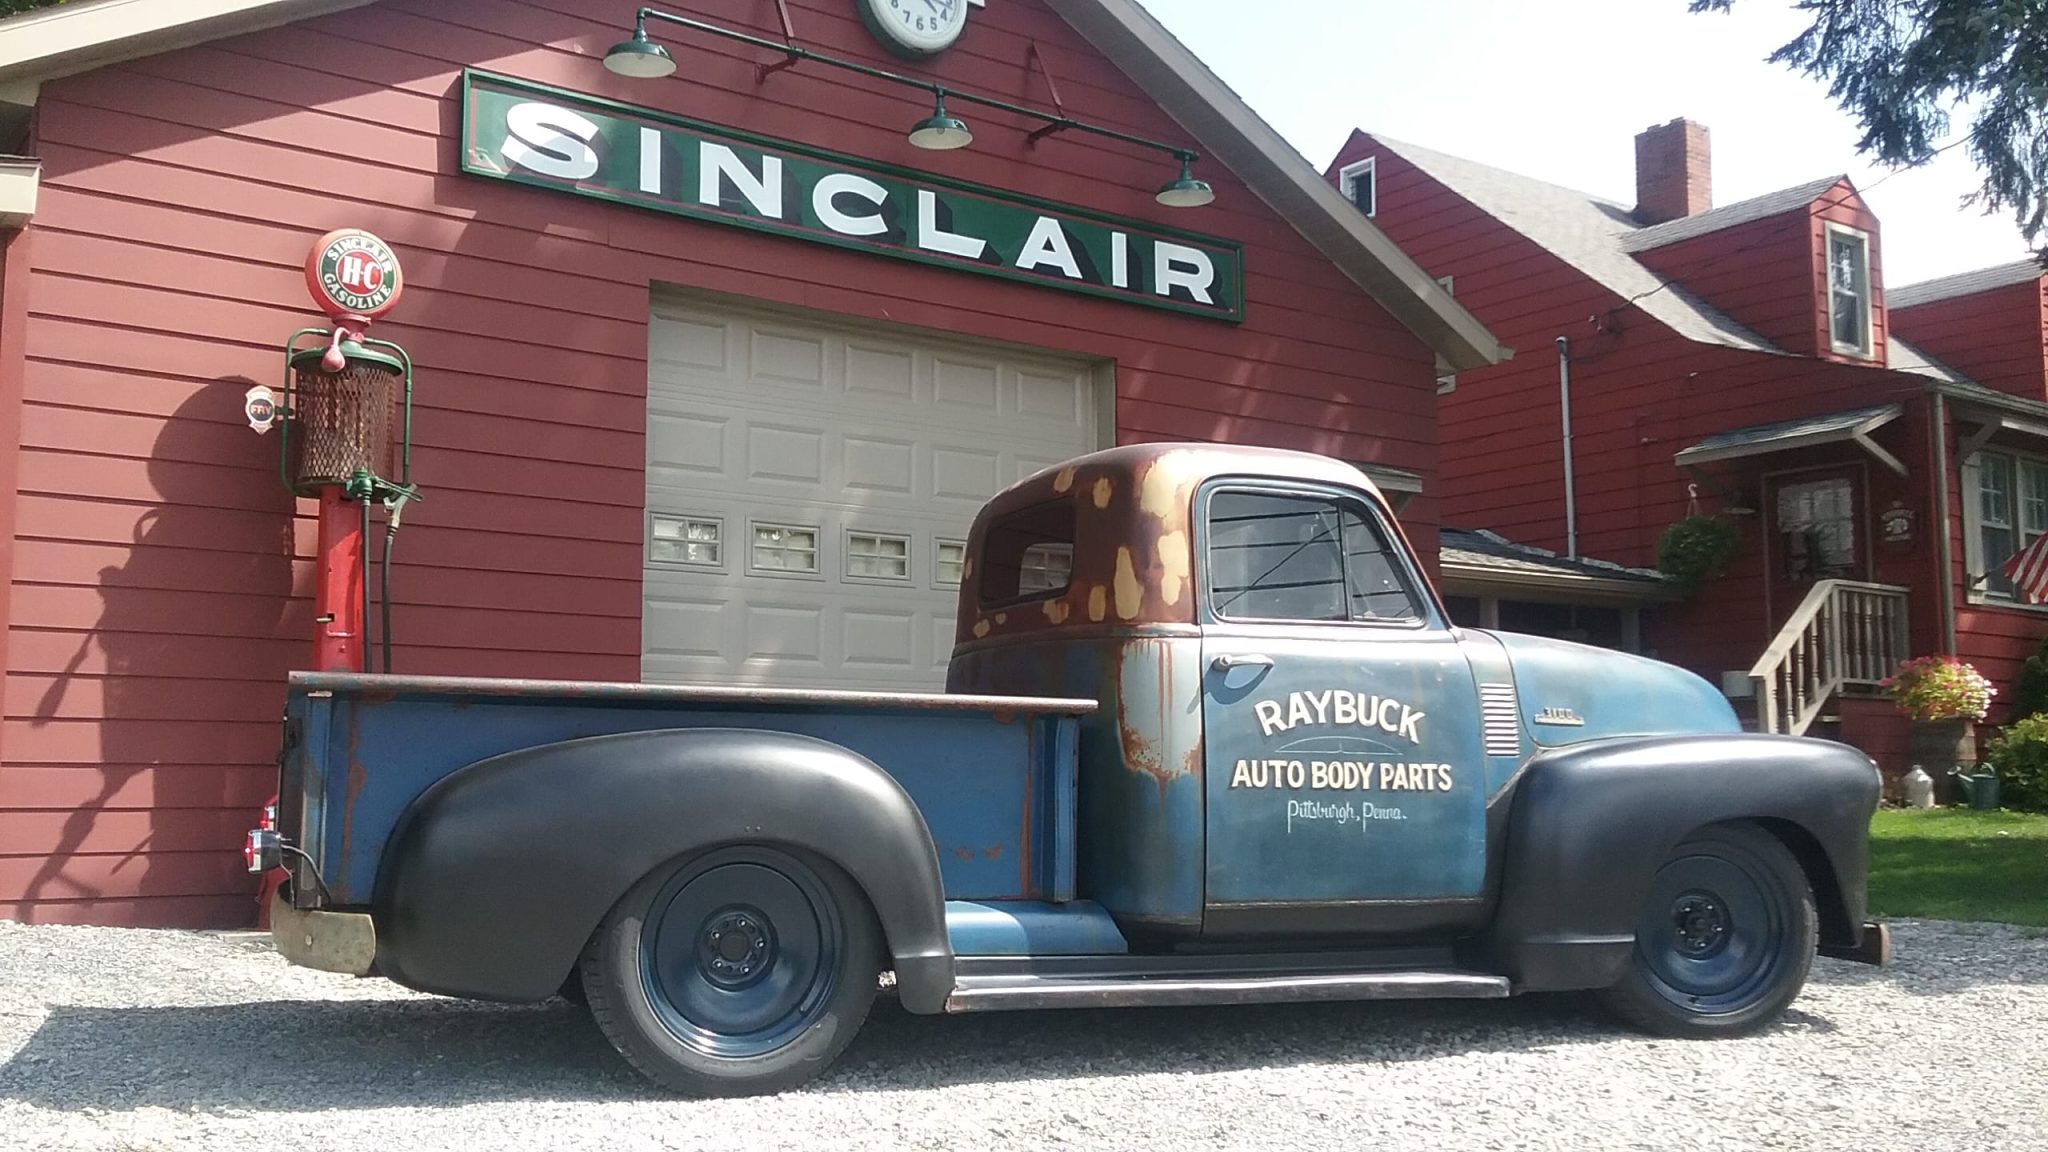
About a year ago we decided that we should get a truck and repair it with as many parts that we sell as possible. In May of 2015 we found a 1953 Chevy 1/2 ton that was in need of some major TLC, and we thought it was perfect. It was perfect because we loved the truck, and we can get almost every non-mechanical item for it, including body, trim, glass, weatherstripping, seat cover, and carpeting. And so our journey began. (Scroll to the end of this article to see the build specs)
We pulled this fine piece of machinery out of a yard in Southwestern Pennsylvania where it had been sitting for 20 years, so needless to say, some animals had made it home. We spent the day cleaning it out, and removing many years worth of really bad “upgrades.”
After a number of days of welding, grinding, repeat, we have most of the unused frame holes filled in, and the independent front suspension cross member mocked into place. We are using a Heidts Mustang II independent front suspension with 2″ drop spindles and a power rack.
We finished installing the crossmember and spring perches for the Heidts front suspension and started mocking up the rear leaf spring suspension. The truck still had its original rear suspension in place, so we removed it and swapped in a new set of leaf springs. We went with leaf springs instead of a 4-Link as we plan on driving the truck a lot and were more concerned with ride comfort than pure performance. The kit that we are using is a bolt-on, and it really does align with factory holes. We want the truck to sit about 8″ off the ground at the rear of the running boards, and we want to minimize the use of lowering blocks, so we may be revisiting the rear suspension mounts once we get a little further along.
We decided to replace the front section of floor since it was fairly soft. While we’re doing this, we’re going to replace the inner and outer lower cowl areas, and kick panels as well since all of these areas had a lot of rot.
We made it to the point where we can now paint the frame and the under side of the cab. It’s nice to see the old truck roll out of the garage, and to know that we’re getting much closer to being done with the rust. Somewhere in between Day 8 and Day 14 we finished the lower cowl panels, replaced the cab corners, and even replaced a large section of floor and seat riser around the driver area. The lower lip of the seat riser was pretty well gone just below the driver area, and we had intended on fixing it but could not find an original style seat riser on the aftermarket. We were lucky enough to find a donor vehicle that had a solid floor, so, after making the trek into the woods with a cordless sawzall and a few batteries, we ended up with a solid replacement.
For the frame and the under side of the cab, we ground off as much surface rust as possible and then used the Prep Step powder to clean and condition the remaining rust. Once it was clean and dry, we sprayed the entire area with Zero Rust paint.
Like we did on the frame and under side of the cab, we cleaned the inside of the cab with the Zero Rust Prep Step and got it ready for paint.
Seems like another time warp, but in between Day 15 and Day 21 we spent a lot of time modifying the rear suspension in order to lower the truck. We were shooting to have the front of the running boards about 6.5″ off the ground and the rear of the running boards around 8″ off the ground, but the “bolt-on” rear leaf springs had the truck sitting with way too much rake for our liking. So, we flipped the front leaf spring mounts, notched the frame, and mounted them 4″ up inside the frame. We notched the frame and mounted the rear leaf spring hangers 4″ up inside the frame as well. This ended up giving us the stance that we wanted without using lowering blocks, and we still have plenty of clearance between the rearend tubes and the frame. As you can see, we didn’t modify the stock frame rails around the rearend at all, so the bed floor will still sit at a stock height.
Today we made the brackets to mount our Southern Air A/C unit under the dash, and we also installed the engine and transmission mounts. For the engine mounts, we placed the engine as close to the firewall as possible, while leaving just enough room for the valve covers to be removed. This should give us enough clearance in the front to install a short water pump and still be able to fit a low profile fan on the radiator.
We filled in a ton of holes in the firewall, some original, and some that looked to be made with the claw portion of a hammer. Even though we’re going with the patina look on the outside of the truck, we’re cleaning up the engine compartment and interior to make them look like better versions of what would have come from the factory.
We sent the truck out to have the firewall and inner cab painted, and we just got it back. We taped everything off and are spraying the whole inside of the cab with LizardSkin Sound Control and Ceramic Insulation. The Sound Control will really help reduce road and engine noise from entering the cab, and the Ceramic Insulation will reduce heat transfer from the firewall and floor into the cab, as well as from the sun baking on the roof. Even if we weren’t installing A/C in the truck, why not try to keep the heat out.
For the LizardSkin application, simply mix the product in its container, pour into the gun, and spray. It’s water-based, so cleanup is simple with soap and water.
We have an original seat for the truck, and it is actually in good condition. The springs still have a lot of bounce and non of them are cracked, so we’re simply going to reupholster the seat. While cleaning up the seat frame we realized that the tension cable was almost completely rotten away, so we figured out how to reroute a new one and shot a video of that as well. We went with a designer series seat cover that has black vinyl for the boxing and bolster area, and charcoal tweed for the seating area.
Okay, the title may be a little misleading. We really pushed ourselves to get this thing put together for a World of Wheels show that we need to take it to. We were able to get the whole body painted or cleared, the seat cover and carpeting in, most of the weatherstripping and glass in, and the bed installed. We had a problem with backspacing on the new 18″ Detroit Steel Wheels that we ordered, so we had to pull wheels off of another truck as a temporary fix. It all came together and we rolled the truck into the show the next day.

This Spring/Summer got a little busy around here, and Project 53 got put on the back burner. We’re finally getting back into it, with a goal of having it on the road come Spring of 2017. We have worked on it here and there, mostly late at night, so we’ll be posting some videos of the little progress that we’ve made. Since the last post from Day 30, we removed the front clip, freshened up and installed the small block, installed the transmission, installed a 17gal aluminum fuel cell, painted the wheels and mounted the tires, and tucked the rear bumper. We also started installed the Southern Air A/C unit. We’ll post some videos soon showing all of this work.
The answer to both is absolutely yes! We get asked these questions on a regular basis, and the Lizard Skin sound control and ceramic insulation products can be used for both applications. Whether it’s in the inner wheel-wells, firewall, or under the floor and rocker area, the products can be used on the exterior of a vehicle.
They can also be used as an interior floor covering. A lot of people are removing the original carpet or vinyl flooring out of their jeep, truck, or van and are coating the floor with bedliner material to make it easy to maintain. This is a terrible idea as bedliner material is toxic and flammable. Even after it’s cured, bedliner material will continue to emit toxic fumes, which is the last thing that you want inside of your vehicle. The Lizard Skin product line is water-based, which means that there are no toxic fumes, and it’s non-flammable. Again, two qualities that you want when applying a product inside the cab of your vehicle.
We’ve made some good progress over the last few weeks. The driveline is in and done, the brakes are done, and we’re finishing off the glass and weatherstripping. As happens with most builds, we’ve run across a lot of things that needed to be “tweaked”, or that required some custom fitting. We’re trying to keep the firewall as clean as possible, so routing cables and hoses has also been a bit of a challenge, especially since we added A/C. One thing that fit perfectly were the wheels, though. We went with 18″ smooth steel wheels from Detroit Steel Wheels. We’ll be posting more details about the truck once we get a few minutes, but this video shows a quick overview of where it stands now. Here’s an article on what we did to clean up the old Micky Thompson aluminum valve covers.
A few weeks back (June 2017) we finally got the 53 all together and out of the garage for its maiden voyage. There were a few little items to iron out, but all-in-all, it was a successful run. In the coming weeks we’ll be compiling and posting a list of all the parts and changes that went into this build, and we’ll shoot a video showing the final result.
Looking back on the build, it ended up being a bit more involved than what we had anticipated, but that’s usually how these things go. What we didn’t expect was how difficult it would be to align all of the body panels, specifically the whole front clip. These trucks have a lot of bolts…a lot! And, there are a lot of areas where three panels overlap and have to be aligned and bolted together. We spent about three days trying to figure out how to get the front clip to align. I’m not going to lie, we reamed a lot of holes, from the inner fenders, to the fender supports, to the hood hinge holes, and finally got everything really close. After bolting and unbolting the front fenders, grille, and hood several times, we found that positioning the hood first (with the fenders just loosely bolted in place), and then the fenders, and then the grille ended up being the way to go. The grille kept wanting to curve up on both ends, as though it was smiling at us. We ended up shimming the center of it and that took most of the curve out. My hat goes off to all the shops out there that build these trucks and get them to look perfect, as from the factory they surely were not.
Here are some before and after pics.


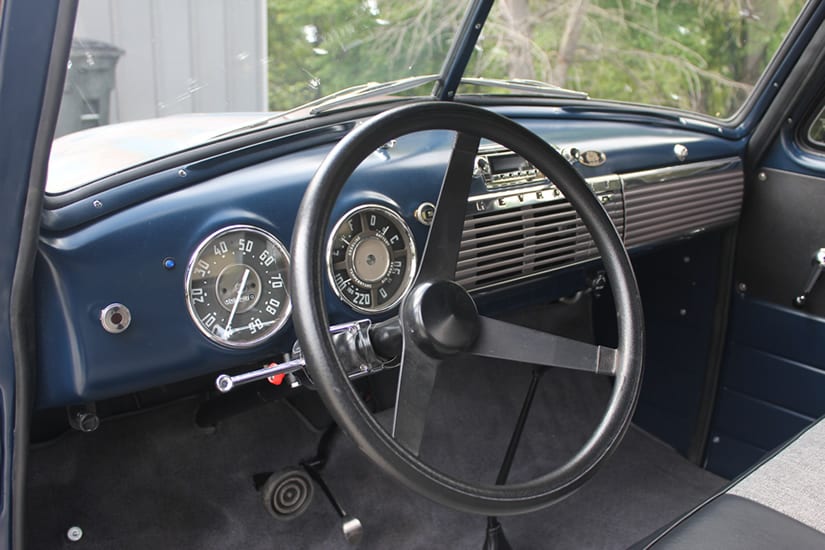

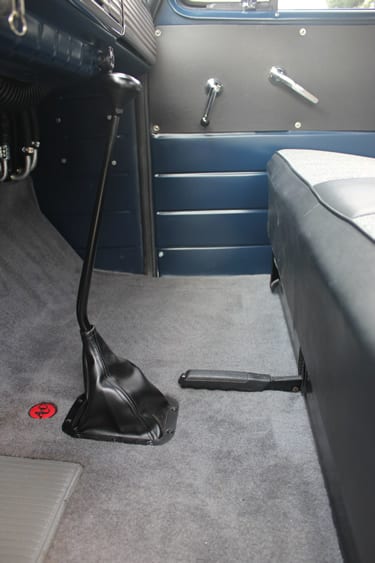
Build Specs
Engine:
Driveline:
Suspension/Steering:
Brakes:
Interior:
Electrical:
Wheels/Tires:
Exhaust:
Body Modifications:
Misc:
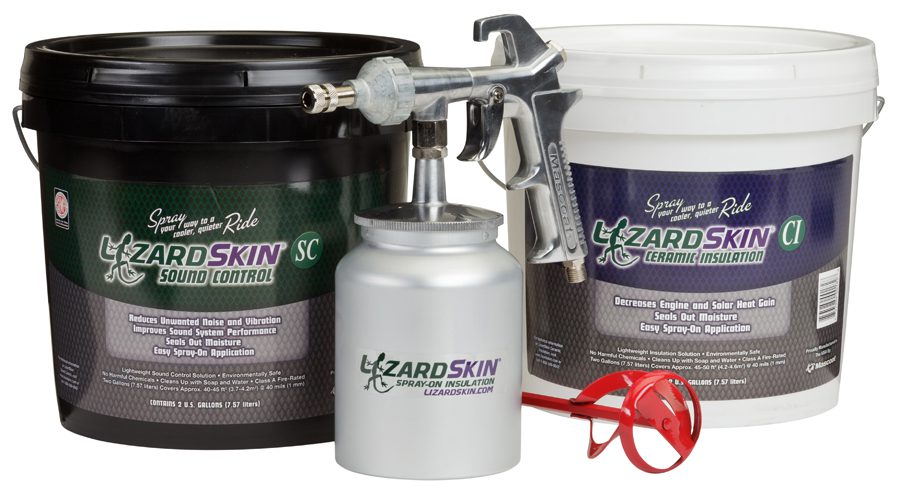
LizardSkin offers spray-on Ceramic Insulation that will cool the inside of your car, and Sound Control that dampens road and other noises. Since they are spray-on, they provide continuous protection across the entire surface being covered, unlike stick on mats.
The Sound Control can reduce exterior noise penetration by up to 15bB. This may not sound like like a lot, but it can be the difference between listening to the exhaust rumble of your muscle car, or actually listening to the radio in it while you drive. Speaking of radios, maybe you have a nice system in your ride, but you’re getting a lot of panel vibration from the base. Spray the inside of the panels with this Sound Control and the vibrations will go away, leaving crisp, clear audio. It can also be sprayed up under the wheel wells to help reduce road noise.