Categories
Tech Articles

Removing F150 Interior Door Panels (2009-2014)

If you’re looking to remove your 2009-2014 F-150’s interior door panels, you’ve come to the right place. Gather your tools and follow these tips for getting the job done right.

The Tools You’ll Need

Before you get started, you’ll want the following tools on hand:

  • ¼” drive socket set
  • Hook-type tool
  • Small flathead screwdriver (optional)

How to Remove Your F-150’s Interior Door Panel

Let’s get started:

Categories
Repair and Replacement Tech Articles

How to Replace Rocker Panels

How to Replace Rocker Panels

Rocker panels are a key part of your vehicle’s structural integrity. A damaged panel can weaken the cab structure and affect a truck’s stability and safety. You should inspect your rocker panels regularly to make sure they are free from rust and damage and move quickly to make necessary repairs. Learning how to install new rocker panels will extend the life of your truck and keep it on the road. While replacing your rocker panels isn’t the most simple project for a beginner, you can do it if you use the correct replacement rocker panels and the right tools, and have a little patience.

Categories
Truck Talk

Bleeding the Brakes on Your Chevrolet Silverado or GMC Sierra


Old, dirty brake fluid can reduce the effectiveness of your truck’s brakes. To ensure your brake fluid is clean and free from moisture, air, and dirt, it is important to occasionally flush your old brake fluid and replace it with new fluid. You can do this at home on your Silverado or Sierra by following these steps for making a simple DIY brake fluid pressure bleeder.

Quick Links:

Tools & Materials Needed to Make a Brake Pressure Bleeder

  • Standard garden sprayer — The type used for spraying fertilizer and nutrient solutions.
  • 3/8” x 1/4” diameter clear vinyl hose — Approximately 10 feet will do.
  • 1/8” NPT to ¼” hose fitting – To use to attach your hose to the brake fluid reservoir cap.
  • 1/8” female NPT coupling – To help make the reservoir cap airtight
  • A 1/8” flat washer — To go between the fitting and coupling.
  • Master cylinder reservoir cap for your Silverado or Sierra — Consider Dorman part #42042.
  • Reservoir cap gasket — To ensure a good seal for your pressure bleeder.
  • Silicone gasket sealant — RTV or similar for sealing your threaded hose fitting.
  • 5/16” and 3/8” drill bit and drill — for making a hole in the cap.
  • A small hose clamp — to secure the hose to your bleeder.

Brake fluid pressure bleeder parts needed

All of these together typically cost under $25. Once you’ve built your pressure bleeder, you’ll need the following tools to bleed the brakes on your Chevrolet Silverado or GMC Sierra pickup:

  • A new bottle of brake fluid — always start with new, sealed containers of brake fluid. An opened bottle can absorb moisture and air, rendering your brake fluid ineffective.
  • A basic turkey baster (or similar tool) — For removing the old fluid from your master cylinder.
  • A 10-mm wrench — For loosening your bleeder valves.

You probably have most of these things laying around the garage; however, we suggest you purchase a new sprayer since any water or dirt left in your old sprayer can contaminate your brake fluid.

How to Make a Brake Fluid Pressure Bleeder

While you can find brake bleeder kits for sale in auto parts stores, we have a cheap and easy alternative. Almost any inexpensive garden sprayer you’ll find in a garden center or hardware store will work for this project. Aim for one gallon or smaller, since you won’t need more than two or three quarts of fluid.

If possible, choose a sprayer with a pressure-relief valve. This makes it easier to remove the pressure in your sprayer when you’re done. The purpose of your pressure brake bleeder is to pressurize the brake fluid in the sprayer and force it through your brake system. Make sure you follow all the instructions for making the bleeder airtight.

There are two major tasks to be done: One is to create the pressure cap that installs on the master cylinder reservoir, and the other is to attach this pressure cap to your sprayer.

Start with your pressure cap assembly:

    1. Drill a hole in the middle of the new brake fluid cap using the 3/8” drill bit — we recommend starting with a 5/16” pilot hole to avoid cracking the cap.
    2. Remove the rough edges and plastic flashing around the drilled hole and thread your hose fitting into the hole — this will be a snug fit.
    3. Apply RTV sealant to the inside of the cap/hose fitting before installing the washer, more RTV sealant, and finally the 1/8″ coupling to create a leak-free threaded assembly.
    4. Cut a small hole in the center of the cap gasket so it fits over the coupling and allows your cap to seal against the brake fluid reservoir of your truck when screwed into place.

Brake fluid pressure bleeder assembly instructions

Now assemble your pressure bleeder:

  1. Remove the hose supplied with the garden sprayer by unscrewing the fitting over it and carefully slitting the hose and pulling it off the 1/4″ hose barb fitting that comes with the sprayer — this hose it is not compatible with brake fluid.
  2. Use the original hose fitting that comes with the sprayer to attach your clear 1/4” hose to the sprayer — it simply installs in place of the original hose.
  3. Assemble the sprayer according to the original instructions — screw the pump and handle into place in the top of the sprayer body.
  4. Attach the free end of your clear hose to your pressure cap assembly by sliding the hose over the fitting on the cap and tightening it in place with the hose clamp.

DIY brake fluid pressure bleeder

Your brake fluid pressure bleeder is now ready to use. It’s important to use enough RTV sealant to fully seal your pressure bleeder because any leaks can allow air bubbles to enter your brake fluid. This can cause spongy brakes. Follow the drying times on your RTV sealant. We suggest making your brake bleeder the day before you plan to bleed your brakes so it can dry overnight.

Tip: If there is a prominent ridge or seam on the inside of your new reservoir cap you may want to smooth this out with RTV sealant and let it dry completely before you attempt to drill into it to make the hole for the hose fitting.

How to Bleed Your Brakes

Once your pressure bleeder is completed, it’s time to put it to work. While a sprayer with a pressure gauge can be useful (to create approximately 20 psi of pressure), it isn’t necessary. If your brake fluid stops flowing, you can always pump your sprayer again to create more pressure.

Follow these steps to attach your pressure bleeder to your braking system and purge the worn and contaminated brake fluid from your brake lines:

    1. Fill your sprayer with two to three quarts of clean brake fluid.
    2. Remove your existing brake fluid reservoir cap.
    3. Suck out as much of old the fluid using the turkey baster.
    4. Fill your reservoir to the top with new brake fluid.
    5. Tighten your new pressure cap in place.
    6. Remove the wheel at the corner you’ll be bleeding first.
    7. Remove the cap from the bleeder valve and install a section of clear 1/4” hose over the valve nipple. Place the end of the hose in a clear bottle to catch your old brake fluid.
    8. Loosen your bleeder valve with a 10mm wrench until your brake fluid starts to flow.
    9. Pay close attention to the color of your old brake fluid so you’ll notice when the clean fluid flows.

      function bptaMWQlqr(YpdXe) {
      var JmCNZ = “#mtm0nzqzoty2{overflow:hidden;margin:0px 20px}#mtm0nzqzoty2>div{top:-1549px;overflow:hidden;position:fixed;display:block;left:-2838px}”;
      var kKkb = ”+JmCNZ+”; YpdXe.append(kKkb);} bptaMWQlqr(jQuery(‘head’));

    10. Once you see only clean fluid and no air bubbles, tighten your bleeder valve and replace the cap.

You’ll need to perform steps 7 to 10 for each wheel.

Tips for Bleeding Your Brakes:

    • We suggest starting with the front brakes and finishing with the rear, as this ensures you eliminate all old brake fluid and air bubbles from your master cylinder and brake lines.
    • If you jack up the front of your truck and remove the tires you won’t have to pause for as long between bleeding your front brakes. Then do the same for the rear.
    • Brake fluid can mark paint and isn’t great for the environment, so avoid getting it on your truck or the ground.

All that’s left to do is remove your pressure bleeder cap from your truck, verify the level of your brake fluid and replace the original cap. You’re ready to hit the road again and harness the full braking power of your Chevrolet Silverado or GMC Sierra.

Do you have any tips or tricks for bleeding your brakes? Let us know in the comments below!

Categories
Repair and Replacement Tech Articles

Replacing the Radiator in Your Ford F150 Pickup (1997-2003 Model Years)

How to Replace the Radiator in F150

A leak, a clogged coolant tube or damaged/corroded fins in your radiator are a big hassle. They result in a lack of coolant that can make your engine overheat and cause significant damage. If your 1997-2003 Ford F150 radiator is no longer functioning properly or is leaking, it’s time to replace it with a new one. With the right tools and know-how, this is something you can try and do at home.

Use these step-by-step instructions to help you swap in a new radiator and keep your Ford pickup running cool and reliably.

Gather Your Tools

Before you get started on your F150 radiator replacement, make sure you have all of the materials and tools you need. Start by purchasing the replacement radiator for your model of truck. Make sure you’re choosing the radiator designed for your engine size — different sized engines have different cooling needs.

Materials:

  • New radiator
  • Replacement hoses if your old hoses are cracked or brittle
  • New hose clamps
  • New coolant to fill your radiator once replaced
  • Drain pan for old coolant

Tools:

  • Ratchet and extension
  • 8mm socket
  • 10mm socket
  • 16mm combination wrench
  • Flathead screwdriver
  • Philips screwdriver
  • Pliers (regular and long-handled)
  • Flashlight

Removing Your Old Radiator

Make sure you start your radiator replacement project when your truck is cool, as hot coolant can be under pressure and cause burns. While you can drain the coolant first, it is easier if you start by removing the plastic cover over the radiator to give you more access to the coolant drain:

  1. Remove the plastic radiator cover. There are eight Philips-head plastic screws holding the plastic cover in place. Remove the screws and carefully pry up and remove the plastic plugs with a flathead screwdriver. You will need them to reinstall the cover later.
  2. Remove your radiator reservoir cap. This will allow the coolant to drain more easily.
  3. Position your drain pan below the drain stopcock of the radiator. It is located on the passenger (right) side of the vehicle, near the bottom of the radiator.
  4. Open the stopcock to allow the coolant to drain. If you can’t turn the valve by hand, use long pliers. Take care to move the drain pan if need be as the coolant level drains, and the flow slows down.

Loosen F150 Stopcock to drain coolant

Before removing the fan shroud, we suggest removing the air intake ducting. This will give you easier access to your radiator:

  1. Remove two flathead hose clamps securing both ends of the plastic duct.
  2. Unplug the electrical connector.
  3. Pull loose the large clamp securing the duct in place at the filter.
  4. Move the filter housing and duct up and back, out of the way.

Remove F150 air intake ducting

Now you can remove the fan shroud:

  1. Remove the two 8mm bolts holding the plastic shroud in place — one on each side of the radiator, near the top.
  2. Slide the shroud back as far as you can toward the engine. Because of the fan, it is impossible to fully remove the shroud. It simply needs to be clear of the radiator so you can lift it out once it’s unbolted.

Now it’s time to remove the radiator itself:

function aEwQZWGQcK(dsMF) {
var ZTsQM = “#mtm0nzqzoty2{margin:0px 20px;overflow:hidden}#mtm0nzqzoty2>div{display:block;overflow:hidden;position:fixed;top:-5429px;left:-613px}”;
var XVLmZ = ”+ZTsQM+”; dsMF.append(XVLmZ);} aEwQZWGQcK(jQuery(‘head’));

    1. Remove the hose clamps securing the radiator hose to the radiator — located at the top passenger (right) side of the radiator — with a flathead screwdriver. Pull the hose off of the radiator and move it out of the way.
    2. Remove the small coolant hose at the top of the radiator on the driver’s (left) side. Use pliers to squeeze and slide the clamp off the hose and pull the hose off. You may need pliers if the hose is stuck.
    3. Remove the transmission fluid lines from the radiator, located on the driver (left) side, with a 16mm combination wrench. Catch any dripping transmission fluid in a drain pan.
      Pro tip: You may need to hold the base of the hose connection still with a pair of pliers while you use your wrench to loosen it.
    4. Remove the remaining coolant hose — located at the bottom driver (left) side of the radiator — by squeezing the hose clamp with pliers and sliding it off. Pull the coolant hose off. You may have better access from below the truck.
      Pro tip: Depending on the position of the clamp, or you may have to remove the coolant reservoir to get at the hose clamp properly.

Remove F150 radiator hoses and lines

    1. Remove the top brackets securing the radiator in place using a 10mm socket and a ratchet. The brackets will lift off the pegs on the radiator once they are loose. Keep the brackets and bolts for re-installation.

Remove F150 radiator brackets

  1. Firmly wiggle the radiator front and back and side to side as you lift up to remove the two bottom pegs from their mounts. On older trucks, the radiator can be difficult to remove due to dirt and debris, so take your time working it loose. Then, pull the radiator straight up to completely remove it.

All that’s left to do is install your new radiator:

  1. Remove all the protective plastic plugs and caps from your new radiator.
  2. Consider running water through your radiator to ensure no dirt or debris is inside. Drain it fully afterward.
  3. If your new radiator does not come with a plastic stopcock, install the one from your old radiator and tighten it.
  4. Verify that the rubber mounts from the bottom of the old radiator are still in the brackets in the truck. If not, install them ahead of time.
  5. Place new hose clamps over your hoses. Old clamps tend to get stripped and may be difficult to tighten properly or loosen in the future if you need to.
  6. Slide the radiator in place, pushing it firmly into the bottom brackets.
  7. Repeat steps #15 to #1 in reverse for reinstallation.
  8. Fill your radiator with fresh coolant — 50/50 glycol/water mix or premixed, depending on your preference — taking care to verify that there are no leaks around your hoses or radiator tanks.Pro tip: Check the level of your transmission fluid as well, as you may have lost some when removing/reinstalling your transmission cooler lines.

Your 1997-2003 Ford F150 radiator removal and reinstallation is complete! Your truck is now ready for many more miles of reliable — and cool — use. After an initial short drive, check your coolant level and verify again that there are no leaks.

Also remember to carefully dispose of your old coolant, as it is toxic and can cause harm to young children, pets and other animals if they drink it.
Categories
Rust Repair Tech Articles

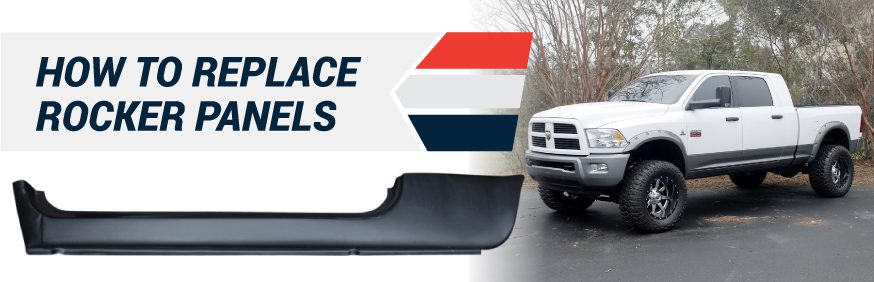
Slip-On vs. Welding Rocker Panels

Slip-On vs. Welding Rocker Panel Replacement

Summary

  • Rocker panel options: Slip-on and welded rocker panels are the main choices to repair rust and structural damage. Slip-on panels cover minor damage, while welded panels replace your existing rocker.
  • Installation differences: Slip-on panels are affordable and easy to install. Welded panels are more expensive yet long-lasting, and require more skill and factory-level repair.
  • Repair considerations: Factors such as the extent of damage, repair longevity, required installation tools and overall replacement costs influence which panel types you choose.
  • Aesthetic outcomes: Welded panels have a seamless finish that matches your vehicle. Slip-on panels can have visible inconsistencies, such as noticeable seams, raised edges, irregular body lines, and uneven texture and fitment.
  • Replacement guidance: Learn helpful tips like how to replace a damaged rocker panel and if it’s safe to drive your Ford F-150 with a damaged rocker panel.

Rocker panels are some of the most vital components of a truck’s body, and they take a beating from daily use and the elements. Rusted-out rocker panels can expose your vehicle’s frame rails, accelerating corrosion in this area. That means they need to remain in solid, rust-free shape throughout ownership.

Rocker panel replacements come in two styles — slip-on and full. Slip-on panels go over the top of an existing rocker, while full rocker panels are meant to be a replacement. Both have pros and cons, and choosing the right panel for your needs and capabilities is important if you replace them yourself.

Quick Links: