Categories
Restoration

Interior Restoration Priority Matrix: What to Fix First

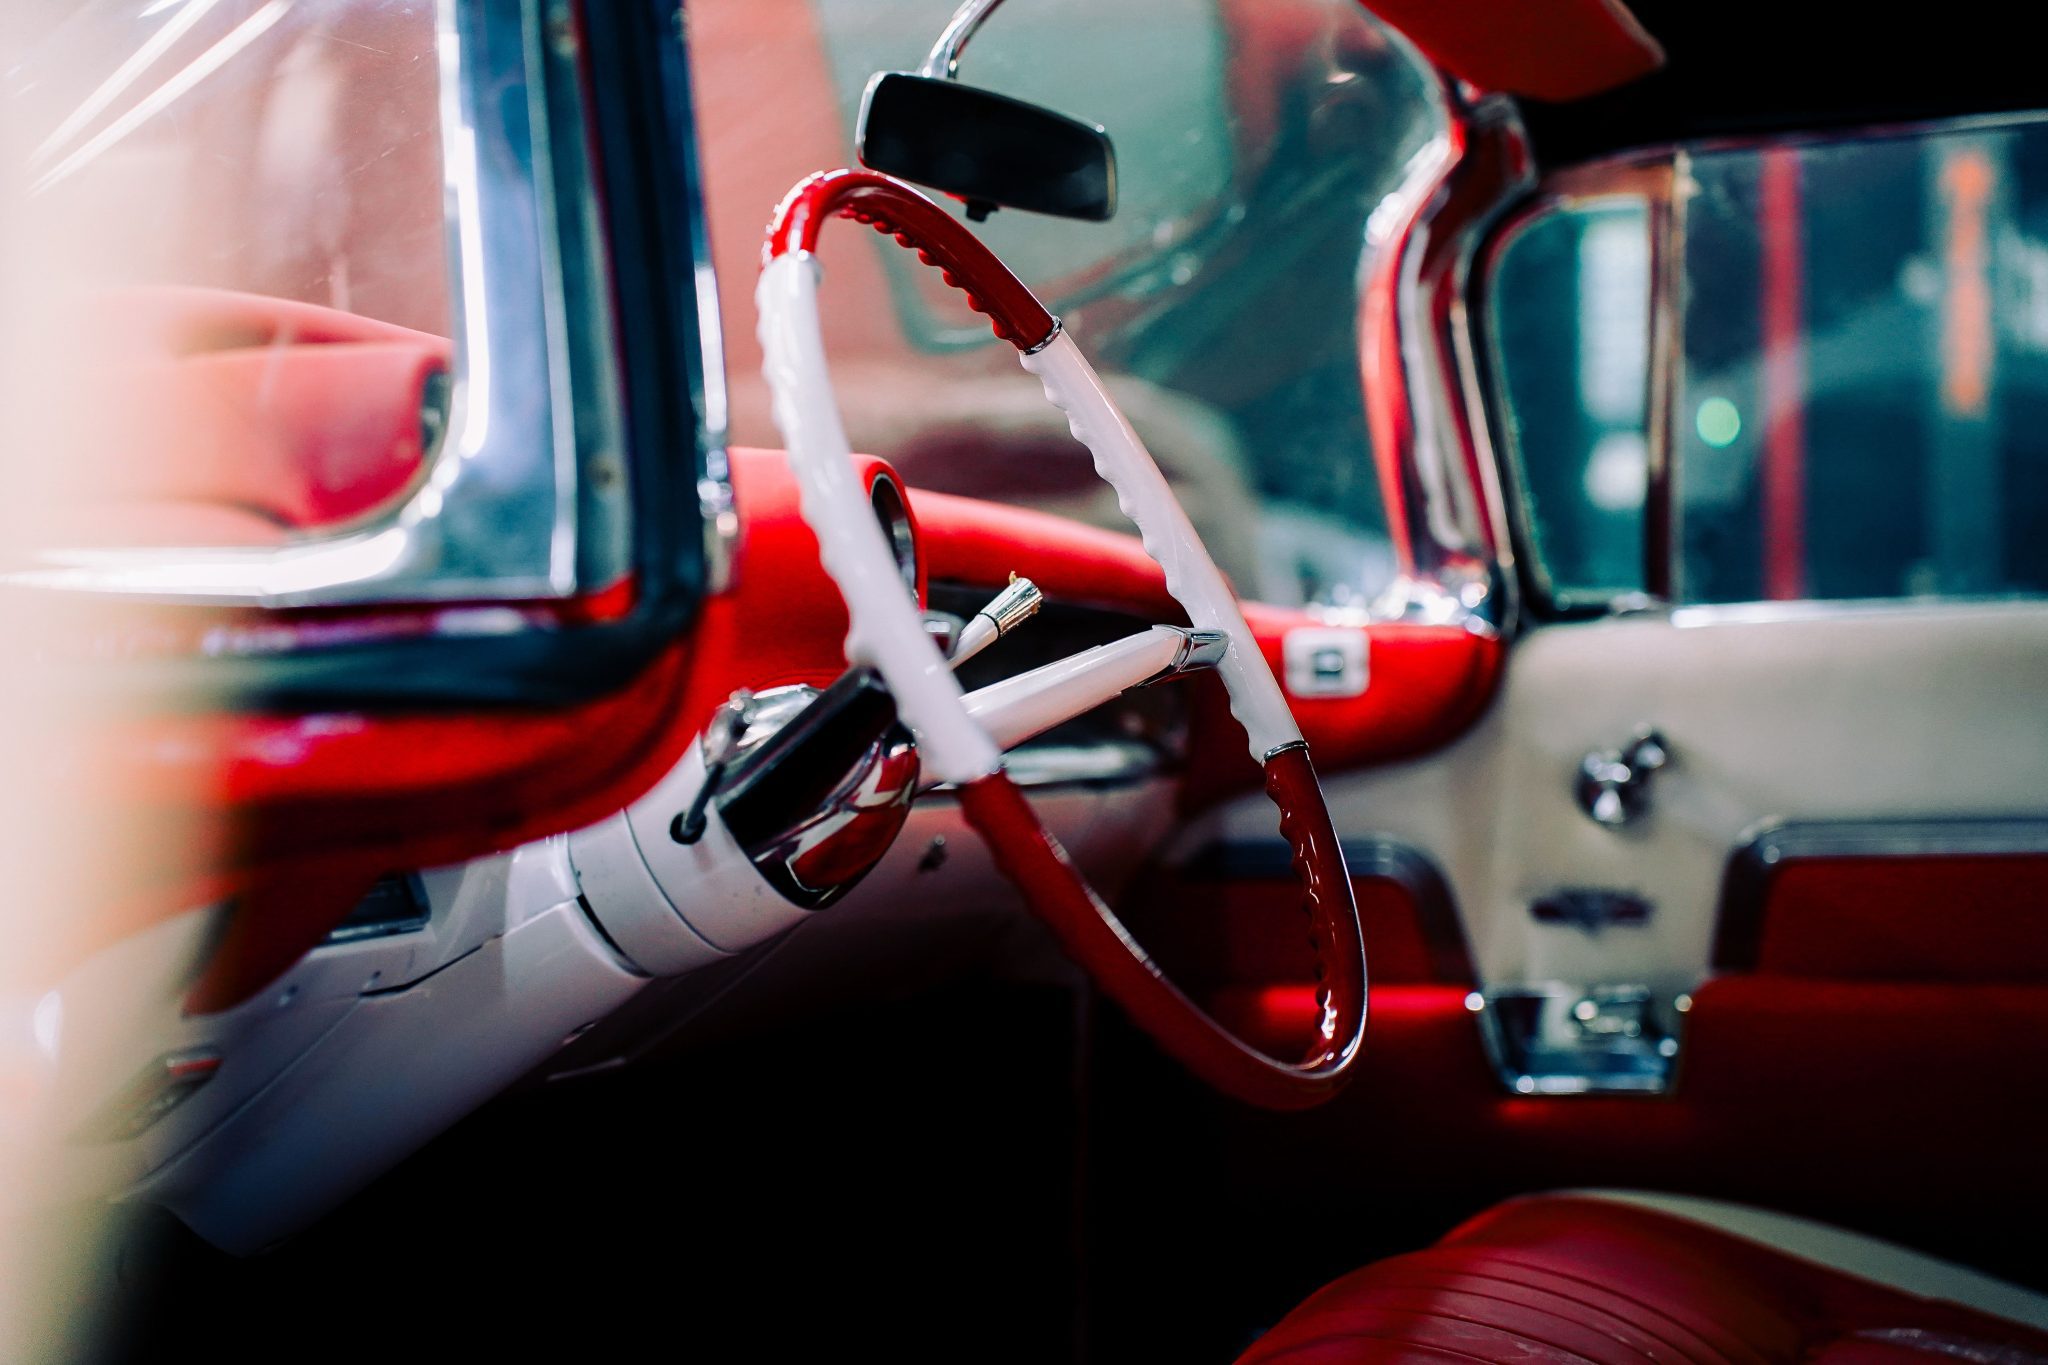
A classic car or vintage truck interior can look overwhelming when everything seems worn at once. The seats are cracked, the carpet is faded, the dash is sun-damaged, and the door panels may have seen better days. When the budget is limited, the smartest move is not always to start with the part that looks the worst. The best auto interior restoration plan starts with a clear sequence.

At Raybuck, we believe restoration should be practical, rewarding, and budget-conscious. A good interior plan helps you fix the parts that protect the vehicle, improve comfort, and create the biggest visible improvement without wasting money on the wrong first step.

Key Takeaways

  • Start every auto interior restoration project with safety, drivability, and moisture control before cosmetic upgrades.
  • Flooring should move up the list when there is damp carpet, musty odor, worn padding, or signs of floor pan rust.
  • Seats and upholstery deliver a major comfort and appearance upgrade, but damaged foam or frames should be fixed first.
  • Dash parts, door panels, trim, mats, and sound deadener can finish the interior once the foundation is solid.
  • A budget-conscious restoration plan helps avoid rework by grouping related jobs, such as flooring, padding, and sound deadener.

Did you know? Pulling old flooring can reveal hidden moisture, odor, or rust issues, so it is often one of the most important early steps in a vintage truck interior project.

Why Interior Restoration Needs a Priority Matrix

Interior projects often grow quickly. Once seats come out, you may find bad padding, surface rust, missing hardware, cracked trim, or water damage under the flooring. That is why it helps to rank each repair before ordering parts.

Use the matrix below to decide what to fix first.

Priority Factor Question to Ask Fix First When
Safety Does this affect driving position, control, or visibility? Seats, tracks, pedals, or gauges are unsafe or unreliable
Damage Prevention Is the problem causing rust, odor, mold, or moisture damage? Flooring, padding, or weather-related damage is getting worse
Comfort Does this make the vehicle unpleasant to drive? Seats, heat, noise, or flooring reduce enjoyment
Visual Impact Will this make the interior look dramatically better? Dash, door panels, carpet, and trim are highly visible
Budget Fit Can this be completed properly with available funds? The repair fits the current budget without creating rework

A smart sequence prevents paying twice for the same labor. For example, if the carpet is already coming out, it may be the right time to inspect padding, treat the floor pan, and consider sound deadener before the new flooring goes in.

Priority 1: Safety and Drivability

Start with anything that affects how the vehicle drives or how securely the driver sits. A beautiful interior does not matter much if the seat frame is loose, the tracks do not lock, or the pedal pads are too worn to provide good grip.

Check these areas first:

  • Seat frames and mounting points
  • Seat tracks and adjusters
  • Pedal pads and pedal boots
  • Gauge visibility and basic instrument function
  • Sharp or loose trim near hands, legs, or seat belts
  • Missing hardware around seats and panels

Seat foam also belongs in this category when it affects posture or support. Collapsed foam can make a truck or car uncomfortable and can change the driver’s position behind the wheel. Before replacing seat covers, press down on the seat base and backrest. If the foam crumbles, sags, or feels uneven, plan for foam repair or replacement before installing new upholstery.

Priority 2: Moisture, Odor, and Floor Protection

Flooring should move near the top of the list if there is moisture, odor, or visible damage. Old carpet, vinyl flooring, jute padding, and sound deadening can trap water. If that moisture sits against the floor pan, a cosmetic interior issue can become a rust repair issue.

Inspect the floor area carefully by looking for:

  • Damp carpet or vinyl
  • Musty odor
  • Moldy or deteriorated padding
  • Rust on the floor pan
  • Worn-through areas near pedals
  • Water stains under seats or in footwells

If flooring is badly worn, replacement can improve the appearance of the interior and help protect the structure underneath. This is especially important in a vintage truck interior, where work use, weather exposure, and age often show up first on the floor.

When planning flooring, think in layers. The visible carpet or vinyl is only one part of the job. Padding, backing, sound deadener, sill plates, seat removal, and floor pan preparation should all be considered before the installation begins.

Priority 3: Seats and Upholstery

Seats are one of the most noticeable and most-used parts of any interior. They affect comfort every time the vehicle is driven, and worn upholstery can make the entire cabin feel unfinished.

Use this basic decision guide:

Repair When

  • The upholstery has small cracks or minor tears
  • The seat foam still feels supportive
  • The seat frame is solid
  • The goal is to preserve as much original material as possible

Replace When

  • Seams are split across large areas
  • Vinyl or cloth is brittle, faded, or torn
  • Foam is collapsed or crumbling
  • The seat frame is rusted, broken, or unstable
  • Missing parts make the seat difficult to restore properly

Seat covers and upholstery kits can deliver a major visual upgrade, but they should not be installed over failing foam or damaged frames. Restoring the foundation first helps the finished seat look better and last longer.

For budget-conscious classic car interior parts planning, seats are often a strong second or third phase. They make the vehicle more comfortable, they are highly visible, and they can be completed as a focused project without necessarily replacing every interior part at once.

Priority 4: Dash, Door Panels, and Interior Trim

Once safety, flooring, and seating are under control, move to the parts people notice when they open the door. Dash pads, dash covers, door panels, handles, armrests, and trim pieces can change the look of the cabin quickly.

These items are usually visual priorities unless they affect function. A cracked dash may be unattractive, but a loose door panel that interferes with window operation or door function should move higher on the list.

Good candidates for this phase include:

  • Cracked dash pads or damaged dash covers
  • Faded or broken door panels
  • Missing interior trim
  • Loose armrests or handles
  • Worn kick panels
  • Mismatched color pieces

This is also the stage where planning matters. Before buying one piece at a time, think about the full color and material direction of the interior. Matching black, blue, tan, red, or gray components across different materials can be tricky if purchases are made without a plan.

Priority 5: Sound Deadener, Mats, and Finishing Touches

Finishing touches should not be ignored, but they usually come after the larger repair decisions. Floor mats, trunk mats, trim details, and sound deadener help complete the project and protect the work already done.

Sound deadener may move higher on the list if the flooring is already removed. Installing it while the interior is apart can be more efficient than pulling new carpet or vinyl back out later.

Consider this phase for:

  • Sound deadening mats
  • Floor mats
  • Trunk mats
  • Small clips and fasteners
  • Trim finishing pieces
  • Detail parts that complete the interior

These upgrades may not be the first thing on the list, but they can make the final interior feel more complete, quieter, cleaner, and easier to maintain.

Sample Budget Restoration Sequences

If Your Budget Is $250 to $500

Focus on small parts that improve safety, cleanliness, and first impressions.

Good choices include:

  • Pedal pads
  • Basic trim pieces
  • Floor mats
  • Small hardware
  • Cleaning supplies
  • Minor upholstery repair supplies

If Your Budget Is $500 to $1,500

Choose one major area and do it properly. Flooring, seat covers, padding, or a dash improvement can make a major difference without turning the project into a full interior rebuild.

Best focus areas include:

  • Carpet or vinyl flooring
  • Seat covers
  • Seat foam repairs
  • Sound deadener during flooring work
  • Dash cover or door panel replacement

If Your Budget Is $1,500+

Plan the work in phases. Start with safety and moisture control, then move into seats, flooring, dash, door panels, and trim. Buying parts by year, make, model, and trim level helps keep the project organized and reduces the chance of ordering parts that do not match the vehicle.

Common Mistakes That Waste Interior Restoration Budgets

Avoid these mistakes before starting:

  • Replacing carpet before finding the source of a leak
  • Installing new upholstery over collapsed seat foam
  • Buying parts before confirming year, make, model, and trim
  • Skipping floor pan inspection when flooring is removed
  • Forgetting adhesives, clips, fasteners, and tools
  • Mixing colors or materials without a full interior plan
  • Spending the whole budget on cosmetic pieces while safety items remain unresolved

A restoration budget goes further when every part supports the next step.

Final Restoration Order

For most auto interior restoration projects, the best order is:

  1. Safety and drivability
  2. Moisture, odor, and floor protection
  3. Seats and upholstery
  4. Dash, door panels, and trim
  5. Sound deadener, mats, and finishing touches

Every vehicle is different, but this sequence helps protect your investment and keeps the project moving in the right direction. Whether you are refreshing a classic car interior or planning a vintage truck interior project, start with the repairs that prevent bigger problems, then move toward the upgrades that improve comfort and appearance.

Shop Raybuck’s auto interior restoration parts by year, make, and model to find the right classic car interior parts and vintage truck interior components for your next project. Any questions? Then contact us.

Further Reading

Categories
Restoration

Everything You Need to Know About Truck Door Skins and Repairs

Truck doors take a lot of abuse. Road salt, mud, moisture, stone chips, daily use and old repairs can all lead to rust or damage, especially along the lower edge of the door. Once corrosion starts, it can spread quickly from the inside out, leaving bubbling paint, weak metal or holes in the door skin.

At Raybuck, we know that the right repair panel can make a major difference in the quality and life of a restoration or repair. Whether you are fixing a work truck, restoring a classic pickup or replacing rusted panels on a daily driver, understanding truck door skins can help you choose the right part and avoid doing the same repair twice.

Key Takeaways

  • Truck door skins are the exterior sheet metal panels that are often replaced when lower-door rust, dents or corrosion damage the visible door surface.
  • Lower-door rust often starts when moisture, debris and road salt collect inside the door shell and work through the metal from the inside out.
  • Minor surface rust, small dents and scratches may be repairable, but rust holes, weak metal or large damaged areas usually call for replacement.
  • The inner door bottom should always be inspected before installing a new outer door skin, since hidden rust can cause the repair to fail later.
  • Choosing the correct year, make, model, cab style, side and door position helps ensure the replacement panel fits the truck properly.

Did you know? Bubbling paint on a truck door can be a sign that rust has already started underneath. Have you checked the lower edge of your doors lately?

What Is a Truck Door Skin?

A truck door skin is the outer sheet metal panel of the door. It is the visible exterior surface that gives the door its shape and finish. Door skins are commonly replaced when the outer metal is dented, rusted or damaged, but the rest of the door structure is still usable.

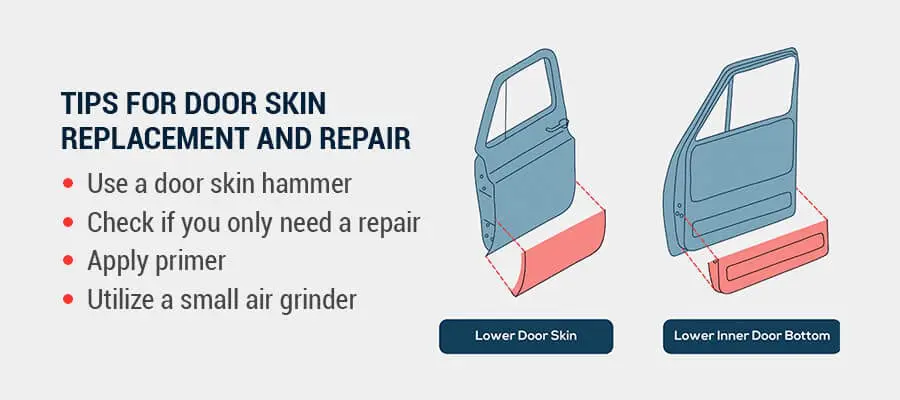
Door skins are different from complete doors or door shells. A full door shell includes more of the door structure, while a lower door skin replaces only the damaged lower exterior section. In many truck repairs, the lower section is the first area to fail because it is exposed to moisture and debris.

Common Door Repair Parts

Part What It Is Used For
Lower door skin Replaces the lower exterior section of the door
Inner door bottom Repairs the inside lower structure of the door
Complete door shell Used when the full door structure needs replacement
Door hardware Includes items such as handles, hinges and latches
Weatherstripping and seals Help keep water, wind and debris out of the cab

Why Truck Door Skins Rust or Fail

Truck door skins often fail because moisture gets trapped inside the door. Dirt, debris and road salt can collect in the lower section of the door shell, creating the perfect environment for rust. Over time, that corrosion can work through the metal and become visible on the outside.

Common causes of door skin damage include:

  • Road salt and winter driving conditions
  • Mud and debris trapped inside the door
  • Moisture that cannot drain properly
  • Paint chips that expose bare metal
  • Dents that crack paint or protective coatings
  • Previous repairs that did not fully remove rust
  • Aging seams, seals and drain areas

On some trucks, rust may begin inside the door before it becomes visible. By the time bubbling paint appears, the metal underneath may already be weakened.

Signs Your Truck Door Skin Needs Repair

A small rust spot may look harmless at first, but lower-door corrosion should not be ignored. The earlier you inspect the damage, the easier it is to decide whether a simple repair is enough or whether a replacement door skin is the better solution.

Look for these warning signs:

  • Bubbling paint near the bottom of the door
  • Rust along the lower door edge
  • Rust around seams or drain holes
  • Soft, thin or flaky metal
  • Holes in the lower door skin
  • Swelling or separation at the door bottom
  • Large dents that are difficult to straighten
  • Rust returning after a filler-only repair

If the rust is only on the surface, repair may be possible. If the metal is perforated or weak, a replacement panel is usually the cleaner and longer-lasting choice.

Door Skin Repair vs. Replacement


Door Skin Repair vs. Replacement

Not every damaged door needs a replacement skin. The best option depends on the extent of the damage, the condition of the underlying metal and the goal of the project.

Repair May Be Enough When:

  • Rust is minor and limited to the surface
  • The metal is still solid
  • Damage is limited to small dents or scratches
  • The repair area is easy to clean, treat and refinish
  • The door bottom is not rotted

Replacement Is Usually Better When:

  • Rust has created holes in the metal
  • The lower edge of the door is weak
  • The outer skin is separating from the inner structure
  • Damage covers a large section of the door
  • The inner door bottom is also corroded
  • You want a cleaner result for restoration work

Replacing the damaged section can save time compared to chasing rust across weakened metal. It also gives you a stronger foundation for bodywork, primer and paint.

Types of Truck Door Repair Parts

Choosing the right part is one of the most important steps in a successful door repair. Raybuck carries a variety of door repair parts for trucks, including lower door skins, inner door bottoms, complete doors, door shells and related hardware.

Depending on the vehicle, you may need more than one repair panel. For example, if the lower exterior door skin is rusted, the inner door bottom may also need attention. If surrounding areas are damaged, related parts such as rocker panels, cab corners, floor pans, weatherstripping and seals may also be part of the repair.

Before ordering, confirm:

  • Year
  • Make
  • Model
  • Cab style
  • Driver or passenger side
  • Front or rear door
  • Outer door skin or inner door bottom
  • Repair height and panel coverage
  • Related parts needed for the full repair

How to Replace a Lower Truck Door Skin

Lower Truck Door Skin

Replacing a lower truck door skin takes planning, patience and the right tools. This is a high-level look at the process, not a substitute for vehicle-specific instructions or professional repair procedures.

Basic Replacement Process

  1. Select the correct vehicle-specific lower door skin.
  2. Remove trim, hardware and any components blocking access.
  3. Cut away the damaged outer door skin.
  4. Inspect the inner door bottom and surrounding structure.
  5. Replace the inner door bottom first if it is rotted.
  6. Test-fit the replacement door skin before final installation.
  7. Prepare bare metal with the correct primer or weld-through coating.
  8. Attach and weld the new door skin as required.
  9. Grind high spots and complete bodywork.
  10. Prime, paint and refinish the repaired area.
  11. Apply cavity wax inside the door shell after painting.

The inner door bottom is especially important. Installing a fresh outer skin over a rotted inner structure can trap the same problem inside the door and cause rust to return.

Tips for a Longer-Lasting Door Skin Repair

A good repair is about more than replacing the visible metal. Rust prevention and proper preparation are just as important as the panel itself.

Use these best practices:

  • Test-fit the panel before welding or final attachment
  • Remove all weak and rusted metal
  • Repair hidden inner-door rust first
  • Use primer on bare metal before joining panels
  • Keep drain areas clear
  • Seal seams properly
  • Paint all exposed repair areas
  • Apply cavity wax inside the door after finishing
  • Inspect nearby panels for related rust

Taking the time to protect the inside of the door can help reduce the chances of corrosion coming back.

Choosing the Right Truck Door Skin

Door skins are not one-size-fits-all parts. Trucks vary by model year, cab configuration, door position and body style. Ordering the wrong panel can lead to extra fabrication, poor fitment or delays.

When shopping for a replacement door skin, start with your truck’s exact year, make and model. Then confirm whether you need a front or rear door panel, driver or passenger side, outer skin or inner bottom. For extended cab and crew cab trucks, cab style can also affect fitment.

Raybuck organizes many repair panels by vehicle application, which helps make it easier to find the right part for your specific truck repair or restoration project.

Why Buy Truck Door Skins From Raybuck?

Raybuck has supplied car and truck parts since 1985. We offer replacement body panels, repair panels and restoration parts for a wide range of vehicles, including trucks, cars, vans and SUVs.

For truck door repairs, Raybuck offers parts such as:

  • Door skins
  • Lower door skins
  • Inner door bottoms
  • Complete doors
  • Door shells
  • Door hardware
  • Weatherstripping and seals

Some Raybuck door repair panels are made from heavy-gauge stamped steel and feature corrosion-resistant EDP coating, depending on the specific application. Raybuck also offers live support to help customers find the correct parts for their repair.

Restore the Door Before Rust Spreads

Lower-door rust rarely gets better on its own. Once moisture, debris and road salt start working inside the door, corrosion can spread into the outer skin, inner bottom and surrounding panels. A timely repair can help protect the truck’s appearance, structure and long-term value.

If the damage is minor, cleaning, treating and refinishing the area may be enough. If the metal is weak, dented or rusted through, a replacement truck door skin may be the better choice. Raybuck makes it easier to find truck door skins, door repair panels and related rust repair parts for the job.

Browse Raybuck’s truck door skins, door repair panels and rust repair parts to find the right fit for your repair or restoration project. Any questions? Then get in touch.

Further Reading

Categories
Repair and Replacement

Benefits of DIY Rust Repair

Rusty vehicle

DIY Rust Repair

For skilled individuals with the right tools, DIY rust repair can offer considerable cost savings. The question isn’t
whether you can fix rust yourself — it’s whether the benefits outweigh the convenience.

They do. DIY vehicle rust repair lets you save costs, control quality and gain the satisfaction of preserving a
vehicle you rely on.

Essential Preparation

Before diving into your rust repair, a solid plan and proper preparation are key:

  • Safety first: Rust repair often involves cutting, grinding and welding. Prioritize safety by wearing personal protective equipment (PPE), including safety glasses or a welding helmet, heavy-duty gloves and a respirator. Have a fire extinguisher readily available when welding.
  • Assessing the damage: Carefully examine the extent of the rust. Probe rusted areas with a screwdriver or pick to determine whether it’s surface rust or has penetrated the metal. This assessment will guide your material needs and repair strategy.
  • Workspace setup: Choose a well-ventilated area free of flammable materials to make the job safer and more efficient. Ensure you have ample lighting to see your work clearly.

Calculating Your True Savings

The cost savings of doing auto rust repair yourself are significant, letting you optimize your investment in your
vehicle. Your material costs for a DIY job typically fall between $30 and $200 and usually include sandpaper, primer, a rust converter chemical and color-matched spray paint.

The financial upside also includes:

  • Efficient material costs: From quality rust repair panels to welding supplies and finishing materials, costs rarely exceed a few hundred dollars, even for extensive work.
  • Labor costs are an investment: Every hour you spend on the repair directly translates into
    financial value. Your effort becomes tangible savings.
  • Building equity with your time: The work increases your vehicle’s resale value, and you capture
    that value directly.

While you might opt for replacement over professional repair for extensive damage, you could consider DIY efforts. This makes restoration feasible for vehicles that might otherwise be considered uneconomical to repair. But if doing the work yourself changes that threshold dramatically, you can justify repairs on vehicles that would otherwise be totaled.

The Benefits of DIY Vehicle Rust Repair

The advantages of repairing car rust yourself extend beyond the financial. When you control the process, you control the result.

You’re the Quality Control

When you handle the repair yourself, you have complete control over the process. You can prioritize thoroughness and quality in line with your high standards.

With DIY, you address and remove rust yourself, ensuring a lasting repair. You can take the time required for proper metal replacement, avoiding issues that can arise from less thorough treatments. When you do the work, you know the rust was actually removed, not just hidden.

Your Project, Your Timeline

DIY car rust repair happens on your schedule. It offers unparalleled flexibility, allowing you to manage your own
schedule for appointments, parts acquisition and unexpected issues, providing a seamless repair experience. Assess the scope, order what you need and start when you’re ready.

For someone who relies on their truck for daily work or business use, this flexibility is beneficial. Work evenings
and weekends without losing vehicle access during business hours. Pause the project when work gets busy and resume when you have time.

Man fixing car part

Quality Parts for Project Success

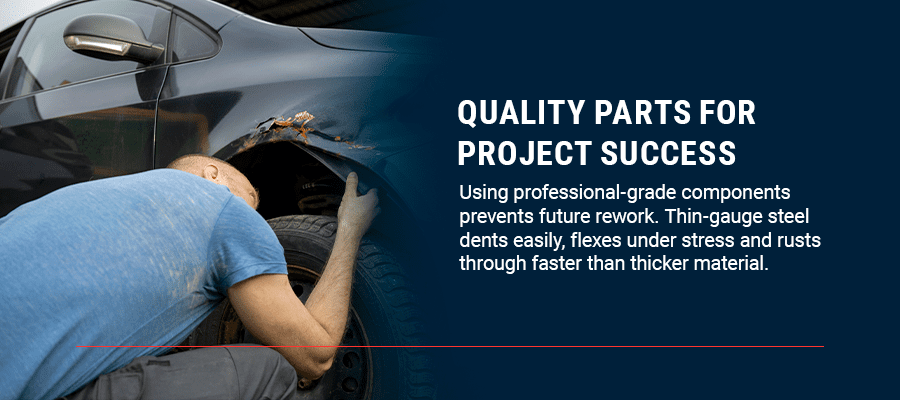
Any lasting rust repair depends on the quality of replacement panels. Doing it yourself gives you complete control over this decision.

Using professional-grade components prevents future rework. Thin-gauge steel dents easily, flexes under stress and rusts through faster than thicker material. If you install a cheap rocker panel now, you’ll have to replace it again in three years. Install a heavy-gauge panel with proper corrosion protection, and the repair outlasts the rest of the truck.

The Personal Return

The benefits of DIY vehicle rust repair go beyond saving money or controlling quality. The personal
rewards include:

  • Tangible accomplishment: You can see the result of your work every time you look at your truck.
    The repair is physical proof of your capability.
  • Skill development: Every project makes you better at metalwork, welding and finishing. Those
    skills transfer to future repairs and other projects.
  • Pride of ownership: Knowing you preserved your vehicle yourself creates a stronger connection to
    it than writing a check to someone else.
  • Increased resale value through your own effort: The repair adds value to your truck, and you
    captured that value by doing the work yourself instead of paying someone else.

Why Your Skill Deserves Professional-Grade Repair Panels

Your DIY auto body rust repair skills are too valuable to waste on substandard materials. Whether the panels you install last five years or 15 depends entirely on their quality.

Gauge Matters

Steel gauge refers to thickness. Lower gauge numbers mean thicker, stronger steel. An 18-gauge rocker panel can withstand impacts from road debris and minor collisions that would dent or puncture a 24-gauge panel. It’s more rigid, holds its shape during installation and doesn’t flex or oil-can after welding. It also provides a better foundation for paint and finish work because it doesn’t distort under heat.

Heavy-gauge steel lasts longer in corrosive environments. Rust eats through metal at the same rate regardless of thickness, but thicker material gives you more time before a problem becomes structural. In salt-belt states, that extra thickness translates directly into additional years of service life.

The Value of OEM-Style Contours

Exact-fit panels save hours of labor and produce superior results. Factory-matched body lines mean panels drop into place with minimal adjustment. You’re welding, not fabricating.

Choosing exact-fit panels and installing them yourself is straightforward when the replacement panel matches the original contours perfectly. Proper fit reduces body filler use. This means filler is used effectively for minor surface imperfections, resulting in a stronger, longer-lasting repair.

The Advantage of EDP Coating

Electro-deposit primer (EDP) is a corrosion-resistant coating applied to bare steel before painting. It covers every surface of the panel, including hard-to-reach areas, with spray coating.

EDP-coated panels arrive ready for final paint prep. The coating acts as a factory-quality primer, bonding directly to the steel at a molecular level. For a repair that’s meant to last, EDP coating is the professional starting point.

Get the Tools You Need for DIY Rust Repair

The cost savings of DIY rust repair are clear, the quality advantage is real, and the personal return is measurable. For anyone with the skills to do rust repair right, the benefits are too significant to ignore. The final step is choosing parts that match your workmanship. Make sure you have the right tools and parts for the job.

Raybuck Auto Body Parts offers heavy-gauge steel panels with OEM-style contours and EDP coating. Every panel is designed for exact fit and long-term durability. Your skill is the most valuable tool you have — don’t waste it on inferior steel. Find the exact-fit repair panels your project deserves now.

Person spraying WD40

Categories
Just For Fun

Fast and Furious Dodge Charger: Why Dom’s Car Became a Muscle Car Icon

A Car Fans Never Forgot

Some movie cars appear for a few scenes and then disappear into the background. The Dodge Charger in the Fast & Furious franchise did the opposite. It became one of the most recognizable vehicles in the series and one of the first cars many fans picture when they think of Dom Toretto.

That kind of staying power did not happen by accident. The Charger brought unmistakable muscle car attitude to the screen from the very beginning. It looked tough, sounded aggressive, and carried a sense of history that made it feel like much more than a simple prop car.

What made Dom’s Charger especially memorable was that it did not rely on styling alone. The car was presented as a blown big block monster, complete with the huge supercharger rising through the hood. That exaggerated look helped make it one of the most unforgettable vehicles in the franchise.

At Raybuck Auto Body Parts, we appreciate vehicles that leave a lasting impression. The Fast & Furious Dodge Charger is a perfect example of a car that captured attention on screen and kept enthusiasts talking long after the credits rolled.

Key Takeaways

  • The Fast & Furious Dodge Charger became one of the most recognizable cars in the franchise and one of the strongest symbols associated with Dom Toretto.
  • Its bold late 1960s styling helped it stand out on screen and made it feel bigger than a typical movie prop.
  • The movie car’s blown engine look, prominent supercharger, and stunt focused setup gave it a larger than life presence.
  • Repeated appearances across the franchise helped turn the Charger into a lasting pop culture icon.
  • For enthusiasts, the Charger’s legacy continues in real garages where classic Mopars are restored, maintained, and appreciated.

Did you know? One of the Charger’s most memorable visual features, the huge blower sticking through the hood, was non-working? And part of its dramatic on screen behavior came from movie specific setup tricks, like adding weight to the trunk area, designed to make it feel even more violent during launches.

Why the Charger Made Such a Strong On-Screen Impression

Dodge Charger Image Credit

The Dodge Charger already had a strong reputation before Hollywood brought it back into the spotlight. In the late 1960s, Charger styling stood out with bold lines, a dramatic front end, and details that helped define the muscle car era. Its distinctive grille and hideaway headlights gave the model a memorable face, and its long fastback shape made it look aggressive even when parked.

That visual identity mattered in a film series built around powerful first impressions. The Charger did not need much introduction when it appeared. It had presence from every angle, which made it a natural fit for the action of The Fast and the Furious.

Beyond styling, the Charger’s mechanical image played a huge role in its screen presence. In the film, Dom’s car is presented as a heavily built big block street machine with a giant blower sticking through the hood, but that setup was used more to create an intimidating visual than to reflect a truly functional street setup. That mattered because the movie wanted the Charger to feel raw, dangerous, and barely contained. It did not just need to be fast. It needed to dominate every scene it entered.

What made it work so well on screen?

  • A shape that looks powerful even when standing still
  • A strong connection to classic American muscle car culture
  • A recognizable silhouette that fans can identify almost instantly
  • A dramatic supercharger setup that made the car feel almost unreal
  • A visual style that felt cinematic without losing its muscle car roots

For a franchise filled with memorable vehicles, the Charger stood apart by feeling both authentic and larger than life.

Why Fans Connect the Charger With Dom Toretto

Some characters are defined by what they say. Others are defined by what they drive. Dom Toretto’s Charger became part of his identity in the eyes of fans. It reflected strength, intensity, and loyalty to old school muscle.

The connection worked because the car felt personal within the story. It did not come across like a random choice pulled in to fill a garage scene. It felt like a machine with history and meaning. That gave it more emotional weight than many of the other cars in the franchise.

The exaggerated blower, blackout look, and barely restrained launch behavior all helped make the Charger feel like an extension of Dom himself. It was not polished or subtle. It was forceful, intimidating, and built to dominate the moment. Fans do not just remember Dom driving fast. They remember that black Charger as part of his identity.

Big Charger Moments Fans Still Remember

The Charger earned its reputation by appearing in major action moments and by returning to the franchise over time. That recurring presence helped it grow from a memorable car into a true franchise icon.

One of the reasons those scenes hit so hard was the way the car behaved on screen. To make the Charger’s launches feel even more dramatic, the production used movie specific tricks to exaggerate its front end lift. One of the details fans still talk about is that weight was added to the trunk to help the car lift the front wheels more easily under acceleration. That gave the Charger an almost mythical quality. It did not just look powerful. It moved like something barely controllable.

That kind of setup mattered in an action movie. The Charger needed to feel different from the tuner cars around it. It had to look heavier, louder, and more violent. The wheel lifting effect helped sell exactly that idea and turned ordinary acceleration into something memorable.

Behind the Scenes Details That Made Dom’s Charger Unforgettable

Part of the Charger’s appeal comes from how the filmmakers exaggerated its personality. The huge blower sticking through the hood gave the car its signature look, even though the setup was used more for visual impact than to represent a realistic street build. The production also reportedly added weight in the trunk to help the Charger lift its front wheels during launches, making it look even more violent on screen. Details like that helped turn the car from a cool classic into one of the most memorable machines in the franchise.

Why Repeat Appearances Matter

When a vehicle returns across multiple films, it gains more than screen time. It builds recognition. Fans begin to associate it with dramatic reveals, major turning points, and the larger personality of the series. That is exactly what happened with the Charger.

Instead of being limited to one standout appearance, the Charger stayed woven into the broader Fast & Furious identity. That gave it a rare kind of pop culture staying power.

Charger Legacy at a Glance

Feature Why it matters to fans
Recognizable model The Dodge Charger was already a respected muscle car before the movies
Strong character link Fans closely associate it with Dom Toretto
Repeating presence It returned in the franchise and stayed relevant
Visual impact Its shape, blackout look, and towering supercharger helped it dominate action scenes
Stunt personality Launch scenes and front wheel lift made it feel wilder than a typical movie car
Cultural crossover It connected movie fandom with classic car enthusiasm

For many viewers, the Charger was not just one cool car among many. It became one of the vehicles that helped define the franchise itself.

Why the Charger Was Bigger Than the Movies

The movies gave the Charger fresh visibility, but they did not create the car’s appeal from scratch. The Charger already had deep roots in muscle car history. What the films did was introduce that style and attitude to a newer generation of fans.

That crossover matters. A younger viewer might first know the Charger from a movie scene, then start learning about classic Mopars, vintage styling, engine builds, and restoration culture. A longtime enthusiast might enjoy seeing a respected model receive major screen attention again. Either way, the Charger benefits from that shared enthusiasm.

At Raybuck Auto Body Parts, we see firsthand how iconic vehicles keep interest alive year after year. A movie can spark attention, but a great car keeps it going.

Keeping a Classic Charger Alive

Classic ChargerImage Credit

Seeing a Charger on screen is one thing. Keeping a classic Charger looking right in the real world is something else entirely.

Older vehicles often need work in key areas that affect both appearance and long term durability. Raybuck Auto Body Parts carries Dodge Charger categories including Body & Sheet Metal, Electrical Lights, Engine & Chassis, Fuel Tanks, Interior, Tools & Supplies, Trim, Weatherstrip, and Windows/Glass.

For enthusiasts, part of the appeal is that the movie car draws attention to the same areas real owners care about. Clean body lines, a strong engine bay presentation, proper trim fit, weather sealing, and interior details all contribute to the overall impact of a classic Charger. The movie version used exaggerated visual tricks, but the admiration it inspires often leads back to real restoration work.

Common Restoration Focus Areas

Exterior structure
Body and sheet metal condition often shape the entire project. Clean lines and proper panel fit matter on a car as visually bold as a Charger.

Interior details
Seats, trim pieces, and cabin components help restore the feel of a classic muscle car.

Sealing and glass related components
Weatherstrip and window related parts play an important role in protecting the vehicle and finishing the project properly.

Fuel and supporting systems
Fuel tanks and supporting components may need attention as older vehicles age.

A car with this much presence deserves careful upkeep. That is part of what keeps legendary models on the road and in the conversation.

The Charger’s Legacy Still Has Pull

The Fast & Furious Dodge Charger remains one of the most recognizable movie cars in modern car culture. Its appeal comes from more than screen time. It also comes from the unforgettable details that made the car feel larger than life, from its blown engine look and towering supercharger to the launch scenes that made it seem almost unchained.

Some vehicles appear in movies. The Charger became part of movie history.

For muscle car enthusiasts, that is part of the fun. The legend lives on in unforgettable scenes, in garage projects, and in the continued appreciation of a car that still knows how to make an entrance.

Keep your classic Mopar looking its best with quality restoration and replacement parts from Raybuck Auto Body Parts.

Further Reading

Categories
Just For Fun

Bullitt Mustang: Why This Fastback Became a Movie Car Legend

The Mustang That Became Movie History

Some cars look good on screen. A select few become part of film history. The Bullitt Mustang belongs in that second group.

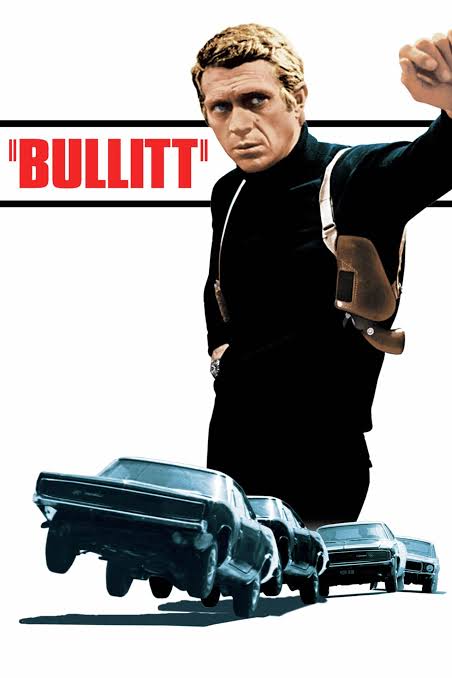
For many enthusiasts, the Bullitt Mustang is more than a classic fastback. It is one of the most recognizable movie cars ever filmed, tied forever to Steve McQueen, the 1968 film Bullitt, and one of the most memorable car chases ever put on screen. That alone would be enough to make it special, but the car itself is what gives the story real staying power.

At Raybuck Auto Body Parts, we appreciate vehicles that continue to capture attention long after their original moment in the spotlight. The Bullitt Mustang is a great example. It combines classic Mustang styling, movie legacy, and the kind of cool that still speaks to enthusiasts decades later.

Key Takeaways

  • The Bullitt Mustang is most closely tied to the 1968 Ford Mustang GT fastback driven by Steve McQueen in Bullitt, powered by a 390 cubic inch FE V8 and a four speed manual transmission.
  • The movie cars were modified for filming, with changes to the suspension, brakes, exterior trim, and overall appearance to make the Mustang tougher, cleaner, and more purposeful on screen.
  • Part of the movie prep included removing and filling the side marker lights so the car would look more like a 1967 Mustang.
  • The famous chase scene helped turn the car into a true movie legend and was widely regarded as the longest continuous car chase yet filmed at the time.
  • The Bullitt Mustang still resonates because it blends classic Mustang style with one of the best known car moments in film.

Did you know? One of the surviving Bullitt Mustangs still showed evidence of filming decades later, including signs of camera mounting from production.

What Exactly Is the Bullitt Mustang?

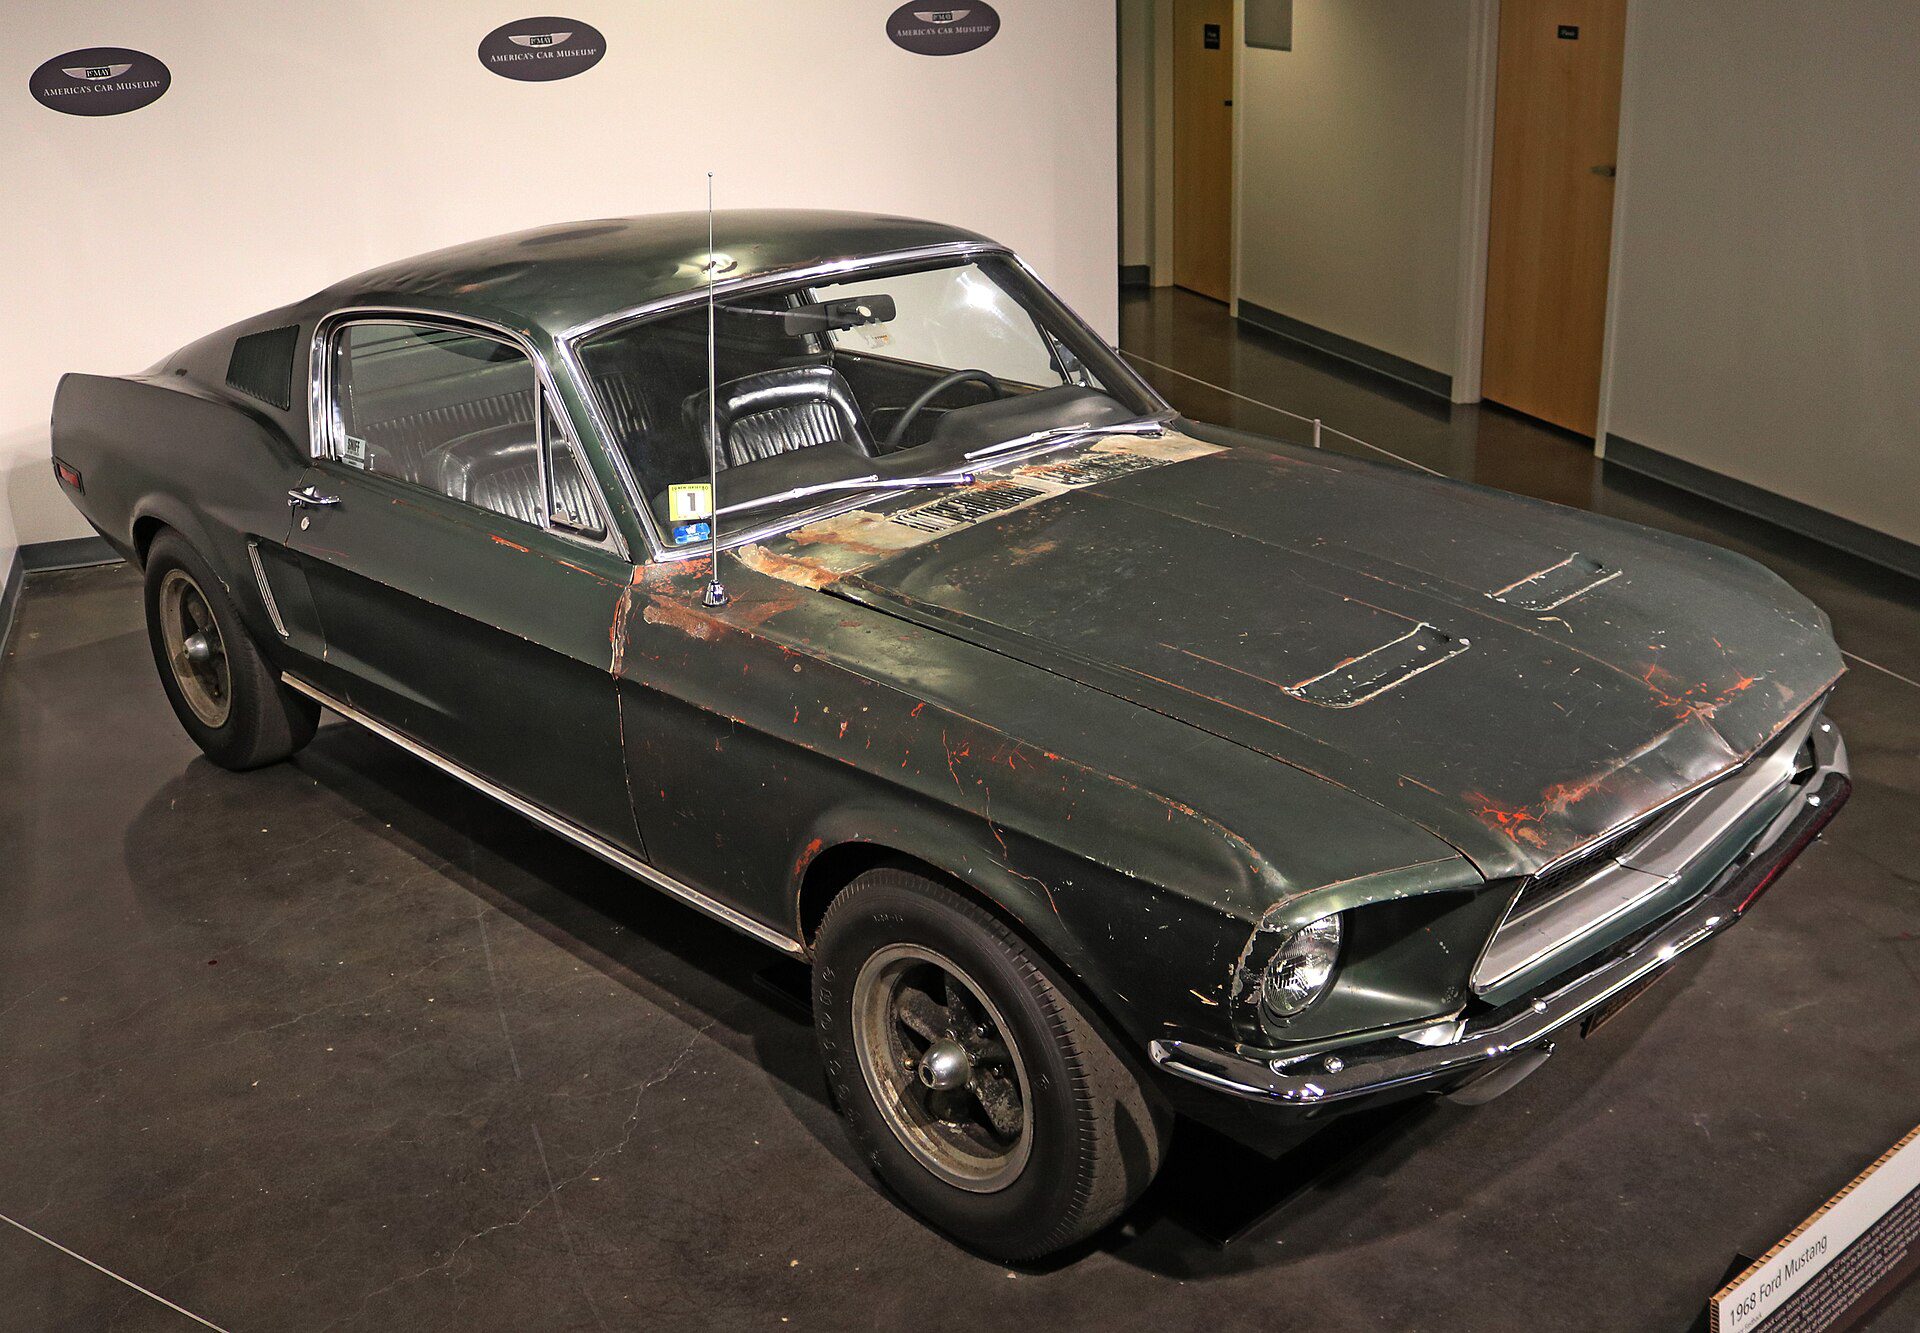
The Bullitt Mustang is most closely associated with the 1968 Ford Mustang GT fastback driven by Steve McQueen in Bullitt. More specifically, the movie cars were Highland Green 1968 Mustang GT fastbacks equipped with Ford’s 390 cubic inch FE V8, rated at 325 horsepower, and backed by four speed manual transmissions. Warner Bros. bought two nearly identical cars for the production.

That matters because the Bullitt car is not just famous because it appeared in a great movie. It was already a strong platform. The 1968 fastback had the proportions enthusiasts love, and for the film the car was further refined to look tougher and cleaner. McQueen reportedly pushed for visual changes including removing some trim, blacking out the grille, fitting American Racing Torq Thrust wheels, and deleting exterior details that made the car look too dressed up.

Technical details that helped define the car

  • Engine: 390 cubic inch FE V8, factory rated at 325 horsepower
  • Transmission: Four speed manual
  • Color: Highland Green
  • Film prep: Engines, brakes, and suspension were modified for chase work
  • Visual cleanup: Trim was removed, the grille was blacked out, and the car was given a more stripped down look for the camera
  • Marker light modification: The side marker lights were removed and filled so the car would read more like a 1967 model on screen

That combination helped the Bullitt Mustang become something bigger than a screen used car. It became a symbol of old school cool.

Why the Bullitt Mustang Looked So Good on Screen

BullittImage Credit

A big part of the Bullitt Mustang’s appeal comes down to shape. The 1968 Mustang fastback had the right look for the camera. It was sleek without feeling delicate, aggressive without trying too hard, and clean enough to leave a strong impression in motion or at a standstill.

The fastback roofline is a major reason the car still gets so much attention. It gives the Mustang a flowing profile that feels athletic and unmistakable. Even among classic Mustangs, the fastback holds a special place for many enthusiasts because it adds a sense of motion to the car’s design.

The movie also benefited from subtle changes that made the car feel more serious. Some trim was removed, the grille was painted black, and the side marker lights were filled, giving the Mustang a cleaner, tougher look than a stock 1968 model.

Design features that helped its screen presence

Fastback profile
The roofline and rear body shape gave the car a dramatic silhouette that worked beautifully on film.

Cleaned up exterior
The movie car’s simplified trim, blacked out grille, and deleted marker lights gave it a more purposeful, less decorative look.

Strong visual attitude
The car had presence, but it did not need oversized styling tricks to get there.

For a movie built around tension, speed, and confidence, the Bullitt Mustang looked exactly right.

The Car Chase That Helped Build the Legend

It is impossible to talk about the Bullitt Mustang without talking about the chase scene. The car became inseparable from one of the most celebrated car chases in film history, and that scene helped elevate the Mustang into another level of fame.

The chase runs for nearly 11 minutes and was widely regarded as the longest continuous car chase yet filmed at the time. That alone helped it stand apart, but the real reason it lasted is the way it feels. For its era, it was unusually long, unusually physical, and much more grounded than what many audiences had seen before.

What made the chase so memorable was not just speed. It was the feel of it. The Mustang came across as raw, grounded, and believable because the production leaned on real driving, real streets, and mechanical noise instead of trick photography. The result still feels convincing decades later.

It is also worth noting that the chase is not actually presented in true geographic order. Even though it feels continuous on screen, it was stitched together from multiple locations, which is why sharp eyed viewers can spot that the route does not unfold in perfect sequence. That is not really a flaw so much as part of the editing achievement. The sequence works because it turns disconnected streets into one coherent burst of tension and momentum.

Why the chase still stands out

  • It was widely regarded as the longest continuous car chase filmed at the time
  • It relied on practical driving and location filming instead of studio fakery
  • It made the Mustang feel like a real machine under stress, not just a prop
  • Its editing created a sense of continuous pursuit even though the route is not shown in true geographic order

For many fans, the chase scene did not simply make the car memorable. It made the car legendary.

Behind the scenes details that made the Bullitt car even cooler

This is the kind of detail Steve was asking for, and it is part of what gives the Bullitt Mustang more depth than a standard movie car story.

The Mustangs were modified for filming, with changes to the engines, brakes, and suspension to handle the punishment of jumps and repeated high speed takes. The cars also received heavy duty suspension related upgrades to better survive the demands of the shoot.

The car’s appearance was intentionally altered as well. McQueen wanted a tougher, more understated look, so trim was removed, the grille was blacked out, and the side marker lights were removed and filled to make the car look more like a 1967 model. The overall effect was more stripped down and aggressive than a normal production Mustang.

There are also surviving traces of how the movie was shot. One of the details often mentioned around the surviving hero car is evidence of camera mounting from production, a reminder that this car was not just dressed for the role, it was physically used to capture one of cinema’s most famous driving scenes.

And on the filming side, one of the more memorable behind the scenes details is that a camera operator was strapped to the outside of a car for part of the shoot to capture the kind of close, physical footage that helped make the chase feel so immediate.

Bullitt Mustang at a Glance

Element Why it matters
1968 Ford Mustang GT fastback The body style gave the car its iconic look
390 FE V8 and four speed manual Gave the car real mechanical credibility on screen
McQueen inspired visual changes Helped create the stripped down Bullitt appearance
Marker lights removed and filled Helped the car read more like a 1967 on screen
Nearly 11 minute chase scene Turned the Mustang into more than just a screen car
Real world stunt preparation Reinforced the car’s authenticity and toughness

Why Enthusiasts Still Love the Bullitt Mustang

Bullitt MustangImage Credit 

The Bullitt Mustang still resonates because it brings together several things enthusiasts already care about. It has classic Mustang styling, a meaningful place in movie history, and a personality that still feels genuine.

That last point matters. The Bullitt Mustang does not come across as flashy for the sake of it. It feels confident, mechanical, and timeless. Those traits help it connect with people who appreciate classic cars for more than just horsepower numbers or collector value.

What keeps the Bullitt Mustang so appealing?

  • It represents a classic fastback shape that never seems to go out of style
  • It carries strong ties to one of cinema’s most memorable driving scenes
  • It feels authentic rather than overproduced
  • It has real behind the scenes substance, from mechanical prep to visual modifications for filming
  • It continues to attract both longtime Mustang fans and newer enthusiasts

Some cars age into nostalgia. The Bullitt Mustang still feels cool on its own terms.

From Movie Fame to Real World Restoration Interest

A car this iconic does more than live on in film clips and posters. It also inspires real admiration in garages, workshops, and restoration projects.

At Raybuck Auto Body Parts, we know classic Mustangs continue to draw serious interest from enthusiasts who want to preserve their style and character.

Raybuck Auto Body Parts carries classic Mustang restoration parts for model years 1964 through 1993, with strong support for the iconic Mustangs of the 1960s and early 1970s. Categories on the Mustang pages include trim, interior, fuel tanks, and window related components, which reflects the kind of work many older vehicles need over time.

Common restoration areas for classic Mustangs

Exterior details
Body appearance plays a huge role in preserving the look that made these cars famous.

Interior refreshes
Cabin components help maintain the feel of a true classic.

Glass and sealing components
Windows and related parts matter for both appearance and long term protection.

Fuel system needs
Fuel tanks and supporting parts can become important on aging vehicles.

That is part of what keeps the Bullitt Mustang relevant. It may be a movie icon, but it also continues to inspire the kind of hands on enthusiasm that keeps classic Mustangs alive.

The Bullitt Mustang Still Has Star Power

Some cars become famous because they appear in a film. The Bullitt Mustang became famous because it brought the right car, the right moment, and the right attitude together in one unforgettable package.

It remains a lasting symbol of classic Mustang style and movie car history. More than that, it still captures the imagination of enthusiasts who appreciate the shape, the story, and the feeling that comes with a true fastback legend.

What gives it extra staying power is that the legend is built on real detail. A 390 powered 1968 fastback, modified for the punishment of filming, visually cleaned up for the camera, altered to look more like a 1967, and thrown into a chase scene that redefined what audiences expected from movie driving. That is a stronger story than nostalgia alone.

That is why the Bullitt Mustang still matters. It is not just remembered. It is still admired.

Keep your classic Mustang looking its best with quality restoration and replacement parts from Raybuck Auto Body Parts.

Further Reading