Categories
Repair and Replacement

Truck Rust Repair Panels: A Must-Have for Restoring Your Pickup

Rust is one of the most common problems pickup truck owners face, especially on vehicles that see regular work use, winter driving, or long-term outdoor storage. What may begin as a small rust spot can quickly spread beneath paint and coatings, weakening body panels and affecting the overall condition of the truck. 

At Raybuck Auto Body Parts, we see firsthand how rust impacts both newer trucks and classic restorations. Truck rust repair panels play a critical role in properly fixing corrosion, restoring strength, and bringing a pickup back to solid, usable condition. Using the right repair panels allows truck owners to replace damaged metal instead of relying on temporary fixes.

Key Takeaways

  • Truck rust repair panels replace damaged metal instead of covering corrosion with temporary fixes.
  • Common rust-prone areas include rocker panels, cab corners, beds, and floor sections.
  • Quality repair panels help restore structural integrity and improve long-term durability.
  • Choosing panels specific to your truck’s make, model, and year improves fit and results.
  • Proper installation and rust prevention help extend the life of repaired areas.

Did you know? Rust often spreads from the inside out, meaning visible damage is usually only part of the problem.

What Are Truck Rust Repair Panels?

Truck Rust Repair Panels

Truck rust repair panels are replacement sections of metal designed to restore areas that have been damaged by corrosion. Rather than covering rust with filler or patches that may fail over time, repair panels replace the affected metal entirely.

Key characteristics of rust repair panels

  • Designed to fit specific makes, models, and years
  • Intended for welding or bonding into place
  • Used when rust damage goes beyond surface corrosion
  • Commonly applied during restorations or long-term repairs

At Raybuck Auto Body Parts, we offer a wide range of rust repair and patch panels to help truck owners address rust correctly and prepare their vehicles for refinishing or continued use.

Common Rust-Prone Areas on Pickup Trucks

Pickup trucks are exposed to moisture, road salt, dirt, and debris, which makes certain areas especially vulnerable to rust. Understanding these areas helps truck owners identify problems early and choose the correct repair panels.

Areas that commonly require repair

  • Rocker panels along the lower sides of the cab
  • Cab corners where moisture and debris collect
  • Truck bed sides and bed floors
  • Wheel arches
  • Floor pans and lower cab sections

These areas often trap water and contaminants, allowing corrosion to start from the inside out. Raybuck carries repair panels for many of these problem areas to support accurate and long-lasting repairs.

Why Quality Repair Panels Matter
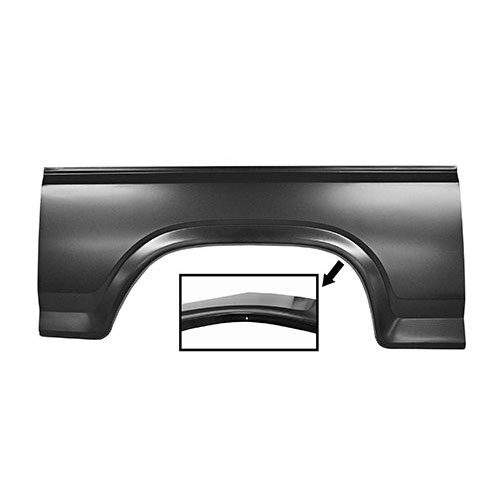
Quality Repair Panels

Replacing rusted metal with quality repair panels provides benefits that go far beyond appearance. Proper panels help restore the original strength of the truck and prevent recurring rust issues.

Structural integrity and safety

Rust weakens metal, especially in lower body sections and floor areas. Installing new panels restores strength and helps maintain the truck’s structural integrity.

Better fit and easier installation

Panels designed for specific vehicles reduce the amount of trimming and adjustment needed during installation. This helps save time and improves the final result.

Long-term durability

New metal panels provide a clean foundation for primer, paint, and protective coatings. This reduces the likelihood of rust returning in the repaired area.

Improved vehicle value

A truck with properly repaired body panels is more appealing to buyers and holds value better than one with visible rust or temporary repairs.

Types of Truck Rust Repair Panels

Different rust problems require different panel solutions. Raybuck offers multiple panel types to match the severity and location of the damage.

Common panel types

  • Patch panels for localized rust
  • Full rocker panels for extensive corrosion
  • Cab corner replacements
  • Bed repair panels for sides and floors
  • Floor pan sections

Comparison of common panel uses

Panel Type Typical Use Best For
Patch Panel Small rusted sections Minor localized damage
Rocker Panel Lower cab sides Structural and cosmetic repairs
Cab Corner Rear cab corners Common rust collection areas
Bed Panel Bed sides or floor Heavy-use or moisture exposure
Floor Pan Interior floors Structural restoration

Choosing the correct panel ensures the repair addresses the full extent of the damage rather than just the visible surface.

How to Choose the Right Repair Panels for Your Truck

Selecting the correct rust repair panels starts with understanding your vehicle and the extent of the corrosion.

Steps to follow

  1. Identify the truck’s make, model, and year
  2. Inspect the rusted area to determine how far corrosion has spread
  3. Decide whether a patch panel or full replacement panel is needed
  4. Confirm panel placement and compatibility before ordering

Raybuck Auto Body Parts organizes repair panels by vehicle application, making it easier to find parts that match your truck. Taking time to evaluate rust damage before ordering helps ensure a smoother repair process.

Installation Tips for Successful Rust Repair

Installing rust repair panels requires preparation and attention to detail. While some repairs are handled by experienced DIYers, others may benefit from professional installation.

Basic installation guidelines

  • Remove all rusted metal before installing the new panel
  • Clean and prep surrounding metal surfaces
  • Test fit the panel before welding or bonding
  • Secure the panel using proper welding or fastening methods
  • Apply primer, seam sealer, and paint after installation

Proper installation is just as important as choosing the right panel. Cutting corners during repair can allow rust to return.

Preventing Rust After Repairs

Once rust repair panels are installed, protecting the repaired areas helps extend the life of the work.

Rust prevention practices

  • Wash the truck regularly, including the undercarriage
  • Apply rust-inhibiting coatings or undercoating
  • Keep drain holes clear in doors and body panels
  • Inspect repaired areas periodically

Raybuck offers rust prevention products that can be used alongside repair panels to help slow corrosion and protect new metal.

Conclusion: Truck Rust Repair Panels

Truck rust repair panels are essential for restoring pickups affected by corrosion. They allow damaged metal to be replaced correctly, improving strength, appearance, and long-term durability. At Raybuck Auto Body Parts, we provide a broad selection of rust repair panels to support truck owners, restorers, and repair professionals. By choosing the right panels, installing them properly, and taking steps to prevent future rust, pickup trucks can remain reliable and solid for years to come.

Browse rust repair panels and restoration parts at Raybuck Auto Body Parts to get your pickup back to solid condition.

Further Reading

Categories
Restoration

Classic Car Emblems and Badges: The Final Touch for Your Restoration

Every classic car restoration reaches a moment where the hard work is mostly done. The paint is cured, panels are aligned, and trim is back in place. What often separates a good restoration from a great one is attention to the smallest details. Emblems and badges play a major role in that final impression. They communicate the vehicle’s identity, trim level, and heritage in a way few other parts can. 

At Raybuck Auto Body Parts, we see emblems and badges as more than decorative pieces. They are the finishing touch that brings the entire restoration together and makes a classic vehicle feel complete again.

Key Takeaways

  • Classic car emblems and badges define a vehicle’s identity and trim level.
  • Missing or incorrect emblems can make an otherwise complete restoration feel unfinished.
  • Choosing the correct emblem requires matching year, model, trim, and mounting style.
  • Interior emblems are often overlooked but play a key role in factory-correct restorations.
  • Proper installation and correct hardware are just as important as the emblem itself.

Did you know? Many classic car emblems were trim-level identifiers first and decorative elements second. Leave your thoughts on which badge defines your favorite classic.

Why Emblems and Badges Matter in a Restoration

Emblems and Badges

Classic car emblems and badges were designed to do more than fill space on a grille or fender. They were carefully styled to reflect brand identity and model distinction.

Visual Identity and Authenticity

Emblems instantly tell a story about the vehicle. A Rally Sport badge, an R/T emblem, or a factory bowtie logo identifies the car’s purpose and personality. When these details are missing or incorrect, the vehicle can look unfinished even if the bodywork is flawless.

Impact on Perceived Value

Buyers and collectors often look closely at trim details. Correct emblems signal care, accuracy, and pride in the restoration. While emblems are relatively small parts, they contribute significantly to how a finished vehicle is judged at shows or during resale.

Choosing the Right Emblems and Badges

Selecting the correct emblem requires more than finding something that looks close. Fitment and accuracy matter.

Match by Year, Make, and Model

Many emblems are specific to a narrow range of years or trims. Mounting points, size, and finish can change from one year to the next. Always confirm:

  • Vehicle year and body style
  • Trim level or package
  • Original emblem location

Original, Licensed, or Reproduction Parts

Restorers typically choose between original parts, licensed restoration parts, or reproduction replacements. Each option has a place depending on availability, budget, and goals for the project.

Common decision factors include:

  • Visibility of the emblem on the vehicle
  • Judged restoration versus driver quality build
  • Ease of installation and mounting accuracy

Common Emblems Replaced During Restoration

Some emblems are more likely to need replacement due to age, exposure, or past repairs. Based on what restorers frequently look for, these categories stand out.

Exterior Emblems

  • Grille emblems that define the front-end look
  • Hood and fender nameplates exposed to weather
  • Trunk and tailgate badges that are often damaged during use

Interior Emblems

Interior badges are often overlooked but make a noticeable difference once installed. Seat back emblems, dash badges, and interior nameplates help restore the factory feel when sitting inside the vehicle.

Typical Replacement Reasons

Reason for Replacement Common Cause
Pitting or corrosion Long-term exposure to moisture
Broken mounting studs Improper removal or age
Faded or peeling finish UV exposure and wear
Missing parts Past body repairs or repainting

OEM Versus Reproduction Emblems

OEM Versus Reproduction Emblems

Choosing between original and reproduction emblems depends on your restoration goals.

OEM and Licensed Restoration Parts

Original or licensed restoration emblems are often preferred for factory-correct builds. These parts are designed to closely match original specifications in shape, finish, and mounting.

Quality Reproduction Options

Reproduction emblems can be a practical solution when originals are unavailable or cost prohibitive. A well-made reproduction still provides the correct look and completes the vehicle visually.

Installation Tips for a Professional Finish

Installing emblems correctly is just as important as choosing the right ones.

Surface Preparation

Before installation:

  • Clean the mounting area thoroughly
  • Remove old adhesive, rust, or debris
  • Protect surrounding paint with masking tape

Alignment and Mounting

Always test-fit before final installation. Measure and mark placement carefully to avoid crooked or uneven emblems. For stud-mounted emblems, ensure holes are clear and properly aligned.

Hardware Matters

Using the correct clips, nuts, or gaskets helps prevent damage and ensures the emblem sits flush against the body. Improvised hardware can lead to loose or misaligned badges over time.

Why Restorers Choose Raybuck Auto Body Parts

At Raybuck Auto Body Parts, we have focused on restoration parts since 1985. Our goal has always been to help enthusiasts finish their projects with confidence.

What Sets Us Apart

  • A strong focus on classic cars and trucks
  • A broad selection of trim and emblem options
  • Live customer support from knowledgeable staff

We understand how frustrating it can be to receive a part that does not fit correctly. Our team is here to help you find the right emblem for your specific vehicle and restoration goals.

Emblems as the Final Step

Many restorers save emblems and badges for the end of a project. That final step often brings the biggest sense of satisfaction. Once installed, the vehicle suddenly looks whole again. Lines flow as intended, trim makes sense, and the car reflects its original character.

Conclusion: Classic Car Emblems and Badges

Classic car emblems and badges may be small, but their impact is significant. They define identity, support authenticity, and complete the visual story of a restoration. Whether you are restoring a classic truck, muscle car, or vintage cruiser, the right emblems help bring your hard work to life. At Raybuck Auto Body Parts, we take pride in supplying restoration parts that help enthusiasts finish strong and enjoy the results of their dedication.

Explore classic car emblems and restoration trim at Raybuck Auto Body Parts and finish your project with the details that matter.

Further Reading

Categories
Restoration

Why Rust Prevention Coatings Are a Must Have for Classic Cars: Protect Your Project with ZeroRust

Classic car restoration is as much about preserving heritage as it is about maintaining mechanical and structural integrity. Rust is one of the most persistent threats to any older vehicle, and once it starts, it rarely slows down without intervention. 

At Raybuck Auto Body Parts, we believe that high quality repair panels are only half of the long term solution. Protecting those panels and the surrounding metal with a proper rust prevention coating is equally important. This article explains why rust control matters, how coatings work, and how the ZeroRust product line fits naturally into a restoration process.

Key Takeaways

  • Classic cars face higher rust risk due to age, worn coatings and exposure over time.
  • Rust prevention coatings add essential protection after installing new panels.
  • ZeroRust provides a direct to metal barrier that helps control future corrosion.
  • Proper preparation, seam sealing and multi coat application improve long term results.
  • Routine inspections and touch ups keep vulnerable areas protected throughout the year.

Did you know? Many replacement panels at Raybuck Auto Body Parts arrive with EDP coating to delay rust before you finish the restoration.

Why Classic Cars Are So Vulnerable to Rust

Many classic vehicles face higher rust risk than modern cars. Factory corrosion-protection processes were not as advanced decades ago, and time has weakened whatever coatings were originally applied. Environmental factors such as humidity, road debris, salt exposure and inconsistent storage add to the problem.

Common rust hotspots include:

  • rocker panels and cab corners
  • wheel arches and lower quarter panels
  • floor pans, trunk floors and frame rails
  • hidden cavities, seams, sills and door bottoms

At Raybuck Auto Body Parts we specialize in replacement panels that target exactly these failure points. Many panels have an EDP coating that holds off corrosion until you perform final finishing. Our repair panels are constructed from heavy gauge steel and designed with coverage that helps prevent rust migration after installation when properly protected.

Unchecked rust does more than degrade appearance. It weakens structural components, increases repair costs, reduces vehicle value and often exposes deeper issues. Prevention is far more efficient than cure, and the right coating creates a strong foundation for long term preservation.

How Rust Prevention Coatings Work

Rust Prevention Coating

Rust forms when moisture and oxygen react with unprotected steel. A rust prevention coating solves this problem by creating a barrier that limits exposure to both elements. Surface preparation is essential because a coating can only bond to sound metal or tightly adhered rust.

Common types of prevention coatings

  • direct to metal rust-inhibiting paints
  • underbody or stone-chip undercoatings
  • cavity treatments for enclosed spaces such as sills and inner panels

Key performance traits

  • strong adhesion to properly prepped surfaces
  • durability against abrasion and movement
  • compatibility with finishing layers
  • coverage that reaches complex shapes and edges

At Raybuck Auto Body Parts we often recommend sealing seams first, prepping bare or repaired metal carefully, and applying rust inhibitor before applying primer and topcoat. This layered approach yields significantly better long term protection.

Spotlight on ZeroRust: Rust Prevention Made for Real World Projects

ZeroRust

Raybuck Auto Body Parts offers ZeroRust as a dependable rust inhibitor for classic car restoration. ZeroRust is formulated as a direct to metal, barrier-type rust control coating designed to protect steel surfaces when applied after proper preparation. It is available in multiple formats, including brushable and sprayable options, making it suitable for DIY projects as well as professional restoration work.

ZeroRust is well suited for structural and cosmetic areas where you have addressed rust and need a reliable coating to prevent future oxidation. It can be used on new Raybuck panels after welding or surface preparation, as well as on existing surfaces that have been cleaned of loose rust and contaminants.

Recommended workflow with ZeroRust

  1. Replace or repair metal using Raybuck’s EDP coated or heavy gauge repair panels.
  2. Prepare surfaces by cleaning, scuffing and sealing seams.
  3. Apply ZeroRust to all exposed or repaired metal areas, including wheel wells, interior cavities and undersides.
  4. Finish with paint after curing, or leave ZeroRust as a protective base where a topcoat is not required.

By combining high quality repair panels with ZeroRust, you address both immediate restoration and long term preservation. This is the same process we advocate for customers who want lasting results from their restoration work.

Where and When to Use Rust Prevention Coatings on a Classic Car

Recommended application areas

  • new or replaced panels such as rocker panels, cab corners, wheel arches and trunk floors
  • undercarriage surfaces that receive constant road spray
  • inside sills, behind inner fenders, wheelhouses and other concealed cavities
  • routine seasonal touch-ups, especially after winter driving or long storage

Example inspection schedule

Area Frequency Action
Undercarriage Annually Rinse and inspect coating
Wheel wells and rockers After winter Touch up chips and recoat
Interior cavities Every 2 to 3 yrs Inspect for rust development

At Raybuck Auto Body Parts we encourage owners to pair quality panel replacement with a complete rust-inhibiting strategy. ZeroRust works well as the primary protective layer in this system.

Application Tips for Better Long Term Protection

  • Clean surfaces thoroughly, removing contaminants such as grease, loose rust and old coating materials.
  • Seal seams and joints before applying the rust inhibitor for maximum protection.
  • Apply multiple thin coats instead of one heavy coat and follow all recommended dry times.
  • Mask off sensitive components such as brake parts, suspension hardware and exhaust surfaces.
  • After curing, apply topcoat or final finish if the coated area requires color matching or UV protection.
  • Maintain a simple log that records the coating date, type of coating used and any relevant notes for future inspection.
  • Store the classic car in a dry, well-ventilated space to minimize moisture exposure.

Conclusion: Rust Prevention Coatings for Classic Cars

Rust is a constant threat to classic cars, but it can be effectively managed with the right combination of metal repair and protective coatings. At Raybuck Auto Body Parts we provide high quality replacement panels and rust control products to help owners preserve the vehicles they care about. ZeroRust is a proven partner in that process, offering trusted protection for vintage steel. 

We encourage every restorer to inspect their vehicle, address problem areas, apply a quality rust inhibitor and establish a routine maintenance plan. Explore our product selection or contact our team to get the right materials for your restoration.

Protect your project the right way by choosing quality repair panels and trusted coatings from Raybuck Auto Body Parts. Contact us with any questions.

Further Reading

Categories
Repair and Replacement Tech Articles

How to Repair a Bumper Using Fusor 143 Extreme Plastic Bond Super Fast Set

Repairing a cracked or damaged bumper can be a practical and economical alternative to replacement when the structure is still intact. Many modern bumpers are designed from plastics that respond well to high strength structural adhesives. 

Fusor 143 Extreme Plastic Bond Super Fast Set is one of the products we recommend for this type of repair because it bonds strongly to common bumper plastics and helps restore a clean, long lasting finish with proper preparation. This guide walks through the complete process to help you tackle this repair project confidently at home.

Key Takeaways

  • Fusor 143 provides high strength bonding for common bumper plastics such as TPO, TEO, PP, SMC, ABS and FRP.
  • Surface preparation with the correct Fusor surface modifier is essential for reliable adhesion
  • Applying adhesive on both the backside and front side of the repair creates strong reinforcement.
  • Proper sanding, shaping and refinishing help restore a smooth, factory style appearance.
  • Working efficiently is important because Fusor 143 sets quickly once mixed.

Did you know? Fusor 143 creates an undetectable featheredge when finished correctly, which helps blend repairs into the original bumper surface.

Understanding Why Fusor 143 Works for Bumper Repairs

Fusor 143 Extreme Plastic Bond Super Fast Set 1.7oz-BS143

Bumper covers are typically manufactured from materials such as TPO, TEO, PP, SMC, ABS and FRP. Fusor 143 is formulated for these plastics and is designed specifically for bonding, repairing and refinishing them. 

The adhesive has an extremely fast set time and produces an undetectable featheredge, which makes it well suited for cosmetic repairs like cracks, holes, and splits. It is also an extremely high strength structural adhesive, which helps reinforce the damaged area so it stays intact once the repair is complete.

Bumper repairs often benefit from a product that fills, bonds, and strengthens at the same time. Fusor 143 provides those functions when used with proper surface preparation, including the use of Fusor 601, 602, or 603 Surface Modifier. When applied correctly, the product integrates smoothly into the original surface and provides a reliable bonding layer that can be sanded and refinished.

Tools and Materials NeededTools and Materials

Before starting your repair, assemble the following items so the process goes smoothly from beginning to end.

Adhesives and Surface Preparation

  • Fusor 143 Extreme Plastic Bond Super Fast Set 1.7oz
  • Fusor 601, 602, or 603 Surface Modifier as recommended on the product page
  • Compatible dual cartridge applicator gun
  • Mixing tips for two part adhesives

Tools

  • Plastic safe cleaner or degreaser
  • Clean lint free rags
  • Sandpaper ranging from 80 to 320 grit
  • Plastic spreader or putty knife
  • Masking tape and paper
  • Backing mesh for holes
  • Body filler if needed
  • Plastic safe primer
  • Color matched bumper paint
  • Clear coat

Safety Gear

  • Protective gloves
  • Safety glasses
  • Respirator or mask suitable for sanding dust and fumes

Preparing the Bumper for Repair

Proper preparation is essential for a long lasting repair. Skipping steps or rushing surface prep can affect adhesion and shorten the life of the repair.

Step 1: Inspect and Access the Damage

Look for the full extent of cracks or splits. If the bumper is severely torn, crushed, or missing large sections, replacement may be a better choice. If the damage is manageable, removing the bumper may provide easier backside access, although repairs can be done on the vehicle if needed.

Step 2: Clean the Area

Wash the damaged section to remove dirt and road film. Follow with a plastic safe degreaser to remove oils, waxes and contaminants that prevent adhesion. Dry completely.

Step 3: Sand and Shape

Use 80 to 120 grit sandpaper to roughen the surface several inches around the crack. This creates a mechanical profile for the adhesive. For cracks, cut a shallow V groove along the damaged line to allow Fusor 143 to penetrate and strengthen the repair. If repairing a hole, clean the edges and prepare space for backing mesh.

Step 4: Mask and Prepare for Bonding

Mask nearby painted areas to prevent adhesive from touching intact surfaces. Apply Fusor 601, 602 or 603 Surface Modifier according to instructions to ensure proper bonding. This step is required for the materials listed in the product description.

Applying Fusor 143 to the Repair Area

With prep finished, you are ready to apply the adhesive. Fusor 143 is a fast setting product, so work efficiently and be ready to complete each stage before the set time begins.

Step 1: Load and Prime the Cartridge

Place the Fusor 143 cartridge into the applicator gun. Purge a small amount of material to ensure both components dispense evenly. Attach a fresh mixing tip.

Step 2: Backside Application

For cracks, begin on the back side of the bumper. Align the crack and apply adhesive along the V groove. For holes, place backing mesh behind the opening and apply adhesive to form a reinforced base layer. Smooth the material with a spreader.

Step 3: Front Side Application

Once the backside begins to set, move to the front. Apply a controlled amount of adhesive along the repair. Slightly overfill the area so it can be sanded smooth later. Shape the adhesive enough to minimize high spots but do not try to finish it perfectly at this stage.

Step 4: Allow Full Cure

Follow the instructions on the product packaging for complete set and cure times. While Fusor 143 is an extremely fast set adhesive, full structural strength still requires proper curing. Avoid flexing the bumper during this time.

Shaping, Sanding and Refinishing

Once the adhesive has cured, you can move into sanding and surface finishing to restore the factory appearance.

Step 1: Initial Sanding

Use 80 or 120 grit sandpaper to level the adhesive and blend it into the surrounding plastic. Work gradually to avoid digging into the original surface.

Step 2: Refinement

After rough shaping, switch to finer grits such as 180, 220 and finally 320. Inspect the surface for remaining imperfections. If needed, apply a thin skim of body filler to perfect the cosmetic finish.

Step 3: Primer and Paint

Finish with a plastic safe primer. Lightly sand once more for smoothness, then apply color matched paint and clear coat. Allow each layer to dry fully before moving to the next step.

Step 4: Reinstallation

If you removed the bumper, reinstall it carefully and check for proper alignment.

Performance Notes and Troubleshooting

Tips for Success

  • Work in a temperature controlled area for consistent results.
  • Mix only the amount of adhesive you can apply quickly.
  • Keep surfaces clean during every step of the process.
  • Ensure the surface modifier is fully applied and dry before bonding.

Common Issues

  • Poor adhesion: Usually caused by inadequate cleaning or skipping the surface modifier.
  • Visible lines after painting: The featheredge was not sanded gradually enough.
  • Recurring cracks: The repair may need additional reinforcement or the bumper may be experiencing stress in that specific area.

Product Details at a Glance

Feature Information
Part Number BS143
Product Name Fusor 143 Extreme Plastic Bond Super Fast Set 1.7oz
Adhesive Type Extremely high strength structural adhesive
Set Speed Extremely fast set
Color Black
Recommended Surface Prep Fusor 601/602/603 Surface Modifier
Compatible Plastics TPO, TEO, PP, SMC, ABS, FRP
Typical Applications Bumpers, emblems, door trims, interior and exterior plastic repairs

Final Thoughts – Fusor 143 Bumper Repair Guide 

A damaged bumper does not always need full replacement. With proper preparation and the right adhesive, many common bumper cracks and breaks can be repaired at home. 

Fusor 143 Extreme Plastic Bond Super Fast Set provides the high strength, fast curing performance needed for these repairs when used with the appropriate surface modifier and application techniques. 

At Raybuck Auto Body Parts, we aim to provide reliable products that help customers complete repairs with confidence and professional looking results.

Repair your vehicle with confidence by choosing quality adhesives and supplies from Raybuck Auto Body Parts. Shop our adhesvies today!

Categories
Just For Fun

The General Lee’s 1969 Dodge Charger: TV Legend, Real-World Builds and How to Restore Yours

A Muscle Car That Jumped Into Legend

Few vehicles have earned television immortality like the bright-orange 1969 Dodge Charger known as The General Lee. Launching across creeks and barns in The Dukes of Hazzard, it became a character in its own right. Decades later, the General Lee still fuels the imagination of car enthusiasts and restorers alike. At Raybuck Auto Body Parts, we see that passion every day from customers rebuilding or reviving their Chargers with quality restoration panels and body parts.

Key Takeaways

  • The General Lee is a television icon built from modified 1968–70 Chargers made to look like 1969 models
  • Underneath the style, show cars used 318, 383, or 440 engines and mainly automatic transmissions
  • Hundreds of Chargers were destroyed in stunts; consistency in look was maintained via parts swaps
  • The roof’s Confederate flag draws serious controversy; many restorers now focus on context and craftsmanship
  • Authentic restoration demands attention to body fitment, structure, and correct trim details

Did you know that over 250 Chargers were reportedly used during the show’s production?

What the General Lee Was —and Wasn’t

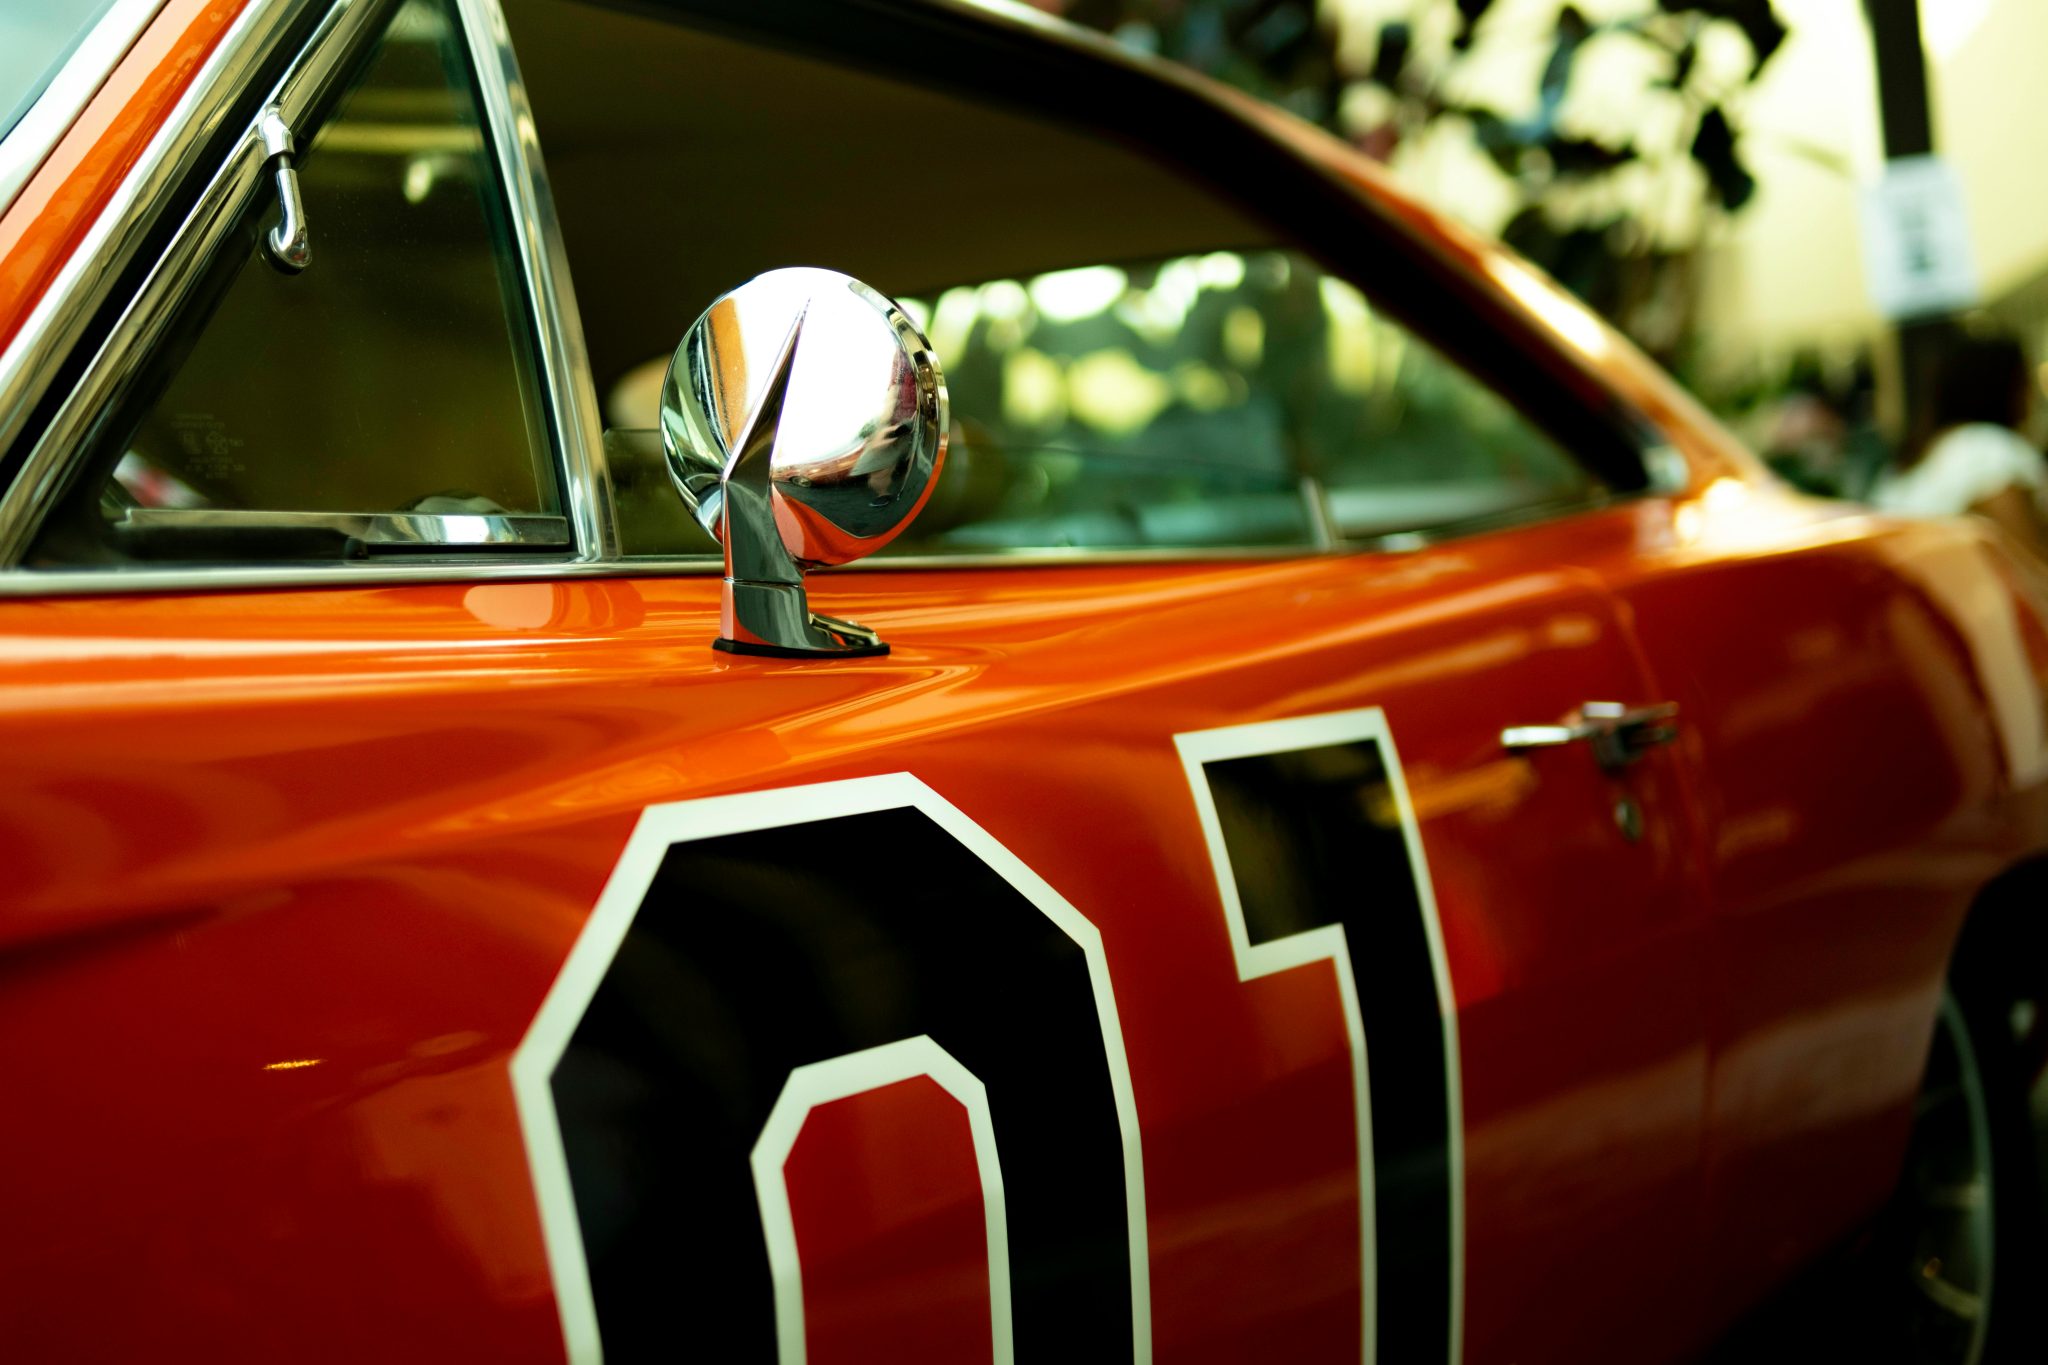
On-screen, the General Lee was introduced as a 1969 Dodge Charger R/T driven by Bo and Luke Duke, but the show’s production used a mix of 1968 to 1970 Chargers converted to look identical. Its defining details became instantly recognizable:

  • Vivid orange paint
  • The number “01” on each door
  • Doors welded shut for window entry
  • A roof flag and “General Lee” script above the doors
  • A horn that played the first notes of “Dixie”

Although the television car is often described as an R/T, the builds varied widely—many weren’t performance models at all. What unified them was their look, sound, and screen presence.

Under the Hood: Engines, Transmission and Stunt Prep

Charger Logo

The cars that portrayed General Lee came with whatever drivetrain the crew could obtain. Typical engines included the 318, 383, and 440 cubic-inch V8s, paired mainly with TorqueFlite automatic transmissions. While fans love the legend of a 426 Hemi, none of the show cars used one.

For jump scenes, mechanics added trunk ballast to balance flight arcs and prevent nose-dives. Stunt cars were sometimes pre-lifted in front to achieve the perfect mid-air stance. Each episode could destroy multiple Chargers, so the team constantly repaired or rebuilt cars to keep production rolling.

Stunts, Swaps and the Fleet of Chargers

The General Lee’s airborne feats required a huge fleet of vehicles. Estimates suggest that more than 250 Chargers were used during the show’s run. Jumps often bent frames beyond repair, and cars that survived were patched up for future close-ups. Mechanics kept spare bodies, sheet-metal panels, and trim pieces on hand to maintain continuity.

Because visual consistency was essential, the crew repainted and modified each car to match the same orange hue, “01” graphics, and General Lee livery. The show’s success eventually inspired a cottage industry of Charger restorations and replica builds that continues today.

Games, Films and Modern Reappearances

After the television run, the General Lee raced into digital form in video games such as The Dukes of Hazzard: Racing for Home (PlayStation) and Return of the General Lee (PlayStation 2 / Xbox). Collectors have built detailed replicas, and original production cars have sold at auction for six-figure prices. A 2005 film reboot reintroduced the car to a new generation, proving the enduring appeal of its design and energy—even as debates around its symbolism grew louder.

Legacy and Controversy

The General Lee’s roof flag has long been a flash point. While The Dukes of Hazzard originally portrayed it as a regional emblem, it is widely recognized today as a symbol tied to racism and the history of slavery. In 2015, television networks pulled reruns and manufacturers ceased producing flag-bearing replicas. Even some car owners, including professional golfer Bubba Watson, chose to remove the emblem from surviving screen-used vehicles.

At Raybuck Auto Body Parts, we believe enthusiasts can honor automotive heritage while acknowledging cultural context. Many modern builders focus on the car’s craftsmanship, design, and performance rather than its roof markings. Recognizing both the joy and the controversy keeps the conversation—and the restoration hobby—grounded in respect.

Restoring a ’68–’70 Charger: Where Authenticity Matters

Restoring a ’68–’70 Charger

When reviving a 1969 Charger or building a General Lee-style tribute, authenticity and structure come first. Key areas demanding precision include:

Body and Fitment

  • Quarter panels and trunk floors
  • Roofline and rear window frame
  • Rocker panels, door skins, and hood alignment

Signature Details

  • Accurate “01” door graphics
  • Roof script placement
  • Proper grille and taillight assemblies

Structural Integrity

  • Frame rails and underbody braces
  • Floor pans and wheelhouses

Typical rust zones on Chargers include the lower quarters, trunk pan, and floor sections—areas where Raybuck Auto Body Parts offers high-quality reproduction panels. We stock Mopar restoration parts covering 1964–1976 models, so whether you’re patching a small section or replacing major sheet metal, we can help maintain your car’s original shape and strength.

Popular Upgrades for Drivability and Stance

Modern drivers often want reliability and comfort without sacrificing period appearance. These upgrades balance both goals:

  • Front and rear disc-brake conversions
  • Heavy-duty sway bars and gas shocks
  • Mini-tub + spring relocation kits for wider tires
  • Subframe connectors for chassis rigidity
  • Electronic ignition and updated fuel delivery

Each improvement enhances control while keeping the silhouette pure. Because our parts catalog covers both factory-style and performance-oriented components, builders can choose how far to modernize their projects.

Parts Spotlight: Common Restoration Panels

Part Purpose
Front fender (LH/RH) Replace damaged or rusted front sections
Quarter panel Repair corroded rear body areas
Trunk floor and extensions Rebuild storage area and structure
Rocker panels Reinforce lower body strength
Roof skin or overlay Correct roof damage or prepare for decal application
Inner wheelhouse Restore support around rear arches
Bumper assemblies and hardware Complete the classic exterior look

These examples represent items available in our Dodge Charger catalog. Every piece is engineered for precise fitment and long-term durability.

Keeping the Legend Alive Responsibly

The General Lee’s 1969 Dodge Charger remains an icon of American television and automotive culture. It captures the freedom and rebellion of a bygone era while reminding us how cultural symbols evolve.

At Raybuck Auto Body Parts, we share the enthusiasm that keeps these Chargers on the road. Whether you’re restoring an original or building a tribute car, we supply the panels, braces, and components that let your craftsmanship shine. Explore our full selection of parts for the 1969 Dodge Charger and discover everything you need to make your project a success.

Further Reading

  • General Lee (car) — A detailed look at the famous 1969 Dodge Charger from The Dukes of Hazzard, including production history, technical notes, and legacy in pop culture.
  • The Dukes of Hazzard  — Background stories and behind-the-scenes insights from the creators, stunt drivers, and mechanics who kept the General Lee flying week after week.