Categories
Tech Articles

Pontiac Firebird vs. Trans Am: History and Trivia

Pontiac Firebird vs Trans Am

The Pontiac Firebird was one of the most iconic muscle cars of the late 1960s through the early 2000s, rivaling other famous models like the Ford Mustang and Chevrolet Camaro. The Firebird went through quite an evolution in its nearly 40-year history, with its engine’s capabilities changing and its body continuously getting reworked and improved. The vehicle didn’t just make an impact on muscle and pony car enthusiasts — it also entered the mainstream pop-culture world, appearing in multiple TV shows and movies.

In this guide, we’ll dive deep into Firebird history so you can learn more about the iconic muscle car’s development and get some of the most interesting facts about the pony car’s many years in production.

Quick Links:

The Pontiac Firebird vs. Trans Am

The Pontiac Firebird and Pontiac Trans Am made a significant mark on the auto industry. Both vehicles were iconic, with a few Trans Ams even making it into movies and TV shows. To understand the mark both the Firebird and Trans Am had on the industry, you should know how they’re different.

Difference between the Pontiac Firebird and Trans Am

What’s the Difference Between the Pontiac Firebird and the Trans Am?

Are the Firebird and Trans Am the same? The truthful answer is yes and no. While all Trans Ams are Pontiac Firebirds, not all Firebirds are Trans Ams. This is due to Trans Ams being a type of Pontiac Firebird started as a specialty package in 1969.

The Trans Am essentially took the Firebird’s performance to the next level. Compared to their Firebird counterparts, Trans Ams offered upgraded horsepower, handling and suspension. Through all four generations, you could purchase a Trans Am instead of the base Firebird if you wanted to take your performance to another level.

History of the Pontiac Firebird

The Pontiac Firebird lasted for four generations, with models in production from 1967 through 2002. General Motors designed the vehicle to be a pony car that could take on the Mercury Cougar and the Ford Mustang. The name came from previous concept cars and the General Motors Firebird prototype cars from the 1950s. These Pontiac Firebirds would go on to be some of the most iconic muscle cars to ever hit the market.

1st Gen Pontiac Firebird

First Generation of Firebirds

The first generation of Firebirds was relatively short-lived, lasting from 1967 to 1969, but this generation made a mark, setting up many more generations.

The first Pontiac Firebird models came in either two-door coupe or two-door convertible options. Though firebirds were built on the Chevrolet Camaro’s platform, they were constructed using different parts, helping to separate the new Firebirds from the Camaro. Unlike the Camaros, the Firebirds featured body-integrated front bumpers and different engines.

These first Firebirds came with a 3.8 L6 engine that offered 220 horsepower. Buyers who wanted to get more performances out of their new car could purchase a Firebird with an upgraded 6.6-liter V8 engine that packed 340 horsepower.

Buyers who chose the L6 engine could also expect to hit a top speed of 114 mph and go 0-60 in just over 10 seconds. Additionally, the engine featured 240 lb.-ft. of torque. Selecting the L6 version of the Firebird also meant you also got 4-speed manual gearbox with Safe-T-Track – Pontiac’s version of posi-traction – as optional equipment.

With the V8 version, buyers received a 3-speed automatic instead of a manual transmission with the same optional equipment offering. Alongside its impressive horsepower, it also featured 430 lb.-ft. of torque. This generation of the Firebird also saw the arrival of the Firebird Trans Am in 1969.

The inaugural Firebird Trans Am released in 1969 got off to a slow start. It was offered as a Trans Am Performance and Appearance Package and cost $725. It had very little media hype around it and no advertising. The name for the car was inspired by the Trans American racing series to allude to the car’s performance.

The base engine that came with the Trans Am was a 400-cid V-8 engine that had a brake horsepower of 335. Other performance advantages Trans Ams gave buyers included a one-inch front stabilizer bar, a heavy-duty suspension system, variable-ratio power steering and seven-inch-wide rims featuring Polyglas F70xl4s.

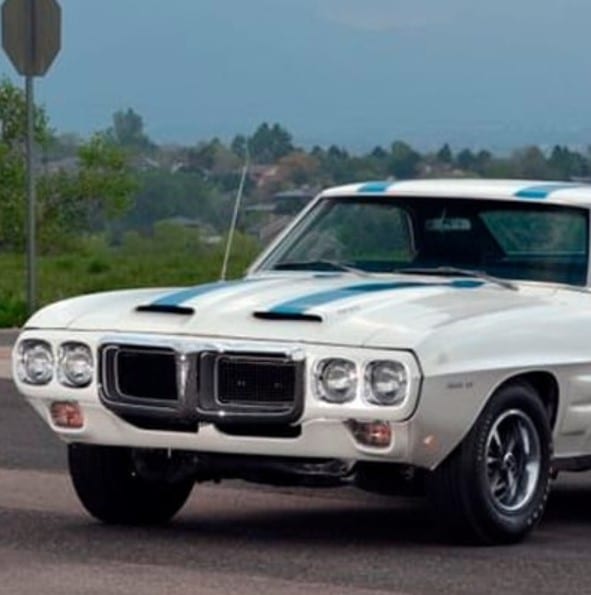
The 1969 Trans Ams came with a unique look as well. They all were painted Polar White and had blue racing stripes across the top of the vehicle’s hood and trunk. The cars also had a 60-inch airfoil across the rear deck. The rear-facing hood scoops were made out of fiberglass and were constructed to help vent the car’s engine bay. Finally, the car had functional air inlets included that were controllable by the driver, who could open or close them.

Though the initial Trans Am didn’t come out to much fanfare, it became one of the most popular options for drivers looking for a high-performing Firebird.

Shop First Generation Firebird Parts »

2nd Gen Pontiac Firebird

Second Generation of Firebirds

Following this first round of Firebirds, the second generation of the vehicle hit the scene in 1970 and ran until 1981. The new generation of Pontiac Firebirds brought with them a new look for the vehicle.

One major appearance change was the front of the Firebird getting two stylish air intakes added to it. Additionally, the Firebird switched from four circular headlights to two large headlights, which changed the look of the car’s front significantly. Convertible lovers were in for a harsh reality during this generation, as a convertible model didn’t carry over from the fourth generation.

This generation gave Firebird buyers even more options that enhanced performance. The 1970 model saw four different engines and three transmissions. Notably, you could get a three or four-speed manual or a two or three-speed automatic, making the car suitable for different types of drivers.

The second generation gave users only an average amount of power, but Pontiac quickly put out a stronger 6.6-liter Ram Air IV motor. In 1971, buyers had access to a 7.5-liter engine. Though it looked like the sky was the limit for the Firebird’s power, the car got hit with new regulations and high fuel prices, diminishing its power potential.

By 1974, the Pontiac’s weight had increased significantly due to new five mph bumper requirements and other safety features. The change to unleaded fuel at the time caused a reduction in compression ratios which dramatically decreased the car’s power output. Regulations relating to limiting carbon monoxide and hydrocarbon also made it so ignition timing took longer, and cams weren’t as aggressive.

By the end of the generation, the Pontiac Firebird’s top power had gone down significantly. The most powerful V8 engine you could get only put out 200 horsepower, a far cry from the early Ram Air engines. One notable featured that came later in the generation was a Firebird decal that gave the car an extra flair.

The Trans Ams of this period saw a decrease in power as well. They started with a 6.6L V8 engine and progressed to a 7.5 L V8 engine, but by the end of their run were down to their top engine being a 4.9 L Pontiac turbo V8. Compared to the standard Firebirds of the period, the Trans Am boasted a much-improved suspension system.

Shop Second Generation Firebird Parts »

3rd Gen Pontiac Firebirds

Third Generation of Firebirds

The third generation of Firebirds would be a strong one, with new model years releasing from 1982 to 1992. While the past generation had been hampered by changing regulations and a need to add new features, the third generation of Firebird was better prepared to handle the new regulations on their industry.

Instead of staying with the heavy design of the Firebird from the past generation, Pontiac constructed the car in a new form that featured a more aerodynamic design. This design was built for efficiency, with a much lighter weight and much easier handling. The company dropped hundreds of pounds off of the previous generation and made the car much smaller. With the loss of weight, they crafted a wedge-like appearance for the car’s body.

The vehicle was a 3-door hatchback coupe that offered four different engine choices at the beginning, making it more customizable to the desires of the buyer. These engine options ranged in their ability, with 90 to 238 horsepower options available, depending on the engine. The final 1982 model arrived with a four or five-speed manual transmission or a four-speed automatic.

Pontiac employees also developed a new chassis that made the vehicle more aerodynamic, working on the car’s development in a wind tunnel to ensure they could achieve the aerodynamic design they wanted. This creation process resulted in windshields that sloped at 62 degrees.

The car also saw a change to the headlights, as they now were hidden underneath panels.  Near the end of the generation, the 1991 Firebird came with a convertible option, bringing back a favorite feature of some.

The Trans Am of this period came with a new appearance meant to give it a more high-tech look. To make their high-tech appearance really work, designers used a matte gray finish on its unique features, like the dual mirrors, turbo wheel covers, grilles, door handles, functional air exhaust and a wing. Like past Trans Ams, this version of the Firebird also offered a boost to power and handling.

Shop Third Generation Firebird Parts »

4th Gen Pontiac Firebirds

Fourth Generation of Firebirds

The fourth generation of Firebirds ran from 1993 to 2002 and was the last generation to hit the market. Advances in motor technology gave Pontiac the ability to put some high-powered options back into the Firebird, calling back to the first and second generation of the car. Though the power called back to earlier generations, the 1993 Firebird was made out of a majority of new parts.

One of the most notable engines from this generation was the LS1 V8, which got up to 325 horsepower. Even besides the more specialized performance-oriented LS1 V8 engine, standard models received a 3.8 L V6 engine from 1996 onwards. This strong engine gave the base Firebird 200 horsepower. Alongside the power options, the Firebird also received anti-lock brakes and airbags to improve the safety of the vehicle.

In 2002, the car went out with a bang, as they released a Firebird Trans Am that featured a WS6 option. With this option added, the 5.7 liter V8 made it so the car could go a quarter of a mile in just over 13 seconds. The 325 horsepower of this final Trans Am made for a powerful car. This Trans Am was also a 35th-anniversary version of the Firebird, featuring yellow paint, custom graphics and black wheels.

Shop Fourth Generation Firebird Parts »

The End of an Era

Even though the final generation of Firebirds got back to their high-powered and high-speed roots, they suffered from a decline in the sports coupe market and a loss in sales. Though the car was still popular with a small audience, GM set aside little funding for the development of new Pontiacs for years and finally ceased production in 2002.

Though the cars are no longer in production, restoration enthusiasts still love to keep the cars on the road, keeping the classic vehicles alive long after they’ve stopped being manufactured. There are tons of aftermarket parts available to assist Firebird owners with restoring their older cars. You can also find plenty of parts and systems that can help you customize the Firebird to your vision.

Fun Facts About the Pontiac Firebird and Trans Am

If you enjoy learning about the history of the Firebird, then you’ll love knowing some of the main facts about the car. Next time you go to a trivia night, you’ll be ready to handle any question about the Firebird by checking out some of the little known facts about the Firebird below:

1. The Trans Am Starred in “Smokey and the Bandit”

A modified Trans Am co-starred with Burt Reynolds in the 1977 movie “Smokey and the Bandit,” making it a cultural touchstone. The Trans Am used in the film was primarily a 1976 model, but it also had its front end replaced by a 1977 model. The movie generated a lot of attention for the car, with Pontiac seeing a significant increase in sales.

2. The Trans Am Also Starred in Other Movies and TV Shows

After starring in Smokey and the Bandit, casting agents recognized the Trans Am’s acting chops. It went on to be featured in the 1979 film “Rocky II,” the 1984 film “Alphabet City,” and continued its roll in the “Smokey and the Bandit” cinematic universe, appearing in “Smokey and the Bandit II” and “Smokey and the Bandit III.” More recently, viewers of the hit TV show, “The Office,” could see the fictional character Dwight Schrute driving around in his 1987 Trans Am in multiple episodes.

3. It Served as the Pace Car for the 1980 Indianapolis 500

The pace car for the 1980 Indianapolis 500 was a 1980 Turbo Trans Am. It was driven by Johnnie Parsons, a retired racer. It’s one of only four Pontiacs to serve as the pace car for the Indianapolis 500.

Pontiac engineer John DeLorean

4. The Pontiac Firebird Was Created by John DeLorean

Most famous for the car he made with his name, John DeLorean originally worked as a Pontiac engineer. At the time, GM management wanted a car to compete with the Mustang and Camaro, leading them to task DeLorean with the responsibility of coming up with the design.

5. The Car Never Reached 400 Horsepower

Even though the vehicle was built to compete with the Chevrolet Camaro, it never reached the power of the rival car. While multiple Camaros have gone over 400 horsepower, the Firebird only ever topped out at 335 horsepower. This lack of high horsepower was likely due to the Firebird’s focus on handling.

6. The Screaming Chicken Decal Arrived in 1973

One of the most famous parts of the Firebird’s design was its decal that got nicknamed the “Screaming Chicken.” Though the decal’s design was created in 1970, it stayed in the shadows until 1973 when a Pontiac designer saw the logo and demanded it be placed on the car. After 1973, it became a very popular feature on the car.

7. It’s Known for Its Exceptional Handling

The Camaro had the edge over the Trans Am in terms of speed, but the Firebird made up ground by providing greater handling. The car’s big tires, large sway bars and low suspension assisted with the car’s handling and made it seriously fun to drive.

1978 Firebird the Most Popular

8. Most Popular Model Was the 1978 Firebird

The 1978 Firebird was so popular the year it released, that it sold more than any other Firebird ever. It’s no doubt the release of the “Smokey and the Bandit” movie in 1977 helped increase the car’s appeal. This model maintained its staying power, with many buyers interested in it years after its release.

9. The Most Popular Year for the Trans Ams Was 1979

The end of the 1970s was the best for the Firebirds and Trans Am sales. The popular 1978 model was out, and the Trans Am feature in movies and films caused buyers to take an increased interest in the car. This led to 1979 having the highest sales for all Firebirds and specifically for Trans Ams. That year, Trans Am Sales reached 117,109, and total Firebird sales reached 211,454.

10. Least Popular Year for Firebirds Was 1993

While 1978 and 1979 were high points, the car’s sales began to decline, reaching the lowest point in 1993. In that year, only 14,112 Pontiac Firebirds, Formulas and Trans Ams were sold.

11. The First Airbag Came in 1990

It wasn’t until 1990 that a Firebird got an airbag. During an interior design change to the 1990 Trans Am, Pontiac decided to replace the radio control previously featured on the steering wheel with an airbag.

12. The 1969 Firebird Had the Highest Horsepower

One of the earliest Firebirds was also the most powerful. The 1969 Firebird had a WS4 performance package that buyers could add to their car to get a Ram Air IV V8 engine. With this engine installed, it delivered 345 horsepower, higher than any other Firebird that came after it.

13. The Weakest Firebird Was the 1985 4-Cylinder Model

There were a few Firebirds that simply didn’t deliver serious power, with the 1985 4-cylinder model standing out the most. It’s LQ9 2.5L engine only gave drivers 88 horsepower to work with.

The First Trans Am Colors

14. The First Trans Am Featured a Blue and White Paint Job

If you’re trying to restore an original Trans Am, you can increase its authenticity by outfitting it with its original paint job. The first Trans Am’s body was covered in white paint, and it featured some blue stripes across it.

15. They Didn’t Always Have Pontiac Engines

The Pontiac Firebird didn’t just use Pontiac engines. A few years after the car’s production began, the Firebird started to branch out with the type of engines they used to increase their speed and power. The company began by using Chevy engines but switched over to Oldsmobile and Buick engines in 1976.

Shop Firebird and Trans Am Parts

Shop Pontiac Firebird and Trans Am Restoration Parts

If you own a Pontiac Firebird or Trans Am, you can find parts for your car at Raybuck Auto Body Parts. We’re car people just like you, and we’re proud to provide all of our customers with high-quality parts at low prices. If you’re trying to restore your classic car, we have your back, as we offer Firebird and Trans Am parts fitting 1967 through 1989 models.

Browse our inventory of Firebird and Trans Am restoration parts today. If you have any questions, don’t hesitate to contact us — one of our knowledgeable staff members will be ready to help.
Categories
Chevy/GMC

Tri-Five Chevy History

Tri-Five Chevy History

Of all the car models to achieve great popularity in the past century, few have stood the test of time like the Chevrolet Tri-Five. Manufactured from 1955 to 1957, these vehicles have acquired a cult following that has only caused their popularity, and value, to increase.

As a Chevy enthusiast, you appreciate the history that the Tri-Five Chevy cars embody. If owning one of these cars is a dream of yours, we’ll outline some of the major differences to help with your decision.

Quick Links:

Tri-Five Chevy models

What Is a Chevy Tri-Five Car?

Chevrolet manufactured Tri-Five cars between 1955 and 1957. Tri-Fives are mainly divided into four models — the Bel Air, the Nomad, the 210 and the 150. The 1955 model was also referred to as the “shoebox” because of its squared-off body, which was dramatically different than any previous Chevy car. These cars share many characteristic features of the time period. In the decades since, these vehicles have become a standard representation of 1950s suburbia.

Much of the initial appeal behind Tri-Five cars came from the combination of a more powerful engine and a visually pleasing exterior. These cars broke away from the common appearance of sedans and station wagons to take on a sleeker, Cadillac-inspired look. They also adopted a V8 engine, with the option to have fuel-injected instead of a carburetor.

Millions of these cars were manufactured to meet the widespread residential and business demand, so it’s no surprise that many of them are still around today. Some still exist in their original form, while others have been modified to have a more modern look or performance.

Chevy Bel Air

Chevy Bel Air

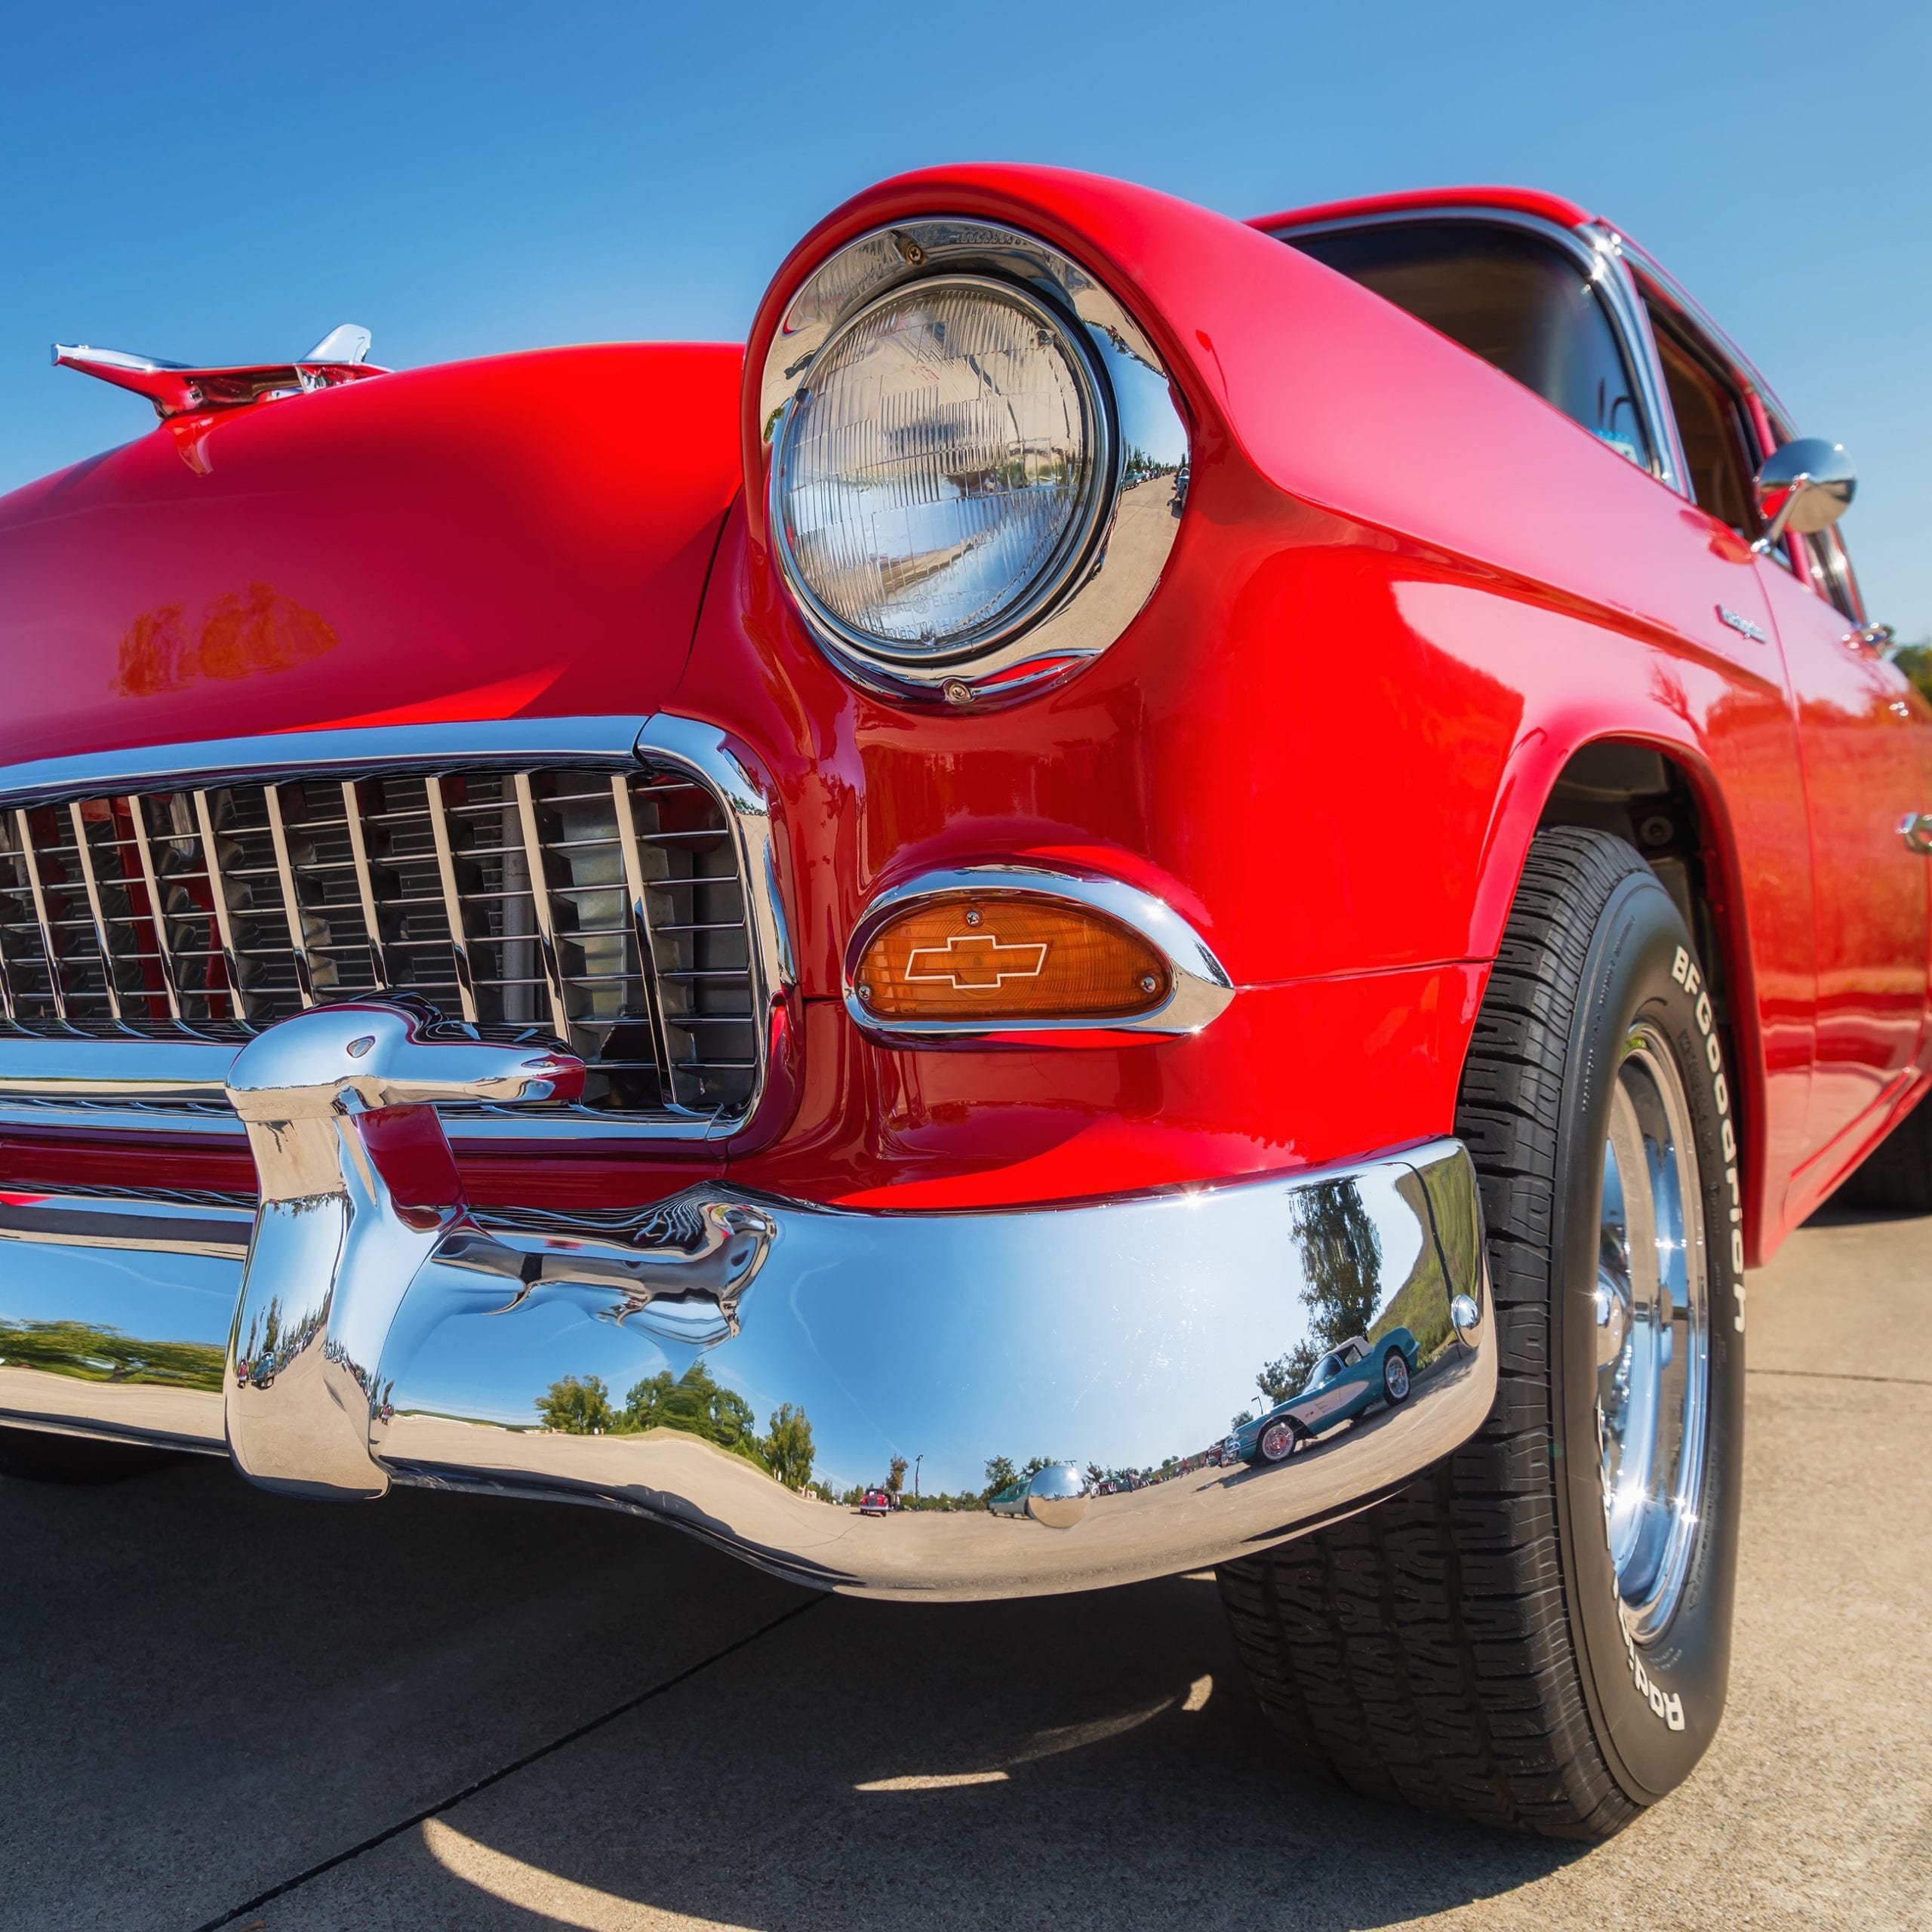
The Chevy Bel Air was the most popular of the Tri-Five cars. The Bel Air was first introduced in 1950, but a second generation was produced in 1955. This second generation was the one that started the “Tri-Five” legacy. Its new design also earned it the name “the Hot One.” Where the first generation only used straight-six engines, 1955 saw the introduction of the V8 engine for Bel Airs. Air conditioning also became available as a feature.

The model primarily targeted suburban homeowners with its sleek look. It succeeded at capturing public interest, receiving praise from publications like Motor Trend and Popular Mechanics. People liked how smoothly it drove and how much power it had. The Bel Air was available in a few different body styles, including.

  • Hardtop, both two-door and four-door
  • Four-door sedan
  • Two-door convertible
  • Station wagon, both two-door and four-door

In addition to the V8 engine and air conditioning, the Tri-Five Bel Air came with several notable visual features. These included:

  • Full wheel covers
  • Chrome spears on the front fenders
  • Chrome bands on hardtop models
  • Stainless steel window moldings
  • Interior carpeting

A few of the Bel Air’s visual elements changed over the years — including the headlight lids, which grew more prominent each year. Likewise, tail fins became more prominent towards the late 50’s. Another element that changed was the grille. In 1955, the grille was smaller and similar to those on Ferraris. It widened in 1956 with an overall positive reception, and remained wide in 1957. 1957 also saw the installation of two hood rockets instead of one.

Another change was the replacement of the torque tube driveline with an exposed driveshaft. This made it easier to perform maintenance on the transmission or clutch. The new 12-volt electrical system also made cold starts easier.

The Bel Air was frequently offered in convertible form. In 1956, some convertible models came with moisture sensors that automatically raised the top in the event of rain. Seat belts were available the same year, but only 7.4% of Bel Air owners were reported to have ordered them.

The following engine options were offered for the Bel Air:

  • 3.5L “Thriftmaster” I6
  • 3.9L “Blue Flame” I6
  • 4.3L “Turbo-Fire” V8
  • 4.6L “Super Turbo-Fire” V8

The 4.6L V8 was known as the “Super Turbo-Fire” V8 due to its high horsepower. First offered in 1957, it came in two types — carburetor or mechanical fuel injection. Carburetors pumped fuel directly from the tank to the engine, whereas fuel injection sprayed fuel into the air being combusted in the engine. Fuel injection allowed for a smoother throttle response in the Bel Air, and cars with this type of engine were nicknamed “fuelies.”

Production of the Bel Air continued into 1958, proving to be a greater financial asset for Chevrolet that year than in 1957. Due to the styling changes, the post-1957 models were not viewed as the cultural icon that the Tri-Five models were.

Shop Chevy Bel Air Parts »

Chevy Nomad

Chevy Nomad

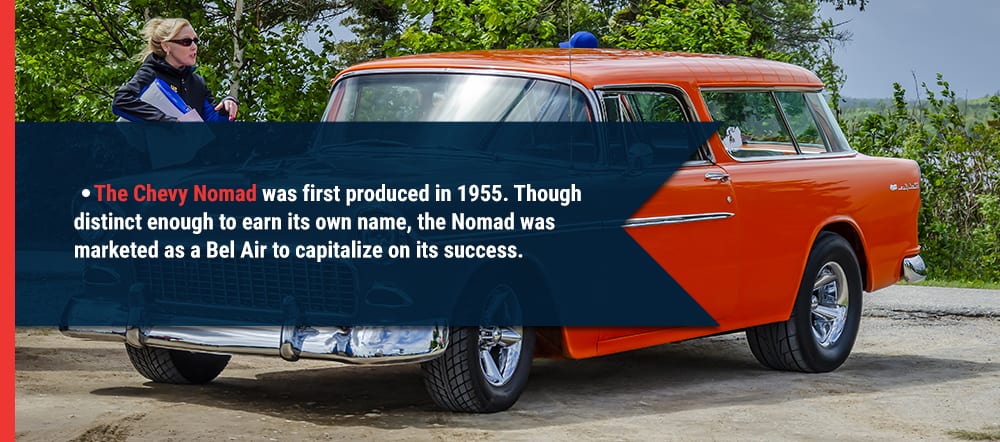
The Chevy Nomad was first produced in 1955. Though distinct enough to earn its own name, the Nomad was marketed as a Bel Air to capitalize on its success. It resembled the Bel Air in many ways, with a new V8 engine and air conditioning options. The Nomad was a sort of hybrid car — with a front resembling a Corvette and the rear of a station wagon, all built on the chassis of a Bel Air sedan.

The Nomad was mainly marketed toward suburban homeowners. However, the Nomad’s distinct build lent it a higher price than the standard Bel Air. It was the most expensive model Chevrolet offered at the time, besides the Corvette. Though it kept the Cadillac-inspired look of the Bel Air, it was built as a two-door hardtop station wagon. This structure gave it a roomier interior than a regular Bel Air.

Many of the Bel Air’s visual features remained part of the Nomad. But the Nomad also bore some new features, including a wrap-around windshield and chrome stripes on the tailgate.

One of the 1955 Nomad’s most distinct elements was the amount of chrome it had. Compared to the Bel Air, it had more decoration, though in 1956 and 1957 the amount of chrome decreased.

The Nomad also experienced the same changes as standard Bel Airs: a widened grille, dual hood rockets, taller tail fins and more prominent headlight lids. Unlike Bel Airs, it had no posts — the metal framework surrounding the window — on the doors. Other changes in 1956 included gas caps that were hidden behind flip-down taillights and padded dashboards.

The Nomad made a name for itself partly due to its appearance. It tended to look sleek and shiny — even the engine looked nice beneath the hood. Most Nomads had a two-tone color scheme inside and out, as was common for cars at the time.

Aside from visual appeal, the top distinguishing feature of the Nomad was its station wagon rear. This structure meant the Nomad didn’t have a convertible option like the Bel Air, but it also meant it came with extra storage space. This space was complete with a flip-down tailgate, usually decorated with bold chrome stripes.

The following engine options were offered for the Nomad.

  • 3.5L “Thriftmaster” I6
  • 3.9L “Blue Flame” I6
  • 4.3L “Turbo-Fire” V8
  • 4.6L “Super Turbo-Fire” V8

Like with the Bel Air, the Nomad included the “Super Turbo-Fire” V8 in both carbureted and mechanical fuel-injected forms in 1957.

Low sales ultimately led to the Nomad being discontinued and replaced by a new body beginning in 1958. But the passing decades gradually led to the Nomad being viewed as an icon of the 1950s.

Shop Chevy Nomad Parts »

Chevy 210

Chevy 210

Where the Bel Air and Nomad were the poster cars of the Tri-Five years, the Chevy 210 was the midrange variety. It served as a more affordable option with reduced flair, though it maintained the basic structure and design of the Bel Air. The model number 210 was created by shortening the production series number 2100 by one digit.

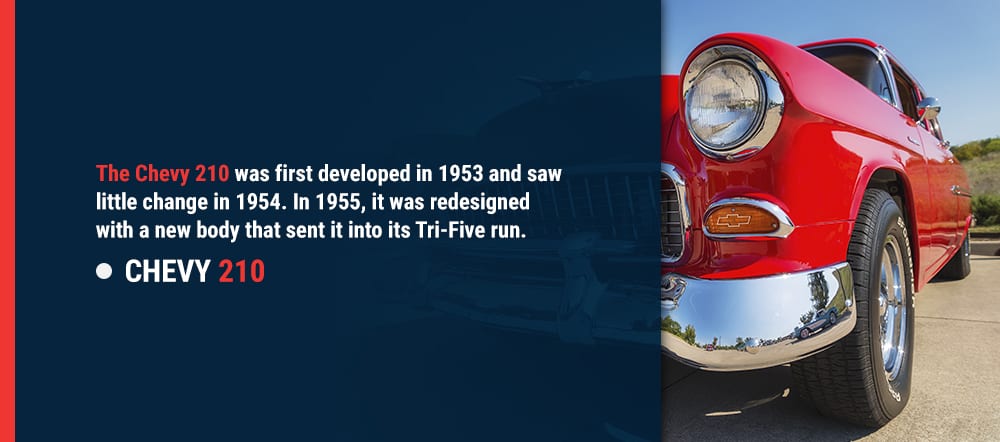
The Chevy 210 was first developed in 1953 and saw little change in 1954. In 1955, it was redesigned with a new body that sent it into its Tri-Five run. The new body was accompanied by a move to V8 engines in place of the straight-six ones.

The 210 was marketed toward lower income homeowners compared to the Bel Air and Nomad. While it wasn’t as flashy as those models, it was just as efficient. Its visual appeal made it one of the more popular cars of the day. Chevy 210s came in a few different body styles, including:

  • Hardtop, both two-door and four-door
  • Four-door sedan
  • Two-door coupe
  • Station wagon, both two-door and four-door

The Chevy 210 had many of the same features as the Bel Air and Nomad, though not as high-grade. There was still plenty to admire, including:

  • Full wheel covers
  • Chrome spears on the front fenders
  • Stainless steel window moldings
  • Rubber flooring

The 210 also underwent many of the same changes as its counterparts over the years. The grille expanded, the headlight lids pushed outward, the hood rockets doubled and the tail fins rose higher.

The engine changed, as well. In 1956 the 210 came with a higher power output rating, and in 1957 it could be made with the “Super Turbo-Fire V8” engine as well. To mark this transition to V8 engines, all applicable 210s came with a V-shaped trim on the hood underneath the Chevrolet logo. Unlike the Bel Air and Nomad, this trim was often painted the same color as the body on the 210.

From 1955 to 1957, the following Chevy 210 engine options were offered:

  • 3.9L “Blue Flame” I6
  • 4.3L “Turbo-Fire” V8
  • 4.6L “Super Turbo-Fire” V8

Like the Bel Air, the 210 initially came in a convertible form. But this option was short-lived — it was only available in 1953, before the start of the Tri-Five years. After that, all 210s were closed-top.

At the end of 1957, the 210 was discontinued. Its replacement came in the form of the Biscayne, which was built to look similar to the 210. While not as sought-after as Bel Airs, 210s are still prized today — particularly rare ones, like the 210 convertible.

Shop Chevy 210 Parts »

Chevy 150

Chevy 150

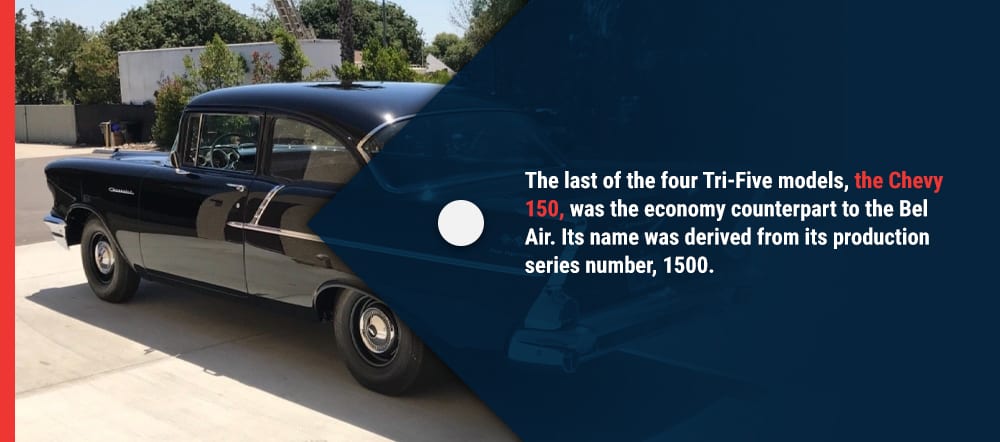
The last of the four Tri-Five models, the Chevy 150, was the economy counterpart to the Bel Air. Its name was derived from its production series number, 1500. It was the cheapest of the four Tri-Fives, though it maintained the same basic shape and structure. Like the 210, it was first developed in 1953 before being remodeled in 1955 for the Tri-Five years. At that time, it gained the V8 engine as an option, though it typically lacked the air conditioning of the Bel Air.

In contrast to the other three models, the 150 was not marketed to homeowners or individual consumers. Though some homeowners bought the 150, residential use was not the main source of revenue the 150 brought in. Because of its inexpensive but efficient build, the 150 worked well as a fleet car for businesses and government organizations.

Any institution that required its workers to use standard-issue vehicles was likely to buy the Chevy 150 in bulk and customize it. One prominent example was the police force. Many 1950s police cars were 150s. Accordingly, the 150 is the model of choice for many current-day film and television depictions of 1950s police cars.

The Chevy 150 came in the following body styles during the Tri-Five years:

  • Sedan, both two-door and four-door
  • Two-door utility sedan
  • Two-door station wagon

Where the other three Tri-Five models bore a variety of visual features, the 150 had few. It was designed to be efficient rather than attractive. Next to a Bel Air, it might be seen as bland because the vehicle looked much less sleek than its counterparts. Besides the lack of chrome trim, it also had less prominent tail fins and headlight lids. It also didn’t automatically include accessories like mirrors and ashtrays to keep the vehicle’s price down. The 150 was never released in a convertible form.

What it lacked in aesthetics, it made up for in speed. With its 2-speed Powerglide automatic transmission, the 150 was a favorite of drag racers. This led to the release of the “Black Widow” variety in 1957, named for the black and white paint job it sported. The Black Widow was specifically designed for drag racing and was equipped with heavy-duty brakes and dual shock absorbers.

The Chevy 150 came with the following engine types:

  • 3.9L “Blue Flame” I6
  • 4.3L “Turbo-Fire” V8
  • 4.6L “Super Turbo-Fire” V8

As always, the “Super Turbo-Fire” V8 was available in both carbureted and fuel-injected forms when it was released in 1957.

Like the Chevy 210, the 150 was discontinued in 1958 and was replaced by the Delray. However, despite it being the cheapest of the Tri-Five models, the 150’s legacy exceeded expectations. In fact, its association with drag racing led to it being used in the 1973 George Lucas film “American Graffiti. In the film, Harrison Ford’s character, Bob Falfa, drives a Chevy 150 while drag racing. This legacy ensures that it remains valuable to Tri-Five enthusiasts today.

Shop Chevy 150 Parts »

4 Tips for Buying a Chevy Tri-Five

If you wish you could buy a Chevy Tri-Five car today, you’re in luck. They may not be produced anymore, but there are still plenty around from the 1950s. There’s a whole market for Tri-Five cars, and it’s not just for elite buyers. If you know what to look for, you can find some good options for a surprisingly low cost. Here are some tips to keep in mind when shopping for a Tri-Five car:

Know what you want

1. Know What You Want

The first thing to determine is the application you have in mind for your Tri-Five car. Do you want to have a perfectly restored model that looks like it came off the 1957 assembly line? Or do you want a less expensive project car that you can restore and modify yourself? Depending on what you’re looking for, you’ll need to keep an eye out for different things. Different cars are sold with different intentions in mind — whether that be modification or preservation. Aim to find a vehicle that best fits your needs and intended application.

Focus on the strengths of each model

2. Focus on the Strengths of Each Model

As you look for options and make a purchase, keep in mind what you want to do with your car once you have it fixed up. Whether you plan to modify it or not, you know a station wagon will give you more storage space than a sedan. If you don’t plan on modifying it, you can bet that a Bel Air in good condition will look nicer than a 150.

While you look around, consider how you picture yourself using the car. If you plan to use it for road trips with lots of baggage, a Nomad might be a good investment. If you want to use the vehicle for drag racing, you’ll likely want to choose a 150. Each model has advantages that may be more valuable to you depending on your end goal.

3. Know Where to Look

You probably won’t have a hard time finding a Tri-Five dealer. With the help of your favorite search engine, you can have a whole list of dealers and other marketplace sites displayed for you in seconds. Even without using the internet, Tri-Fives aren’t too hard to find. There’s no shortage of classic car dealers, and a regular dealer or car shop can probably point you in the right direction.

The great news here is that you can afford to be picky. Do some initial research on which dealers are reputable before you start getting serious in your search. If you find an option that fulfills some of your goals but not all of them, keep looking to see if someone else has a better option.

Check for damage

4. Check for Damage

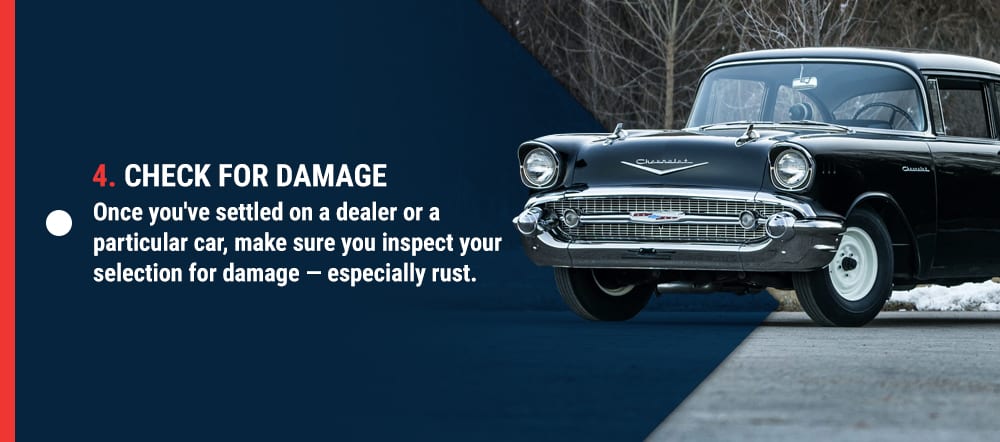
Once you’ve settled on a dealer or a particular car, make sure you inspect your selection for damage — especially rust. Old cars rust very easily, even restored ones, and you want to be aware of any issues before you sign on the dotted line. Take special care to look in areas where water might accumulate after a rain, like the floor braces. Look for signs of body work or a quick paint job that may be covering up damage or corrosion. If you’re looking for a project car, a lot of times you’re better off finding one that is rough but hasn’t been touched, versus one that looks nicer but was done quickly and poorly.

Shop Chevy Tri-Five Parts Online

Once you have your Tri-Five car, there’s a good chance you’ll want to make a few modifications — more than a few, if you plan on improving it. But where can you find new parts for cars that were manufactured 70 years ago? Look no further than Raybuck Auto Body Parts. We offer a wide variety of Tri-Five replacement parts to help you complete your project. To get started selecting the parts you need for your classic Bel Air, Nomad, 210 or 150, browse our selection or get in touch with us today.

Shop Chevy Tri-Five Parts Online

Categories
Tech Articles

The Evolution of the Ford Mustang

Evolution of the Ford Mustang

The Ford Mustang is an icon in American motor vehicle history. Over the last 50 years, few vehicles have earned the same acclaim and following as the Mustang. At any point in the Ford Mustang history timeline, you’ll discover that this was much more than a simple car. All of the Mustang generation years were boldly changing the industry standard and rising to meet consumer expectations.

At Raybuck Auto Body Parts, we have a fond appreciation for classic Mustang history. All six Mustang generations have their own unique hallmarks, and it’s difficult to single out one as the absolute best. From the Fox Body to the Shelby GT to the King Cobra, Ford has given us a parking lot full of amazing Mustang models over the last half of a century.

Quick Links:

Ford Mustang Timeline

The Evolution of the Ford Mustang: Six Generations and Beyond

From 1964 until today, the Ford Mustang history timeline is stacked with an impressive line of high-performance models. Let’s take a ride through Ford Mustang history, cruising through the various Mustang generations to see how this beloved car was first envisioned and how it may look in the future.

First Generation Ford Mustang: 1964 – 1973

When the first Ford Mustang came off of the line in the mid-1960s, it was an instant best-seller and sold more than 400,000 models in the first year alone. More than one million of these cars were built over the next decade. Unveiled by Henry Ford at the World’s Fair in New York, the Ford Mustang was priced at $2,368. The original Mustang was featured in James Bond Goldfinger. The Fastback body style was changed in 1967, and it’s 1968 version appeared in Steve McQueen’s movie Bullitt.

Ford changed the Mustang’s body shape in 1969, making it larger than the previous model. In ’69 and ’70 they also released new trim and performance packages such as the Mach 1 and the Boss. The Mustangs of ’69 and ’70 are some of the most desired models to collectors. Known as a “pony car,” the Mustang launched a new generation of automobiles with countless imitations. By 1971, however, the Mustang’s redesigns were bulkier and notably different from the first editions, forcing Ford to rethink their popular vehicle.

Shop First Generation Ford Mustang Parts »

Second Generation Ford Mustang: 1974 – 1978

A decade after Ford introduced the revolutionary Mustang to the world, they reinvented it for the masses. First released in 1974, the second generation of classic Mustang history was marked by the “Pintostang” — a Mustang design based on the Pinto platform. Known as the Mustang II, this was pitched as an “upscale economy car” as opposed to the “working man’s Thunderbird” of the first generation. These vehicles were smaller but much more fuel-efficient. This generation was also the shortest of the Ford Mustangs.

With a 4-cylinder engine, the Mustang II found success within its first year, nearly selling as many models as the first generation’s maiden year. It won Motor Trend’s Car of the Year award, a title that the Mustang wouldn’t receive again for another two decades. Ford then produced the flashy Cobra II and King Cobra Mustang. Although the Mustang II was able to meet the changing demands of the market, Ford lovers were missing the hallmarks of the original Mustang, which Ford would quickly cater to.

The one great thing that came from this redesign was the front suspension. With its tubular a-arms, coil springs, and rack-and-pinion steering, this compact independent front suspension was quickly adopted up by the hot rod community and is widely mimicked today.

Shop Second Generation Ford Mustang Parts »

Third Generation Ford Mustang: 1979 – 1993

Of the many Mustang generations, the third generation is the longest in Ford Mustang history. Released in 1979, the Fox Body Mustang was a new design blended with a return to form. Incorporating the same Fox platform that was used in the Mercury Zephyr and the Ford Fairmont, this Mustang offered a number of different engine options from an inline-four to a V8. It retained the long hood and short rear deck of past models but added rectangular headlights and a European-esque design.

In 1983, a turbo-charged engine and a new convertible design continued to showcase the Mustang’s power, performance and style. By the end of the 1980s, Ford began manufacturing the Ford Mustang SSP for law enforcement use. Thankfully, they gave civilians their own high-performance model in 1993 known as the Ford SVT Mustang Cobra.

Shop Third Generation Ford Mustang Parts »

Fourth Generation Ford Mustang: 1994 – 2004

1994 marked the 30th anniversary of the original Mustang, and Ford wanted to commemorate it with a new line of models. Celebrating the Mustang generations of days gone, Ford introduced the new SN-95 Mustang. Again, drivers wanted a more recognizable Mustang, so Ford designed the SN-95 with features that resembled the first generation, such as a twin-cowl dashboard. The exterior, however, featured a more modern shape that was larger and stiffer. The 1994 and 1996 models had 5.0-liter and 4.6-liter modular V8 engines, respectively.

The 1994 Mustang GT etched another victory in Ford Mustang history by once again claiming Motor Trend’s Car of the Year award. The GT could go from 0 to 60 in about six seconds and birthed a number of special additions. The SVT Cobra and Bullitt were followed up in 1999 with Ford’s “New Edge” styling, allowing the Mustang to race into the Millennium in a class all its own.

Shop Fourth Generation Ford Mustang Parts »

Fifth Generation Ford Mustang: 2005 – 2014

The fourth generation of the Ford Mustang enjoyed a decade of success, but by 2005, the world was ready for yet another variation of the iconic automobile. Looking back at classic Mustang history, Ford manufactured their newest models with a D2C platform that resembled the style of the first generation car. The fifth generation of the Mustang was a hit and encouraged other automobile manufacturers to resurrect their classic models. Again, the Ford Mustang was setting the pace for the industry.

Along with a brand-new Mustang, the fifth generation also brought back an old favorite: the return of the Shelby Mustang. The Shelby GT500 Mustang and the GT500KR Mustang could reach 662 horsepower with a 5.0-liter engine. Ford also created a fifth generation Bullitt modeled after the ’68 classic.

Shop Fifth Generation Ford Mustang Parts »

Sixth Generation Ford Mustang: 2015 – Present

The modern Mustang is more than just a car. It’s the effort, imagination and innovation of the last half of a century. Ford celebrated the 50th anniversary of the legendary car by releasing the 2015 Mustang. This sixth generation model features a 2.3-liter EcoBoost four-cylinder engine and received a 5-star rating from the National Highway Traffic Safety Administration. The new Shelby GT500 also became the most popular Shelby ever created.

What’s next in the long legacy of Ford Mustang history? The seventh generation is planned for release in 2022, and while there are no official details about body style or what’s under the hood, the rumors we’ve heard already have us in overdrive. The S650, launching in 2022 for the 2023 model year, may be a hybrid, all-wheel-drive system with electric motors on each front wheel backed by a V8 engine that delivers exceptional low-end torque.

Although it’s not official, one thing is for sure: We’ll be ready to test drive the next entry in the Ford Mustang timeline the minute it leaves the line.

Shop Sixth Generation Ford Mustang Parts »

Decoding Classic Mustangs

Decoding Classic Mustangs

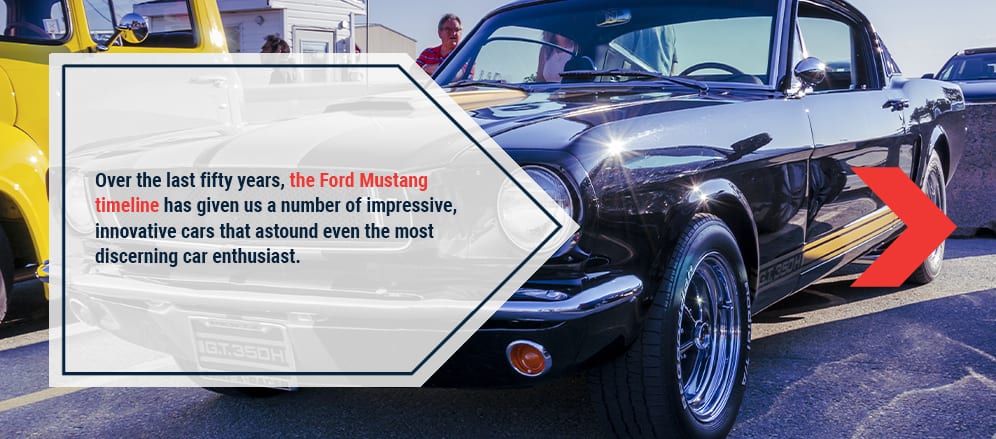
Over the last fifty years, the Ford Mustang timeline has given us a number of impressive, innovative cars that astound even the most discerning car enthusiast. With so many of these beasts on the road, we believe all Mustang lovers should be able to easily identify and learn more about each model using door plate codes, VIN codes and engine identification tags.

Door Plate Codes

Lovers of classic Mustang history can quickly view a list of all original options for models manufactured from 1964 through 1973 via this Ford Mustang door plate decoder. Use the warranty number and door tag information to view this information, keeping in mind that the original door tag may have been changed after an accident. If you don’t have the door tag information, enter the VIN in the warranty number box.

Mustang Door Plate Decoder »

VIN Codes

All vehicles, Ford or otherwise, will have a 17-digit VIN code identifying the country of production, manufacturer, vehicle type, attributes, model year, assembly plant and unique vehicle number. Each Mustang VIN code will tell you everything from the technical specs to the safety equipment to the available colors, styles and trims. Decode a Mustang’s VIN effortlessly with this Ford Mustang VIN decoder.

Mustang VIN Decoder »

For those who want to learn more about the early generation engines, you can find the Engine Identification Tags by referencing these codes:

  • S550 EITs are found on the front of the engine block itself.
  • S197 EITs are found on the driver-side apron fender.
  • SN95 EITs are found stamped on the engine block itself.
  • Foxbody EITs are found on the front-passenger side fender.

Shop Mustang Parts

Mustang Restoration Parts From Raybuck Auto Body Parts

All six Ford Mustang generations deserve to ride free across the nation. Keep your Mustang looking and running at peak condition with restoration and replacement parts from Raybuck. Raybuck Auto Body Parts has a vast inventory of Ford Mustang parts for all Mustang generation years.

Our industry reputation has held strong over the last 35 years thanks to our partnerships with trusted brands, top-tier quality parts and exceptional service. We love classic Mustang history just as much as you do, and we’re here to help you keep your Mustang running for the long haul.

Browse our restoration and replacement parts or contact us with any questions.

Categories
Tech Articles

Common Issues with Jeep Wranglers

Common Issues with Jeep Wranglers

There’s no denying the rugged appeal of the Jeep Wrangler. This tough vehicle can tackle everything from a morning commute to off-road adventures with ease. But Jeep Wranglers still have a variety of issues that can lead to extensive and costly repairs. Each generation has its own set of problems to watch for. We’ve compiled an overview of the most common Jeep Wrangler problems and what to know before buying a Jeep Wrangler.

Quick Links:

A Brief History of the Jeep Wrangler

The Wrangler as we know it did not appear until 1986. However, the Wrangler gets much of its style and capability from the Jeep CJs that came before it.

  • The CJ (1945-1986): Before World War II, Jeeps were only used as military vehicles. Near the end of the war, the first CJ, or “civilian Jeep,” was released. It had a tailgate, a canvas top and lower gearing to make it more civilian-friendly while keeping a classic Jeep look.
  • The YJ (1986-1995):The first Wrangler was the YJ, which was introduced at the 1986 Chicago Auto show. It had the same frame as the CJ, but got a new look with rectangular headlights. The YJ’s suspension and interior features came from the Cherokee.
  • The TJ (1996-2006): The release of the TJ in 1996 marked the beginning of the second generation Wrangler. Improvements to this generation included a stiffer body and frame, coil springs and round headlights. The engine choices remained the same as the YJ, making the TJ less of a relaunch and more of a heavy redesign.
  • The JK (2007-2018): Today, most Wranglers have a four-door cab — but this option didn’t appear until the JK debuted in 2007. The third generation offered traction and stability control to increase safety, and kept features like removable doors, soft tops and fold-down windshields.

Common Issues With 2007-2018 Jeep Wranglers

The third generation of Jeep Wranglers is considered the least dependable. It has the most complaints and lowest-rated reliability among consumers, with multiple issues affecting every part of the vehicle. Let’s take a look at some of the most common issues with Jeep Wranglers of this era.

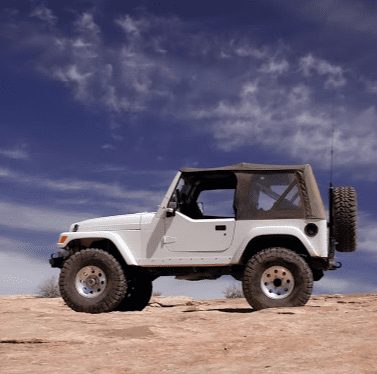
3rd generation Jeep Wrangler

1. TIPM Failure

A vehicle’s electrical system depends on a functional totally integrated power module (TIPM). The TIPM facilitates everything from the fuel pump moving gasoline and power window function, to the headlights and throttle control. Without the TIPM, even the radio won’t work correctly.

Fiat-Chrysler vehicles from 2007 to 2015 are notorious for early TIPM failure. The Liberty, Grand Cherokee and Wrangler from these model years are all susceptible to this inconvenient and dangerous issue. Symptoms of TIPM failure include:

  • Fuel pump remaining on and burning out due to constant use
  • Airbags refusing to deploy or deploying at random
  • Engine stalling while the vehicle is in motion
  • Starter cranking but refusing to start
  • Horn honking at random intervals
  • Power windows getting stuck
  • Doors locking or unlocking without input

Many owners describe a faulty or failed TIPM as making the vehicle feel “possessed.” Chrysler acknowledged the issue by sending out a recall for the 2007 Wrangler. The company blamed the dangerous stalling on a TIPM timing error. Even though many other year models were affected by the issue, none of them received a recall. Owners had to pay for repairs or replacements out of pocket.

TIPM issues are expensive, with the average TIPM repair cost at $1,200. Many reports occur while the vehicle is still under 40,000 miles.

Jeep Wrangler death wobble

2. The “Death Wobble”

The death wobble is something many Jeep owners have experienced firsthand. When the wobble kicks in, the driver feels the steering wheel shake violently. It usually happens after hitting a pothole or experiencing another jolt, and can sometimes be triggered by pressing hard on the brake pedal.

While it may feel like the vehicle’s axle or wheels will fly off, that isn’t something to worry about — no one has died as a result of a death wobble. If it happens, keeping a cool head can help drivers regain control and continue safely to a mechanic.

The death wobble occurs when steering components come loose or become damaged. It can also happen when someone installs suspension or steering parts incorrectly. The first step of diagnosis is to see if any parts have been bent or broken in the front suspension. Possible causes of the death wobble include:

  • Ball joints
  • Drag link and tie rod ends
  • Front track bar
  • Lower control arms
  • Upper control arms
  • Steering knuckles
  • Steering stabilizer
  • Suspension bushings

All these parts need to be inspected for excessive wear and damage. When troubleshooting the death wobble, try tightening all the hardware to the manufacturer-specified torque. Improper wheel alignment and unbalanced tires aren’t typically the source of the death wobble, but these conditions can make the issue much worse.

Most reports show no clear solution to the death wobble, and many owners have attempted to have the issue fixed multiple times. For the 2007 Wrangler, owners report spending almost $900 on attempted repairs, and few of those repairs permanently fixed the issue. Despite how common this problem is, Chrysler has not issued a recall.

3. TPS Failure

The throttle position sensor (TPS) relays information to the engine control module (ECM). It communicates how open the engine throttle is at any point so the ECM can properly alter emissions, ignition timing and fuel metering. The TPS is vulnerable to failure due to its complex combination of electrical and mechanical components.

When the TPS fails, its voltage readings will be incorrect and the check engine light will come on. The TPS sends information to the ECM that affects shift points in the transmission, leading to unexpected shifting issues that can be very dangerous while driving.

Signs of TPS failure to look for include:

  • Bucking or jerking when the engine is under moderate stress
  • Strange surges in speed
  • Engine stalling suddenly and for no reason
  • Reduced power and fuel economy
  • Hesitation under acceleration
  • Delayed shifts
  • Difficulty changing gears

The average cost for a TPS replacement on a Jeep Wrangler ranges from about $130 to $150. Labor costs are estimated between $70 and $90, while the parts are typically priced around $60.
Shop 2007-2018 Wrangler Parts »

Common Issues With 1997-2006 Jeep Wranglers

Though the second generation has fewer registered complaints over time, there are still some 1997 Jeep Wrangler problems that affect all the model years in this range.

05 Jeep Wrangler transmission recalls

1. Transmission Recalls

Jeep Wrangler models starting in 2005 are famous for multiple recalls related to the automatic transmission and power train. The transmission may slip or get stuck in one gear. If the vehicle gets locked in one gear while driving on the freeway, the consequences could be deadly.

Although the issue is under recall and Jeep pays for the repairs, transmission issues typically come with long repair times.

2. Engine Popping

Backfiring or popping sounds in the engine can come as a shock, especially if it’s never happened before. In many cases, backfiring sounds as loud as a gunshot could cause you to jerk the vehicle while driving. Some of the common culprits of backfiring in Wranglers include:

  • Incorrect engine timing
  •  Failed spark plugs
  • Running rich with too much fuel and not enough air
  • Plug wires, if equipped

Backfiring happens under a variety of circumstances and repair costs vary based on the specific issue you’re having.

3. Leaking Door Seals

Door sealing should be a simple component that doesn’t fail early, but Wranglers are famous for having sealing issues. Leaking in the A-pillar is well-known among 1987 Jeep Wrangler issues, and it remains a concern for the other generations. Door leakage is especially common among 2002 Jeep Wrangler problems.

Poorly sealed doors create a damp environment that may cause unpleasant odors. If the issue gets bad enough, the moisture might damage electrical systems. Fortunately, door seals are easy to find and install. You can find Jeep weather stripping for this purpose for under $50 per door.

4. Differential Pinion Seal Leaks

The pinion seal helps keep fluid from leaking out of the differential. If the differential leaks fluid, it can fail, causing your Wrangler’s gears to seize and lock up the rear wheels while driving. The main symptom of low fluid in the differential is a whining noise while driving.

Jeep Wrangler differential pinion seal leaks

The average cost for a pinion seal replacement is between about $210 and $255, most of which is labor.

5. Transfer Case Leaks

Transfer cases are found in AWD and 4WD vehicles and split the transmission’s power between the front and rear wheels. As a self-contained component, it has its own fluid which commonly starts to leak in Wranglers. If your transfer case is leaking, it may be a simple seal failure. It could also mean there is a problem with the overall transfer case, like a bad bearing.

Although the average cost of the parts required is around $30, getting a transfer case oil seal replacement may cost between $150 and $190.
Shop 1997-2006 Wrangler Parts »

Common Across Multiple Jeep Wrangler Generations (1997-2017): Ignition Switch Issues

A Wrangler part to pay special attention to is the ignition switch. The majority of ignition switch complaints for second generation Wranglers are because of age, but you’ll find malfunctioning ignition switches in the third generation, too. The ignition switch is not the slot you push the key into — that’s the lock cylinder. The ignition switch is usually found behind the lock cylinder, and it has three central functions:

  • Accessory power: This is the result of turning the key to the first position, which allows you to roll down the windows, turn on the radio and use other electrical accessories.
  • Ignition: Moving the key to this position starts the ignition and the fuel pump, pressurizing fuel and ensuring the engine is ready to go when it turns over.
  • Starter: Moving the key to this position cranks the starter.

When you have ignition switch issues, the symptoms don’t just affect the car starting. Here are several signs your Wrangler has a problem with the ignition switch.

97-17 Jeep Wrangler ignition switch issues

1. Stalling While Driving

A clear and dangerous sign of ignition switch issues is stalling out while driving. This happens when the failing switch cuts off the fuel pump or stops power to the ignition. The engine can’t run until it picks that signal up again.

2. Starting Then Dying

In some cases there are no problems starting the vehicle, but it immediately dies. When this happens, the fuel pump or ignition is not getting power while the key is in the run position, but power is there when the starter is engaged.

3. Failing to Start

There is more than one way a bad ignition switch can stop your Wrangler from starting. In some cases, the starter cranks but the switch fails to turn on the fuel pump or ignition. This results in the engine turning over but not sparking. The other possibility is that the starter doesn’t turn over.

4. Lack of Power to Accessories

Some cases of a failing ignition switch don’t keep the car from starting or running. Instead, the vehicle may start and drive fine while none of the accessories work. A few vehicle parts don’t require a key in order to be safer, including:

  • Headlights
  • Brake lights
  • Horn
  • Dome light

Other features like power windows, rear defrost, climate control and radio are tied to proper ignition switch function. If those accessories are off or acting erratically, you likely have an ignition switch issue.

5. Battery Draining

While the majority of ignition switch symptoms involve components not getting power, the opposite can also happen. Components may continue to receive power even when you turn the key to the off position. If you’re experiencing unexpected battery drainage, it may be due to ignition switch failure.

Although this problem causes extensive issues, it is relatively cheap to fix. Getting a full replacement typically costs between $115 and $140, with the majority of that cost covering labor. This is a fairly simple DIY fix for those familiar with electrical systems.

Common Issues With 1987-1995 Jeep Wranglers

The oldest generation of Wranglers is the most reliable of the bunch. There are still some issues to be aware of — even if most of them are related to age.

Jeep Wrangler exhaust manifold bolt failure

1. Exhaust Manifold Bolt Failure

The manifold is constantly shrinking and expanding over the course of a duty cycle. Over time, it may stretch further than it is able to retract. This can fracture the mounting stud and make the manifold permanently misshapen. This process also stretches the bolts, creating enough tension for them to fail.

Manifold bolts are cheap, but if the bolts aren’t replaced quickly or get stuck in the manifold, your Wrangler may need a new manifold. An exhaust manifold replacement averages between $950 and $1,100.

2. Body Damage

Wranglers are made for off-roading, which means older Jeeps are more likely to have body damage. Luckily, you don’t have to resign yourself to dented and damaged body parts and panels in your first generation Wrangler. Raybuck offers a wide selection of repair panels for 1987-1995 Wranglers so you can keep your Jeep in perfect shape.

3. Oil Leaks

Even with good maintenance, vehicles this old are susceptible to oil leaks. There are multiple systems within a Wrangler that can leak oil, so diagnosing the problem can be challenging. Each system has a different color of fluid that will mix with the leaking oil and can be used to pinpoint the source of the leak:

  • Engine oil is amber when it’s new, but turns brown or black over time.
  • Power steering fluid is the most ambiguous — it can be red, green, brown or transparent.
  • Transmission fluid is red.
  • Engine coolant can be transparent, red, orange or green.

Jeep Wrangler oil leaks

Oil leakage is one of the more affordable fixes in older Wrangler generations. It can cost between $90 and $110 to get the leak diagnosed, and the repair cost varies depending on the leak source.
Shop 1987-1995 Wrangler Parts »

5 Tips for Buying a Used Jeep Wrangler

Despite potential issues with Jeep Wranglers, there are plenty of solid vehicles out there. Here are five tips to think about if you’re considering a used Wrangler.

5 tips for buying a used Jeep Wrangler

1. Decide on Modifications

Modifications are common in Wranglers, and they can be a good option if you care about performance. However, a modified Wrangler will be more expensive than stock, and modifications may increase the chances of component failure due to poor installation. If you choose a modified Wrangler, it’s important to find out who completed the installation in case you need repairs related to the modification.

2. Check the Body

Before you get under the hood, check the body of the vehicle:

  • Undercarriage: Always check the undercarriage first, as it’s the most visible indicator of how much life is left in the vehicle. It doesn’t matter if there are few miles on the transmission or the vehicle has a newer engine if the undercarriage is in poor condition.
  • Outer panels: Significant denting can be a sign of hard use, and rusting might be a red flag. While rust on the undercarriage is a serious sign you should not buy the vehicle, it’s relatively easy to get replacement panelsand fix up the vehicle if the rust hasn’t spread to the frame.
  • Tires: Inspecting tires for uneven wear patterns is important in spotting things like alignment problems or improper rotation. For example, if you see the front tires are more worn than the back, the front tires have been bearing too much of the engine weight and will need to be replaced earlier.

3. Ask About Mileage Type

Overall mileage is important, but you should also ask how the vehicle was driven. A Wrangler with low mileage might have been driven under severe off-road conditions, which could make another vehicle with high mileage and gentle use a better option.

4. Verify Mechanical History

If everything looks good under the hood, you should still ask for a full record of maintenance and repairs the vehicle has received. A spotty maintenance history could set you up for early part failure.

5. Always Test Drive

A test drive is a chance to uncover symptoms or issues with the vehicle. Take your test drive in the morning so you can hear how the engine sounds on startup. Listen for unexpected idling upon warm-up, stuttering during idling and loud ticking. During your drive, pay attention to how shifting feels and note any unstable handling, jerks or vibrations that could indicate a death wobble in the future.

Shop Wrangler parts online now

The Raybuck Difference

No matter the age of your Jeep Wrangler, you can keep it looking like new with body parts and rocker panels from Raybuck Auto Body Parts. We offer competitive pricing on 1987 to 2017 Jeep Wrangler body panels without compromising on quality. Our dependable aftermarket parts are the smart alternative to buying OEM parts, and we work hard to provide customer service you can count on.

If you’re interested in body parts and panels for your Jeep Wrangler, shop online, give us a call at 800-334-0230 or send us a message through our contact form today.

Categories
Restoration Truck Talk

1973-1987 Chevy Truck History & Restoration

1973-1987 Chevy truck history & restoration

The long-standing Chevy C/K series evolved over many decades, but the third generation delivered one of the most classic pickup trucks. If you’ve had your C/K since its heyday, we know it’s been with you through everything. And if you’re looking to purchase your first one, you’ll understand why so many enjoy this retro-style truck.

But no matter how long you’ve had your Chevy, it may need a complete restoration instead of a few fine-tuning adjustments. Raybuck Auto Body Parts offers Chevy C/K auto body restoration parts for DIYers and professional restoration shops that have the highest expectations.

Quick Links:

History of the 1973-1987 Chevy Pickup Truck

The C/K Chevy truck’s history began in 1973. Production of the truck models lasted 14 years, making it one of the longest-running generations of pickups generated by Chevy. Although they are less rare compared to some other classic automobiles, the accessible and affordable C/K trucks are popular with restoration enthusiasts across the country.

Many changes occurred throughout its history. For example, between 1973 and 1980, several major modifications included moving the windshield wipers behind the hood, developing a vertical side marker and introducing a leveled hood with less rake. The trucks also had different hood styles compared to the later models.

From 1981 to 1987 — the end of the truck’s generation — significant changes involved a flatter grille, horizontal side markers and the windshield wipers moved to the top of the cowl.

What Does the “C” and “K” Mean for Chevy Trucks?

To give you more insight into how the Chevy C/K truck was categorized, the company used a combination of letters and numbers. The “C” stands for two-wheel-drive pickups, while the “K” represents four-wheel-drive trucks. The pickups are also classed by weight known as the C/K10, C/K20 and C/K30 trucks. The C10 represents the half-ton, two-wheel-drive Chevy and the K10 is the half-ton, four-wheel-drive model — and so on.

Chevy C/K definition

C/K Chevy: 1973-1974

At the start of production, Chevy decided to take a different approach to the third generation of C/K pickups. The company developed a design in 1973 that didn’t change much for 14 years, making it a timeless automobile.

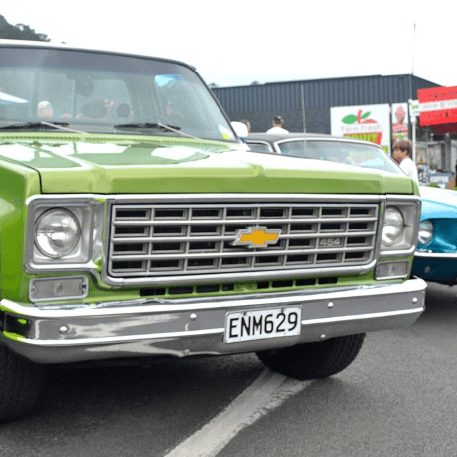
Most changes occurred in the body. With the truck’s larger and wider frame, it was dubbed the square body Chevy because of its box-like appearance. However, it was also formally named the “Rounded Line” generation because the pickups featured a square wheel well with rounded corners. Chevy decided to dismiss the circular design.

To contrast the more squared features of the wheel wells, Chevy forged rounded door frames and windshields to create a balanced look. The curved side glass created additional visibility for drivers and reduced blind spots.

Other changes made to the C/Ks were front stabilizers and increased wheelbases. The short wheelbase increased to 117.5 inches, and the long wheelbase advanced to 131.5 inches. Chevy also reduced the front spring rates and staggered the rear shock absorbers to avoid wheel hop. Flow-through ventilation was also added, along with larger seats that made for a more comfortable ride. Chevrolet engineers came up with several trim levels in 1973, including the Custom, Custom Deluxe, Cheyenne and Cheyenne Super.

The auto company also offered the C30 ⁠— one-ton dually with a Crew Cab. It was considered one of the first heavy-duty pickups in modern times. As the first truck in the industry with dual rear wheels and a Crew Cab, it could hold up to six people. It was revolutionary. They also dropped the 402 V8 engine and replaced it with the 454, which was more powerful. Nicknamed the “Big Dooley,” it could reach up to 155 HP.

By the second year of production in 1974, the recessed egg-crate grille design from 1973 remained. The full-time four-wheel-drive option became accessible on all the C/K V8 models, and Chevy added an aluminum tailgate panel to the tailgate center. They also applied rain gutters above the doors.

The entire first era of the third-generation C/K trucks brought about drastic physical changes that would last through the next several years. With its contrasting round and straight edges, it became a “classic American” style pickup.

C/K Chevy: 1975-1976

In 1975, Chevy began offering the Silverado trim as their luxury option — and a familiar name we know today. The new trim line quickly became the most popular option, taking the place of the top-ranking Cheyenne Super trim. The Cheyenne Super was discontinued soon after. The Custom Deluxe became the base model, and Chevy dropped the Custom trim line as well. As a result, the company started to introduce the Scottsdale edition.

1975-76 Chevy C/K trucks

The Silverado trim models were hitting peak selling records, making them a popular C/K truck throughout the nation. 1975 was also the year Chevy engineered the C20 model with four doors and no rear seats. Other additions to hit the production line were HEI ignition and a quick-release tailgate that became a prominent selling feature.

Catalytic converters also became standard in all C/K models with a gross weight under 6,001 pounds. Chevy even created a flushed grille with three horizontal bars. The design was a massive change that lasted from 1975 to 1976. The windshield wiper component also had a new position.

In 1976, Chevrolet began adding zinc to their primer to prevent rusting as people drove the vehicles to work and used them in the fields. Rubber impact strips in chrome bumpers were a new feature, too.

C/K Chevy: 1977-1979

Available trim lines for the C/K models in 1977 were Cheyenne, Silverado, Custom Deluxe and Scottsdale. The company worked hard to deliver more hood details and came up with an inside hood release feature.

Another new addition was the integration of low-back bucket seats, which later transformed into high-back seats in future versions. At the time, you could also opt for a rear defroster to enhance visibility during winter.

A new grille design entered the formula in the same year, making it the easiest to decipher between the various models. Chevy made a design that got rid of the one horizontal and four vertical dividers from the 1976 look. They also introduced the 305 V8 engine, and the wheels were now styled with center caps. One of the truck’s most unique features, only found on this model, was a gold stripe located in the center side moldings.

In 1978, the Chevy C10 upgraded to the 5.7L V8 diesel engine. Silverado rated as the top trim with added brushed aluminum to its detailing. The manufacturer also got rid of all the woodgrain features.

By the time 1979 rolled around, power windows were introduced. It was also the year when catalytic converters were integrated into all models with a gross weight of at least 8,500 pounds. Chevy replaced the gas cap with a fuel filler door, included more hood details and started combining the turn signal and headlight features into a single design.

C/K Chevy: 1980

Chevrolet crafted an exclusive egg-crate grille redesign to the 1980 series. The truck manufacturer added more chrome at the bottom of the grille and gave buyers the option to have rectangular headlamps. The C/Ks also received cast-aluminum wheels, and a dual exhaust was available on the 292 six-cylinder engines. Interior features came with cassette and 8-track options. Although the grille experienced a fresh look, no major redesigns of the body occurred.

Chevy C/K 1980

C/K Chevy: 1981-1982

In 1981, the Chevy C/K pickup truck underwent a complete refresh. Chevrolet engineers came up with a new frontend design with sheet metal, which stayed intact with the rest of the series until 1987. By implementing sheet metal into the design, it reduced the weight of the rig by 300 pounds — a huge feat at the time.

The truck’s vent windows, fenders and hood hinges experienced new blueprints, and a different sloped hood was in the making as well. Other changes in 1981 encompassed four headlights, a new bumper, a renewed tailgate and horizontal side markers, nicknaming it the Silverado front end. Chevy also improved the C/K’s four-wheel-drive features.

New ideas in the industry meant Chevy moved the windshield wipers to the top of the cowl and refreshed the interior components. They came up with a new dash shape, seats, instrument panels and sill plates.

A chrome grille made an appearance in 1982, becoming the standard for the rest of the C/K models. If you had a 4-speed overdrive manual transmission, you could opt for a 6.3L 379 diesel engine. Power steering was standard on all K-series, and the company discontinued the Cheyenne trim.

1982 was also the year they introduced the Chevy S10 — a light-utility pickup in regular cab and 2WD only. The extended-cab and four-wheel drive options were introduced in 1983.

C/K Chevy: 1983-1984

As time went on with the third generation of C/K pickups, Chevrolet continued enhancing the physical appearance of their trucks. For example, in 1983, they developed the two-level grille and positioned the turn signal behind the grille. They also introduced the automatic 700R4 transmission.

In 1984, drivers had the option of four headlights, meaning you could revert to the original two. High beam lights and cruise control moved into the turn signal handle, and Chevy got rid of any hood ornaments on the pickups.

C/K Chevy: 1985-1987

In 1985, Chevy made another grille redesign. However, it would be the last grille change until the end of the C/K production. Manufacturers introduced the Vortec V6 engine that had fuel-injecting technology. It was one of the most powerful base engines for Chevy trucks. They also started to offer two-tone paint options.

Chevy C/K 1985-87

The 1986 C/K models were named the official trucks of the Indy 500, and by 1987, the models gained new names. The 10, 20 and 30 models changed to 1500, 2500 and 3500. The “C” series changed to “R” while the “K” series turned to “V.”

The Chevy C/K generation came to an end as the company’s 1500 model increased in popularity. The 1500 later became known as the Silverado and skyrocketed to be one of Chevy’s most popular trucks.

Shop 1973-1987 Chevy Truck Parts

How to reestore 1973-87 Chevy truck

How to Restore Your Chevy Truck 1973-1987

If you love to get your hands dirty, DIY restorations are easy to achieve when you follow our 1973-1987 Chevy truck restoration guide. Whether you’ve had your pickup since its initial release or recently bought one, we can help guide you through the process:

1. Inspect the Chevy

Learning how to restore a Chevrolet pickup begins with avid research and assessment. Inspecting your vehicle prior to starting a project will help determine the extent of your restorations. Check the truck for rust, damage, missing parts and faulty components. Major areas to observe include the transmission, steering and brake systems.

Depending on the year of your C/K model, the pickup may have power or manual steering. C/K models gained power steering in 1982, so most models before that will have manual. Knowing the ins and outs of your Chevy will give you an idea of what to expect during the restoration process and how much it may cost to conduct various replacements.

2. Disassemble the Truck

Start by disassembling the interior portion of the vehicle. Look for damaged or worn parts that require complete replacement. Make sure you keep things organized by laying the parts out from front to back, or whatever makes the most sense. Label larger pieces and keep the small nuts, bolts and other hardware in containers.

Once you gut the interior, work on the body components, and inspect for rust and damage. If you can salvage some parts, start the process now. If parts of the truck’s body are unusable, start ordering new components such as rocker panels, door panels and fenders.

3. Focus on the Undercarriage, Suspension and Chassis

Begin taking the body pieces off the frame. Separating the body from the frame will help you see the underside of the truck. If you need to replace large structural sections, you will want to do so right away before removing the body from the chassis — otherwise, the body may twist and move during the removal, resulting in tricky reassembly.

Undercarriage restoration

Next, cut out any rusted, corroded or damaged areas if you can’t salvage them. Install new body panels and parts as needed. Make sure to perform any welding or fabrication jobs before undergoing the undercarriage prep. Clean the chassis and complete suspension work.

After you complete phase three, the C/K’s frame should be clean. Choose the appropriate suspension setup and axle, and make any drivetrain alterations. You may need to rebuild or reinstall the existing components based on their condition.

If you’re adding a new drivetrain and suspension parts, the body panels may demand modification for proper clearance. Also, leave enough room for the exhaust when completing new suspension and drivetrain installations. When everything is in place, paint the chassis and move to step four.

4. Lay Out the Wiring

Phase four of your 1973-1987 Chevy truck restoration project comprises the more meticulous work. Now that the body is back on the chassis, lay out the fuel and brake lines, along with the wiring, hoses and exhaust. Take your time in labeling and routing each electrical wire ⁠— if problems arise down the road, this will make it easier to fix. Make sure to insert a rubber grommet when you run a hose, wire or line through a metal hole.

5. Put Time Into the Body and Painting

Depending on the condition of your Chevy, you may need to strip down the truck before painting. Align the door gaps and hinges and adjust panels for proper fitment. Block sand and prime the C/K before painting.

Painting your truck

First, paint the jambs and put a basecoat on the body of the truck, trying to avoid over-spraying. When the first coat dries, wet sand the body and add several layers of clear coat for some shine. Again, wait for it to dry and wet sand it to remove any blemishes. Buff and polish your Chevy for a fresh paint job.

6. Prep the Interior and Complete Final Body Assembly

Designing the interior of your truck is just as exciting as restoring the outside panels. You can install sound deadener material to reduce road noise and eliminate the tin sound that many old vehicles make. Apply the wiring, assemble the interior, upholster the seats and lay the carpeting. As you add each component to your pickup, you can choose to keep the retro look of the Chevy or opt for more modern modifications.

You can also install insulation, weather stripping and rustproofing agents. Apply exterior trim, molding and badges. Complete any electrical work by assembling hoses, cables and ground straps. Invest in a new bumper and add fresh tires and rims to complete the look.

7. Test Drive Your Chevy C/K

As soon as your Chevy passes inspection, it’s time to hit the toad for a test drive.

The entire restoration process can take several months or even a few years when considering the extent of the renovations and how you want the truck to look. It requires an exceptional amount of time, skill and patience to reap the exact results you want — but it’s always worth it.

1973-1987 Chevy Truck Restoration Tips

Whether you require 1973, 1980 or 1987 Chevy truck parts, you’ll want to have a plan. Having an idea of the type of restorations your truck needs and what type of project you want to conduct can make for a smoother progression. Before starting the restoration process, consider these pro tips:

1973-87 Chevy truck restoration tips

1. Determine Your Objectives

Your first objective is to determine what you want to get out of the restoration project. How do you use the truck? Do you take your Chevy for an occasional joyride, rely on it for daily travel or take it to car shows?

Conduct research on the availability of parts and body panels to help formulate a plan. Making a schedule can aid you in achieving a plan that matches your timeline. You should also think about whether you want to replicate the C/K’s original features or go for more modern additions.

2. Choose the Type of Restoration

You can choose between a full, partial or restomod restoration plan. A full restoration is where you restore the entire Chevy. A partial project is where you renovate only vital areas. If you go the restomod route, it’s a mixture of restoration and modifications. You blend the old with the new to construct a distinctive pickup. It’s an ideal solution if you want to keep the original style of your C/K, but with the addition of modern technology.

3. Figure Out an Appropriate Budget

Producing a timeline can help with sticking to a budget. How much are you willing and capable of spending on new parts and paint? While almost every restoration project goes over budget, you can still work within reason. It’s often helpful to restore one component at a time, starting with the most important.

4. Decide on the Right Work Area

Finding the ideal workspace can mean the difference between an organized area and a cluttered space. Choose a workshop, garage, barn or even your driveway to start your project. Make sure it’s clean and systematized. You will also want to invest in the correct equipment, tools and supplies.

5. Search for the Right Chevy

If you already have a Chevy C/K, you’re off to a solid start. However, if you’re buying, it can be a challenge to find one in excellent condition. You will want to find a truck with the least amount of corrosion, damage and rust if your goal is to salvage as many original parts as possible.

When you find a potential pickup, complete a thorough inspection to help you conclude the costs of renovations. Learn about the Chevy — everything from its VINs, storage history and how often it’s been driven.

It all comes down to your expertise and what you’re comfortable restoring. You can decide what damage is fixable and what trucks may not be worth the time.

6. Understand Your Different Trim and Cab Options

The Chevy C/K third-generation series has prominent trims and cabs specific to the era that many other years don’t have. For example, the Custom, Custom Deluxe, Cheyenne, Cheyenne Super, Silverado and Scottsdale trims were all available at some point, but only a few made it through years of modifications. The trucks also had Regular, Super and Crew Cab designs.

Knowing which trim and cab combination you have can help you focus on the truck’s unique details. It’s an easy way to set yourself apart and indulge in incredible restorations that enhance your C/K’s features.

Once you have an idea of your project type, budget, workspace and other factors, you’re ready to begin the restoration process. If you get stuck, Raybuck’s team is here for additional support.

Restore Your 1973-1987 Chevy Truck With Raybuck Auto Body Parts

Raybuck Auto Body Parts has a vast inventory of 1973-1987 Chevy truck parts. Our pickup restoration parts and replacement panels come from a curated catalog of high-quality solutions. We carry both interior and exterior trims to help you complete any C/K restoration project.

Our experts partner with trusted brands to ensure you receive top-tier standards. We provide body panels made of heavy gauge stamped steel that meet or exceed the thickness of your original parts. Raybuck’s solutions are available at competitive prices, helping you refurbish your C/K without investing in pricey OEMs.

Upholding a strong reputation in the industry since 1985, Raybuck has been able to hone our parts and panels to deliver durable and long-term value. We’re truck enthusiasts, just like you. We know you value your Chevy C/K, so we deliver solutions that are more dependable and durable for your ride while also boosting the look of your third-generation C/K model.

Browse our restoration parts and 1973-1987 Chevy truck body panels or contact us online to speak with a representative for expert guidance.

Contact Us